Thai Peanut Chicken Buddha Bowl
Introduction
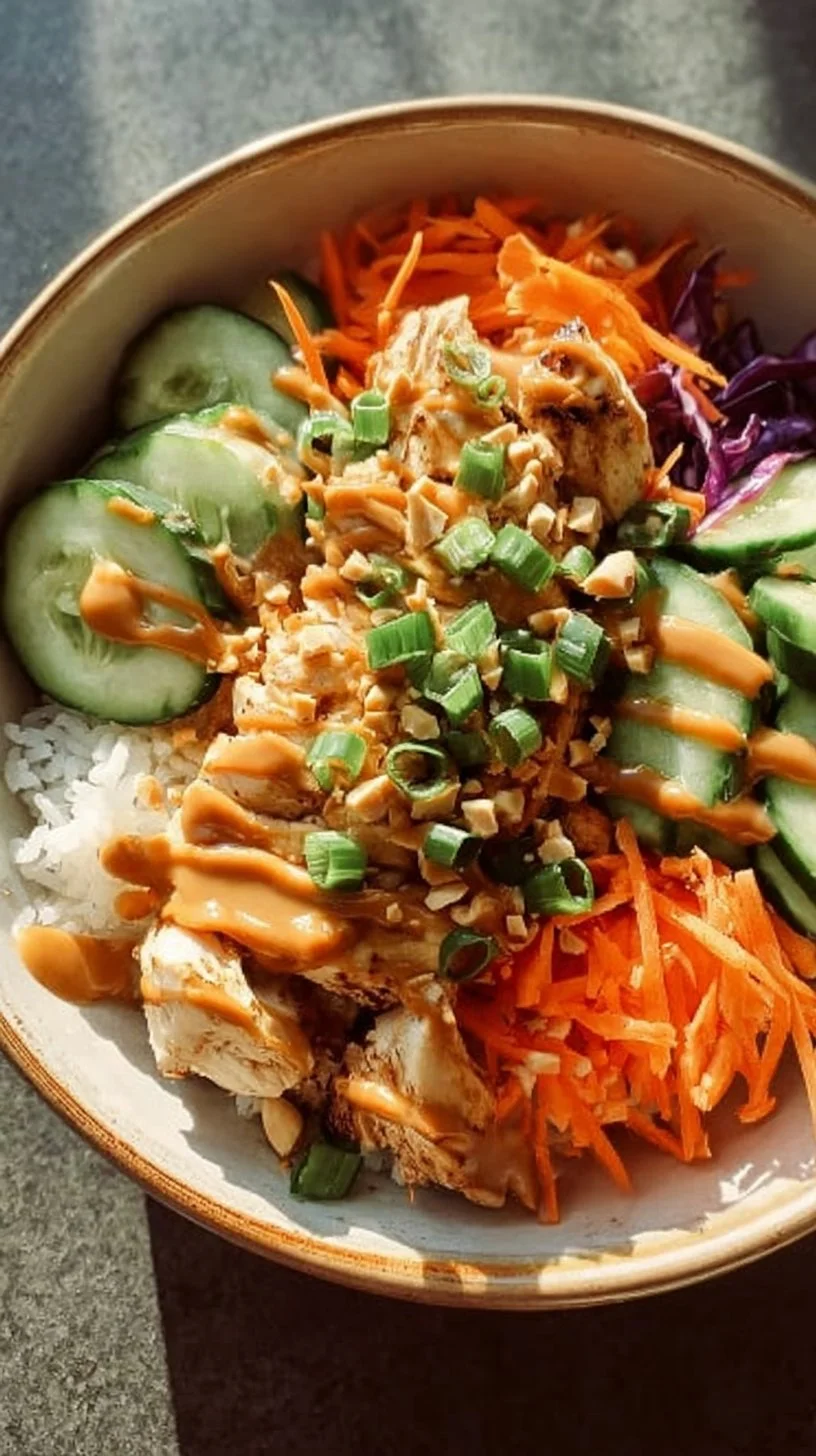
If you’re looking for a meal that feels both fresh and comforting, the Thai Peanut Chicken Buddha Bowl is a wonderful place to start. This recipe was designed for home cooks who want a balanced, colorful dinner without complicated steps or intimidating ingredients. It’s a bowl of familiar textures — tender chicken, nutty peanut sauce, crisp vegetables, and a bed of warm rice or quinoa — assembled in a way that makes each bite satisfying and easy to manage.
Whether you’re new to cooking or returning after a long break, this recipe gives you room to move and clear checkpoints to watch for. If you enjoy dishes like a simple wrap or grain bowl, you may also like my take on a Chicken Avocado Wrap, which follows the same friendly approach to flavor and technique.
My goal here is to walk beside you through each stage: what to expect, what to look for, and what small adjustments you can make if something doesn’t go perfectly. You don’t need to be precise to get a delicious result — just attentive.
Why this recipe is easy to get right
This Buddha bowl is forgiving because it relies on straightforward techniques and forgiving ingredients. The chicken cooks quickly and visibly — once it’s golden and the juices run clear, you’re there. The peanut sauce is flexible: a little more water will thin it; a little more peanut butter will thicken it. Your vegetables are served raw or lightly prepared, so you’re not racing against a stovetop timer for everything at once.
Flexibility points:
- Use brown rice or quinoa depending on what you prefer or have on hand.
- Vegetables can be julienned, shredded, or simply sliced — they’ll all add texture and color.
- The peanut sauce can be adjusted for sweetness, saltiness, or thickness to suit your taste.
Because most of the work is either quick cooking or assembly, it’s well-suited for cooks at any level. There’s little that can “ruin” the dish beyond overcooking the chicken, and even that can be managed with the visual and timing cues I’ll point out below.
How to make Thai Peanut Chicken Buddha Bowl
Start by getting organized: line up your ingredients, have your rice or quinoa cooked and warm, and measure the peanut sauce components. The process flows in three broad stages — season and cook the chicken, make the sauce, and assemble the bowls — and you can do parts of them in parallel.
First: seasoning the chicken. The chicken strips are seasoned and allowed to rest briefly. This short wait helps the flavors settle and brings the chicken closer to room temperature so it cooks evenly.
Next: cook the chicken in a hot skillet. You’ll see the surface go golden; that’s the visual cue that the Maillard reaction (that lovely browning) is happening. Flip once and finish until the pieces feel firm and have no pink inside. If you have a thermometer, 165°F is the safe target, but touch and color are also reliable cues when you’re starting out.
While the chicken cooks, whisk the peanut sauce ingredients together. The sauce will start thick and become smoother as you add warm water. Stir until it’s thick enough to coat the back of a spoon but thin enough to drizzle. Taste and tweak with a touch more soy sauce or honey if it needs balance.
Finally: assemble bowls with your warm grain, arranged vegetables, the sliced chicken, and a generous drizzle of peanut sauce. Scatter green onions and sesame seeds for freshness and a little crunch. If anything feels uneven — a little too salty or a touch too thick — small adjustments at plating can save the day: a squeeze of rice vinegar, a splash of warm water, or an extra handful of greens.
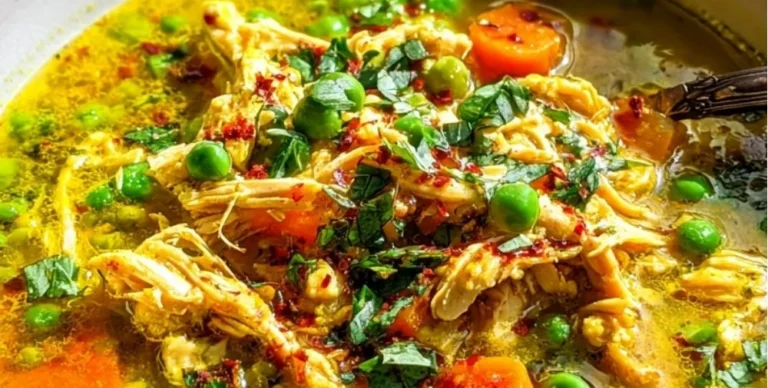
If you’d like more grain-based ideas to pair with bowls, check out this comforting anti-inflammatory turmeric chicken soup for inspiration on warm, nourishing meals.
Ingredients
1 lb boneless skinless chicken breast (sliced into 1/2-inch strips), 1 tsp garlic powder, 1 tsp ground ginger, 1/2 tsp salt, 1/4 tsp black pepper, 2 tbsp olive oil (for cooking chicken), 3 cups cooked brown rice or quinoa (prepared according to package directions), 1 cup carrots (julienned or shredded), 1/2 cup English cucumber (sliced thin), 1/4 cup red bell pepper (thinly sliced), 1/4 cup edamame (shelled and cooked), 1/3 cup creamy peanut butter, 2 tbsp low-sodium soy sauce, 1 tbsp rice vinegar, 1 tbsp honey, 1 tsp sesame oil, 2 tbsp warm water (to thin sauce), 2 green onions (chopped for garnish), 1 tbsp sesame seeds (for garnish)
What each ingredient does and why none are intimidating:
- Chicken breast: Provides lean protein and cooks quickly in strips. Slicing thin helps it cook through fast without drying.
- Garlic powder and ground ginger: Add headline flavors without the fuss of mincing fresh aromatics — perfect for a simple weeknight dish.
- Salt and black pepper: Basic seasoning to bring out the chicken’s natural flavor.
- Olive oil: A familiar cooking fat that helps the chicken brown without sticking.
- Brown rice or quinoa: The warm base that absorbs sauce and balances textures; both are pantry staples.
- Carrots, cucumber, red bell pepper, edamame: These give crunch, color, and freshness. None require precise cutting; julienne, shred, or slice as you prefer.
- Creamy peanut butter, soy sauce, rice vinegar, honey, sesame oil, warm water: These make a peanut sauce that balances sweet, salty, acidic, and nutty. The warm water lets you control the sauce’s thickness.
- Green onions and sesame seeds: Simple garnishes that add brightness and a toasty finish.
Together, these ingredients create a balanced meal — protein, grain, veggies, and a unifying sauce — without any single item being exotic or hard to source.
Directions
Season the sliced chicken breast with garlic powder, ground ginger, salt, and black pepper. Let marinate for 5 minutes at room temperature., Heat olive oil in a large skillet over medium-high heat. Add seasoned chicken strips and cook for 3-4 minutes per side until golden brown and cooked through (internal temperature of 165°F)., While chicken cooks, whisk together peanut butter, soy sauce, rice vinegar, honey, and sesame oil in a small bowl. Add warm water one tablespoon at a time until sauce coats the back of a spoon but still drizzles easily., Divide cooked rice or quinoa among four serving bowls (about 3/4 cup per bowl). Create colorful sections with carrots, cucumber, red bell pepper, and edamame., Top each bowl with sliced chicken (about 4 oz per serving) and drizzle 2-3 tablespoons of peanut sauce over everything. Garnish with chopped green onions and sesame seeds.
Supportive guidance for each step:
- Season and marinate: The 5-minute rest is short but helpful. You’ll notice the chicken gets a bit of the seasoning absorbed. If you’re busy, it’s fine to let it sit a little longer — up to 30 minutes — but it’s not required.
- Heat the skillet properly: A medium-high pan gives you the golden color without over-browning. When the oil shimmers, it’s ready. Place the strips without crowding; they should sizzle when they hit the pan.
- Cooking time and visual cues: 3–4 minutes per side is a guideline. Look for a golden-brown exterior and no visible pink when you slice one piece through. If you use a thermometer, aim for 165°F. Don’t panic if a piece is slightly darker in one spot — slice it and adjust the rest of the batch on lower heat if needed.
- Making the sauce: Start with the peanut butter and liquid ingredients in a bowl. The mixture will appear thick at first; add warm water a tablespoon at a time until it reaches a consistency that coats the spoon but still drips. Taste as you go — the balance should be nutty, slightly sweet, and a bit tangy. Small tweaks are completely fine.
- Assembling the bowl: Arrange the rice first so it holds warmth, then place vegetables in separate sections for contrast. Add the sliced chicken and then spoon the sauce over everything. A little sauce goes a long way, but if you like it saucier, add more.
If something looks off — sauce too thick, chicken dull in color, or vegetables uneven — small corrections (more water, a quick reheat on low, or an extra handful of fresh veggies) will bring the bowl back into balance.
Key techniques you’ll practice in this recipe
- Seasoning evenly: You’ll learn to distribute dry spices over strips of chicken — a simple skill that makes a big flavor difference in many recipes.
- Pan-searing for color and flavor: Cooking the chicken until golden builds flavor through browning. It’s an approachable way to add depth to lean proteins.
- Emulsifying a simple sauce: Whisking peanut butter with liquids until smooth is a basic mixing technique that translates to many dressings and sauces.
- Compositional plating: Arranging grains, vegetables, and protein in sections teaches you to present food in a way that’s attractive without being fussy.
These techniques are not advanced, but mastering them will make many other weeknight meals easier and more reliable.
Common mistakes and how to avoid them
- Overcrowding the skillet: If you put too many strips in at once, they steam rather than sear. Cook in batches if needed, or use a larger skillet.
- Undercooking or overcooking chicken: Rely on the golden color and a quick slice to check doneness, or use a thermometer for certainty. If some pieces are slightly overcooked, slicing them thin and pairing with sauce helps them feel moist.
- Sauce too thick or thin: Add warm water slowly. If it’s too thin, a small extra spoon of peanut butter will thicken it up; if it’s too thick, warm water loosens it without harming flavor.
- Unevenly cut vegetables: Don’t stress about perfection. Cut them to similar thickness for an even bite, but if sizes vary a bit, the bowl will still be delicious.
- Too much salt: Use low-sodium soy sauce and taste the sauce before adding more salt. The sesame oil and peanut butter bring depth so you often need less salt than you think.
If something goes off track, pause and assess: can a quick adjustment fix it? Often the answer is yes — a splash of rice vinegar to brighten, a touch more honey to balance salt, or an extra handful of raw veggies to add freshness.
How to adjust confidently without changing the recipe
Portion scaling: To feed more or fewer people, scale the total quantities proportionally. For example, double everything to serve double, but cook chicken in batches so it still gets a proper sear.
Flavor preference adjustments: Conceptually, you can lean sweeter, saltier, or tangier by small additions: a little more honey for sweetness, a splash more soy for saltiness, or an extra teaspoon of rice vinegar for brightness. These are tweaks at plating, not recipe rewrites.
Texture tweaks: If you prefer softer vegetables, briefly steam or blanch them before assembling. If you like extra crunch, add raw cabbage or toasted nuts as a topping. These changes preserve the recipe while letting you make the bowl feel more like “yours.”
Remember: these are conceptual adjustments only. Do not change the listed ingredients or steps if you want the original result exactly as written.
Serving, storage, and reheating made simple
Serving: Bowls are best served warm — rice or quinoa should be hot, chicken just-off-the-pan warm, and vegetables cool-crisp. Arrange everything so each scoop includes a little grain, veg, protein, and sauce; that’s the satisfying balance.
Storage: Place components in separate airtight containers if you can — chicken and grains together are fine, but keep sauce and vegetables separate to preserve texture. Stored properly, the chicken and rice will stay good for 3–4 days in the refrigerator.
Reheating: Gently reheat chicken and rice together in a microwave or skillet with a splash of water to restore moisture. If using the microwave, cover the dish to trap steam. Add fresh vegetables and sauce after reheating so they remain crisp. For ideas on comfort reheats that preserve texture, you might like this creamy grain-based recipe I’ve developed, such as my Creamy Chicken and Rice.
Leftovers can also be served cold over salad greens for a quick lunch — the sauce keeps everything cohesive.
Questions new cooks often ask about this recipe
- How do I know when the chicken is done?
Look for a golden brown surface and no pink when sliced. A thermometer reading of 165°F is a reliable confirmation if you’re unsure. - Can I make the sauce ahead of time?
Yes — the sauce keeps well in the fridge for a few days. Bring it to room temperature and whisk before using; you may need a splash of warm water to loosen it. - What if I don’t have sesame oil?
You can omit it; the sauce will still be tasty. Sesame oil adds a toasty note, but it isn’t essential. - Is it normal for the peanut sauce to clump at first?
Yes. Start thick, then whisk in warm water gradually. It will smooth out. If it looks grainy, a little extra stirring or a minute in a microwave can help. - Do I have to measure exactly?
Some parts benefit from precision — like cooking times for chicken — but many elements (vegetable amounts, slight sauce tweaks) are flexible. Trust your senses first; taste and texture guide the rest.
Final encouragement from Carla
Cooking is an ongoing process, and recipes like this one are practice in building comfortable habits. You’re learning to watch for color, texture, and balance — skills that grow with each meal you make. If your first bowl isn’t perfect, that’s completely fine; small imperfections are part of cooking and often lead to better intuition next time. Keep trying, keep tasting, and celebrate progress.
I’m proud that you’re trying something nourishing and tasty. Each successful bowl you make builds confidence for the next recipe.
Carla Carter, Founder & Recipe Developer of RecipesCabin
Conclusion
If you’d like an alternate take on this flavor profile, see this clear version at Thai Peanut Chicken Buddha Bowls – Closet Cooking for another home-cook perspective. For a slightly different arrangement and tips on presentation, this recipe is a helpful reference: Thai Peanut Chicken Bowls Recipe – Pinch of Yum.