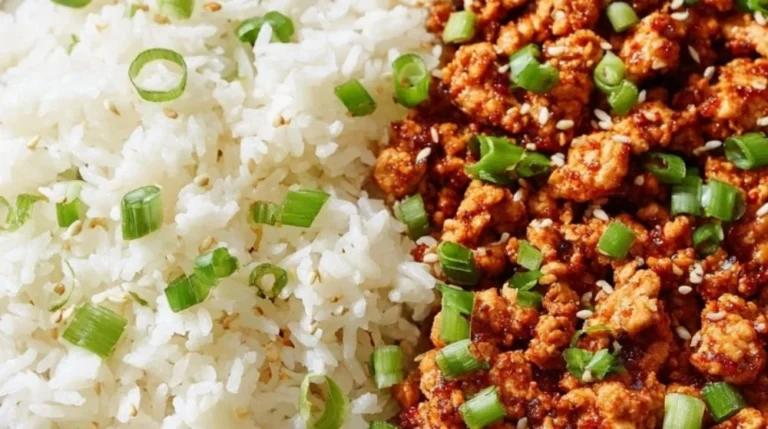
Creamy Chicken and Rice
Introduction
If you’re looking for a cozy, reliable meal that’s gentle on the nerves and kind to a busy weeknight, this Creamy Chicken and Rice is for you. It’s a dish that welcomes cooks at every level — whether you’re just starting to learn how to brown chicken or you’ve been away from the stove for a while and want a straightforward win. I’ve created and tested recipes like this to help home cooks feel capable, and this one is especially approachable because it relies on simple techniques and obvious visual cues.
If you like comforting, one-skillet dinners that don’t demand a long ingredient list, you’ll appreciate how this recipe comes together. For inspiration on other easy, family-friendly meals that build similar skills, you might enjoy reading about my take on pizzas and quick weeknight dinners in this post: The best BBQ chicken pizza. That link leads to a recipe that shares the same calm approach to timing and flavor balance you’ll find here.
This article will walk you through what to watch for, why each step matters, and how to feel confident if things don’t look textbook-perfect. Let’s get you comfortable with a simple, satisfying meal.
Why this recipe is easy to get right
This Creamy Chicken and Rice is forgiving for several reasons. First, the structure is straightforward: brown the chicken, build the sauce in the same pan, and finish the chicken in the sauce while rice waits quietly on the side. Each stage is distinct and full of visual cues — golden-brown seared chicken, translucent onions, and a gently simmering cream sauce — so you’ll know you’re on track by sight and sound.
The recipe also gives you flexibility with timing. A few extra minutes on a simmer won’t ruin the dish; the sauce will generally become more flavorful and slightly thicker as it reduces. Similarly, if your rice is a little underdone or a touch overcooked, the creamy sauce helps mask minor textural differences, making this meal tolerant of small mistakes.
Because it uses common, easy-to-find ingredients and simple techniques — searing, sautéing, simmering — it’s suitable for anyone learning the basics. The dish rewards attention but doesn’t insist on perfection, which is why it’s a great confidence-builder.
How to make Creamy Chicken and Rice
Overall process: you’ll sear seasoned chicken, remove it while you make a quick onion-based sauce in the same skillet, return the chicken so it can finish cooking and absorb flavor, then spoon everything over cooked rice.
What happens first: heating the skillet and browning the chicken. You’re looking for a golden crust — not burnt or raw. That crust provides flavor and helps seal the juices inside the chicken.
Next: remove the chicken and use the same skillet for the onion and liquid. That fond — the little browned bits on the pan — dissolves into the sauce and gives it depth. When you stir in the chicken broth and heavy cream, you’ll see the sauce change from thin to a more cohesive, slightly glossy texture as it simmers.
Last: returning the chicken allows it to finish cooking in the sauce. This step keeps the meat tender and lets the flavors meld. After a few minutes, the sauce should cling lightly to the chicken and spoon nicely over the rice.
Where beginners should slow down: pay attention during the searing step and when the sauce first comes to a simmer. Searing benefits from patience — resist the urge to flip too soon — and the sauce benefits from gentle heat so it doesn’t separate. I’ll describe visual cues in the Directions section so you can feel confident at each moment.
For another friendly weeknight recipe that uses similar timing and flavor ideas, I recommend checking a complementary dinner I’ve noted here: a simple weeknight favorite.
Ingredients
2 chicken breasts, 1 cup heavy cream, 1 cup chicken broth, 1 teaspoon garlic powder, 1 onion, chopped, Salt and pepper to taste, 2 cups cooked rice, 1 tablespoon olive oil
- 2 chicken breasts: These are the main protein and the star of the dish. Chicken breasts cook quickly and take on flavors well. They provide a mild canvas for the creamy sauce.
- 1 cup heavy cream: This creates the rich, silky texture of the sauce. Heavy cream thickens gently as it simmers and carries flavor without becoming grainy when heated carefully.
- 1 cup chicken broth: Broth adds savory depth and thins the cream initially so the sauce can be coaxed to the right consistency. It also helps deglaze the pan, lifting those flavorful browned bits.
- 1 teaspoon garlic powder: A straightforward way to add garlic flavor without fresh garlic’s stronger, sharper edge. It seasons the chicken and harmonizes with the cream.
- 1 onion, chopped: Onion brings sweetness and aroma when sautéed. It softens and becomes translucent, which means it’s ready to accept the liquids.
- Salt and pepper to taste: Basic seasonings that enhance all the other flavors. Season the chicken and adjust the sauce at the end if needed.
- 2 cups cooked rice: The rice is the comforting base that soaks up the sauce. Using cooked rice keeps this a quick finish — no need to time a separate rice cook during the pan cooking.
- 1 tablespoon olive oil: Used for searing the chicken and sautéing the onion. Olive oil transfers heat efficiently and helps achieve that desirable golden color.
None of these ingredients are complicated. Together they balance richness (cream), savory depth (broth and onion), and familiar comfort (rice and chicken). If a jar or carton of broth or cream looks slightly different from what you expect, that’s fine — this recipe is built to work with normal grocery-store staples.
Directions
- In a skillet, heat olive oil over medium heat.
- Season chicken breasts with salt, pepper, and garlic powder.
- Cook chicken in the skillet until golden brown and cooked through, about 6-7 minutes on each side.
- Remove chicken and set aside.
- In the same skillet, add chopped onion and sauté until translucent.
- Stir in the chicken broth and heavy cream, bringing to a simmer.
- Return the chicken to the skillet and cook for an additional 5-10 minutes, allowing the sauce to thicken.
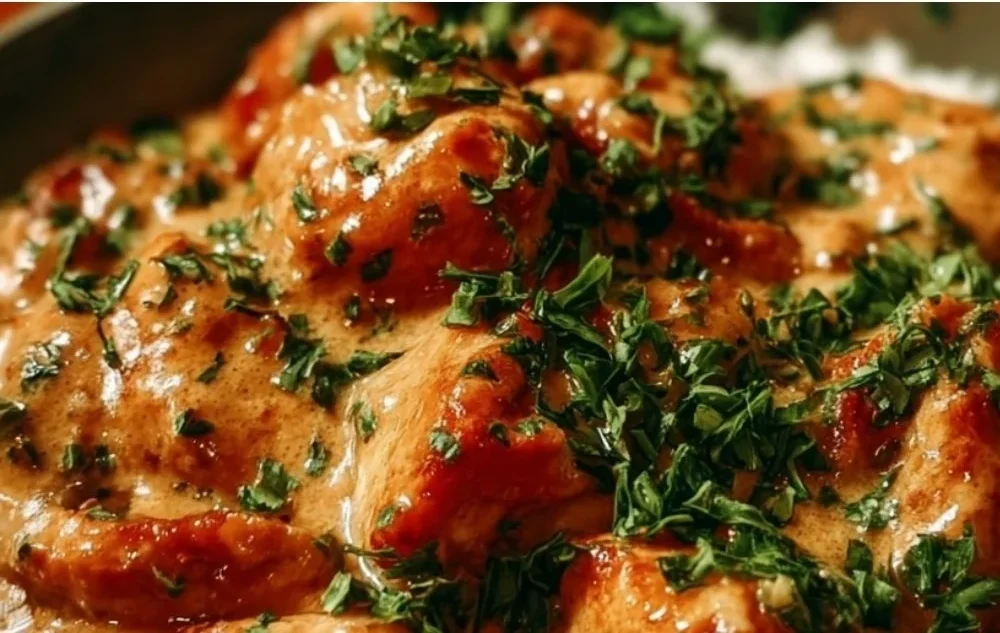
- Serve the creamy chicken over cooked rice.
Supportive guidance around the steps:
- Step 1: Heat the oil until it moves easily across the pan and looks glossy. You’ll hear a soft sizzle when you touch a drop of water in the pan — that’s your cue.
- Step 2: Seasoning should feel even. Don’t worry about exactness; a light, even coating of salt, pepper, and garlic powder is enough.
- Step 3: When the chicken first hits the hot oil, leave it alone for at least most of the suggested time. The first flip should happen when the bottom is well-browned and releases easily from the pan — a sign it’s ready. If it sticks, give it another minute. The timing is a guideline; thickness affects cook time. Use the golden color and a gentle spring when pressed as your cues.
- Step 4: Let the chicken rest briefly when you set it aside. This relaxes the juices.
- Step 5: When the chopped onion hits the warm skillet, stir occasionally. You want them soft and translucent, not browned. If you see a little color, that’s fine, but translucent is the visual you’re aiming for.
- Step 6: As you add chicken broth and heavy cream, stir to lift any browned bits from the pan. The mixture should move from thin to a gentler simmer; watch for small bubbles around the edges rather than a rolling boil. That more controlled simmer is what helps the cream thicken without separating.
- Step 7: When the chicken returns to the skillet, tuck it into the sauce so the surface touches the liquid. The additional cook time finishes the chicken and lets it soak up flavor. The sauce is ready when it’s slightly thicker and coats the back of a spoon.
- Step 8: Spoon the sauce and chicken over the warm rice. If the sauce looks a little thin, a short extra simmer will concentrate it; if it’s too thick, a splash of broth will loosen it.
If something doesn’t look perfect — maybe the chicken wasn’t as brown as you hoped or the sauce isn’t thick enough — that’s normal. Small adjustments like a few more minutes of simmering or a gentle increase in heat are all it takes. The dish is resilient.
Key techniques you’ll practice in this recipe
- Searing: You’ll learn to develop a golden crust without burning. This technique builds flavor and signals when to flip the meat.
- Deglazing: Adding broth to the pan after cooking meat and vegetables lifts the flavorful browned bits (fond). You’ll practice turning those bits into a base for sauce.
- Simmering cream: You’ll see how gentle heat thickens cream into a rich sauce. The key is steady low-to-medium heat and patience.
- Finishing in sauce: Returning the protein to the sauce teaches how to combine flavors and control final doneness without dry meat.
These techniques are fundamental and transferable to many dishes — from pan sauces for steak to creamy pastas. Practicing them here gives you reliable skills for many future meals.
For more examples of simple techniques applied to other recipes, take a look at another of my approachable guides: easy weeknight recipe ideas.
Common mistakes and how to avoid them
- Chicken not browning: If your chicken is pale, the pan probably wasn’t hot enough or the meat was overcrowded. Work in a single layer and wait for the golden color before flipping. If you’ve already started and it’s still pale, crank the heat briefly and give it a few extra minutes until color appears.
- Sauce separates or looks curdled: That usually happens with high heat. Turn the heat down, stir gently, and allow a slow simmer. If separation has occurred, a small splash of cold broth and a whisk over low heat can help bring it back together.
- Onion doesn’t soften: Maybe the pan was too cool. Add a pinch of salt (it helps draw out moisture) and cook a few minutes longer until translucent.
- Overcooked chicken: If the breasts are very thick, you can reduce searing time and finish in the sauce, or slice them in half horizontally to make them thinner before cooking. If they’re already dry, slice them thin and serve with extra sauce to add moisture back.
If you go off track, remember this: nothing here is irreversible. Adjust heat, add a little liquid, or give something a few more minutes. The goal is a comforting dinner, not perfection.
How to adjust confidently without changing the recipe
Portion scaling: To make more servings, increase ingredients proportionally — two chicken breasts become four, one cup of broth becomes two, and so on — and use a larger skillet or work in batches so nothing becomes crowded. Cooking time per piece remains similar; just avoid stacking or overlapping.
Flavor preferences: If you prefer a brighter note, finish with a squeeze of lemon at the end of cooking (conceptually that adds acidity to balance richness). If you like more herb flavor, a sprinkle of fresh parsley at the end adds freshness. These are conceptual suggestions — they don’t change the listed ingredients or steps.
Texture tweaks: For a silkier sauce, reduce it more slowly to concentrate flavors. For a looser sauce, add a bit more chicken broth before serving. Both are simple adjustments that don’t require recipe changes — just a moment of attention while the sauce simmers.
These small conceptual adjustments let you tailor the dish to your family’s tastes without changing the recipe itself.
Serving, storage, and reheating made simple
Serving: Spoon the creamy chicken and sauce generously over the warm cooked rice. Garnish with a light sprinkle of chopped herbs if you have them on hand — it’s a small touch that brightens the plate. This meal pairs well with a simple green salad or steamed vegetables for color and crunch.
Storage: Let leftovers cool to room temperature (no more than two hours out of the fridge), then transfer to an airtight container. Stored in the refrigerator, this dish will keep well for 3–4 days.
Reheating: Gently reheat on the stove over low heat, adding a splash of chicken broth or water to loosen the sauce if it has thickened. Stir frequently and heat just until warmed through. You can also reheat in the microwave in short intervals, stirring between bursts and adding a little liquid if needed. Gentle reheating preserves the creamy texture and keeps the chicken tender.
For another reliable weeknight idea that stores and reheats well, I sometimes point readers to similar recipes in my collection: a simple, make-ahead meal inspiration.
Questions new cooks often ask about this recipe
- How will I know the chicken is cooked through? A cooked chicken breast will feel springy and firm, and juices should run clear. If you have a thermometer, 165°F (74°C) is the safe internal temperature, but visual cues and the slight give when pressed are also reliable.
- Can I use bone-in chicken? This recipe uses boneless breasts and timing assumes they cook quickly. Bone-in pieces will need more time — consider searing, then simmering longer in the sauce until cooked through.
- What if my sauce is too thin? Simmer it a bit longer without the chicken to reduce, or stir in a small additional splash of cream and keep the heat low until thickened.
- Is it normal for the sauce to look glossy? Yes — a glossy sauce indicates it’s emulsified and the fat is incorporated. If it looks broken or oily, lower the heat and whisk gently to bring it back together.
If something feels uncertain, slow down and observe: color, texture, and gentle sizzling sounds are your best friends in the kitchen.
Final encouragement from Carla
You don’t need fancy equipment or exact precision to make a meal that tastes like comfort and care. This Creamy Chicken and Rice gives you clear touchpoints — golden-browned chicken, translucent onions, a gentle simmer — so you can follow along confidently. Small imperfections are part of learning, and each time you cook this dish you’ll notice little improvements in timing and confidence. Trust the process, use your senses, and remember that delicious food is about warmth and effort more than perfection.
Conclusion
If you’d like a variation that leans into a cheesy one-pot style, check this take on a similar dinner: Creamy Parmesan One Pot Chicken and Rice. For another comforting, stovetop creamy chicken and rice approach with slightly different flavor notes, this recipe is a helpful reference: Creamy Chicken and Rice Recipe, One-Pot Meal.
Keep cooking, keep experimenting gently, and know that every meal you make is progress.

Creamy Chicken and Rice
Ingredients
Method
- In a skillet, heat olive oil over medium heat.
- Season chicken breasts with salt, pepper, and garlic powder.
- Cook chicken in the skillet until golden brown and cooked through, about 6-7 minutes on each side.
- Remove chicken and set aside.
- In the same skillet, add chopped onion and sauté until translucent.
- Stir in the chicken broth and heavy cream, bringing to a simmer.
- Return the chicken to the skillet and cook for an additional 5-10 minutes, allowing the sauce to thicken.
- Serve the creamy chicken over cooked rice.