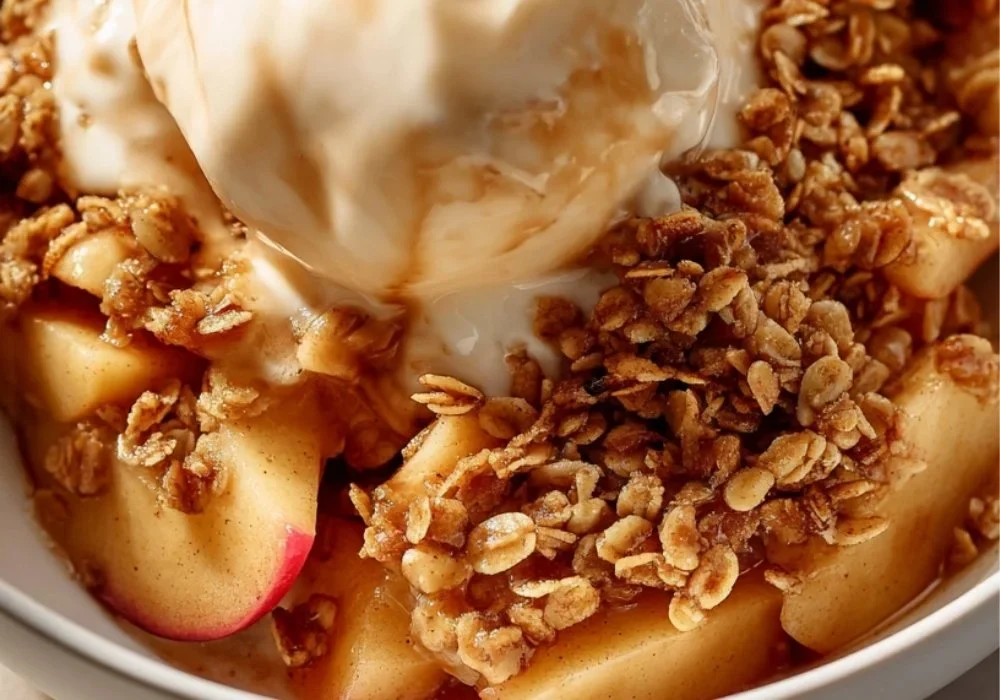
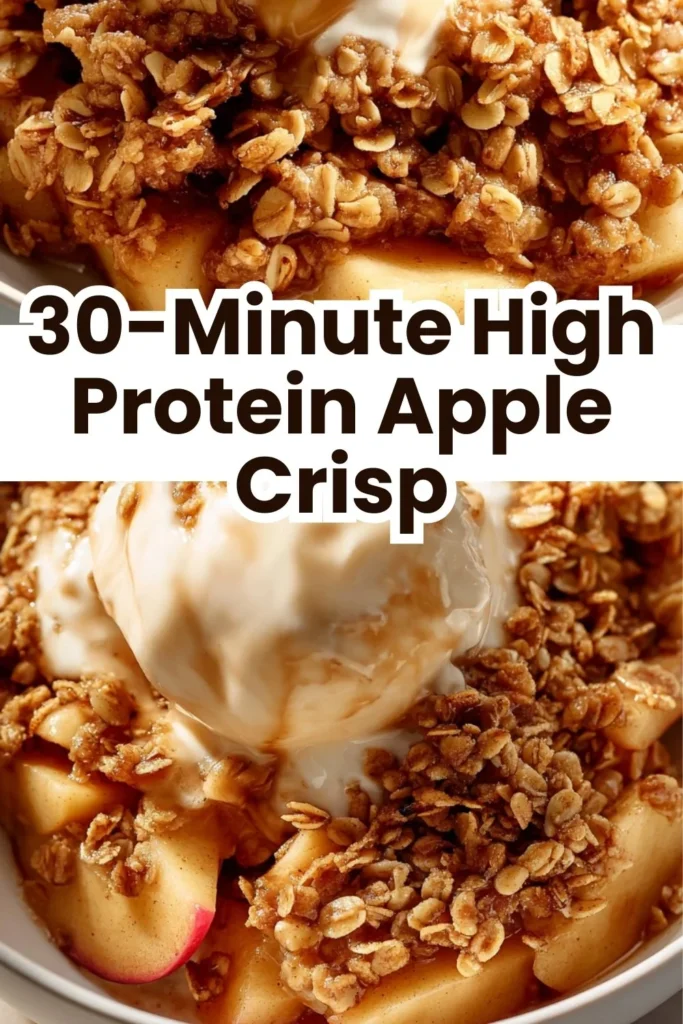
30-Minute High Protein Apple Crisp
Introduction
This 30-Minute High Protein Apple Crisp is for anyone who wants a warm, comforting dessert without a long list of steps or a lot of fuss. Whether you’re new to baking, coming back to the kitchen after a break, or just short on time after a busy day, this is a recipe that gives you a big payoff for a small investment of time and attention. It combines familiar ingredients you probably already have — apples, oats, a bit of sweetener — with a scoop of protein powder to make it feel a little heartier than a traditional crisp.
If you like simple, protein-forward dishes that still feel indulgent, this is a great place to start; I often encourage readers to try recipes that build confidence, and this one does exactly that. For more ideas that balance protein and comfort, check out my take on high-protein breakfast burritos — they use similarly forgiving techniques and are great for practicing portioning and seasoning.
In the sections that follow I’ll walk you through why this is an approachable recipe, what to pay attention to, and how to make it feel like an everyday success.
Why this recipe is easy to get right
This crisp is forgiving for a few reasons. First, the oven does most of the work — once it’s assembled, you mostly wait and watch for color and tenderness. Second, the crumbly topping is designed to be loose and rustic; it’s meant to be uneven and crumbly, not perfectly uniform. That means small mistakes — a topping that’s a little drier or a little more browned in places — won’t ruin the dish.
There’s also flexibility in the sweetness and texture. The recipe gives a simple amount of sweetener, but the natural flavor of the apples carries a lot of the dessert’s character, so slight variations in sugar or sweetener aren’t critical. If your apples are very tart, you might notice that more; if they’re sweet, the crisp will be milder. None of that affects whether it works — it only changes the balance you might prefer next time.
Finally, ingredients like almond flour, oats, and protein powder blend together into a topping that tolerates a range of mixing — you don’t need perfect folding or delicate handling. That makes this crisp a great practice recipe for learning to judge texture and timing.
How to make 30-Minute High Protein Apple Crisp
Start by preheating the oven so it’s ready when your dish is assembled; that gives you predictable cook time. Next, toss the sliced apples with cinnamon and a pinch of salt in a large bowl so each slice gets a little coating — you’re not trying to drown them, just to introduce flavor and help the apples soften evenly as they bake.
While the apples rest, combine the dry topping ingredients: oats, protein powder, brown sugar, almond flour, and melted coconut oil. Mix until the combination looks crumbly and slightly sticky where the melted oil has coated the dry bits. This is your topping; it should hold together if you squeeze a handful but still break apart easily. Layer the apples into a baking dish in an even layer, then scatter the oat mixture across the top. If you’re using chopped nuts and dried fruit, sprinkle them on now.
Bake in your preheated oven for about 25–30 minutes. You’re looking for a top that is golden brown and apples that have softened and started to release a little juice. When the edges are bubbling and the top is fragrant with cinnamon and toasted oats, you’re done. Let it cool slightly — five to ten minutes gives the fruit a moment to settle — then serve.
Beginners should slow down at two points: when you slice the apples (take your time to make even-ish slices so they cook at the same rate) and when you check for doneness (use visual and tactile cues rather than an exact minute). This recipe rewards attention, not speed.
Ingredients
4 cups apples, peeled and sliced, 1 cup rolled oats, 1/2 cup protein powder, 1/4 cup brown sugar or sweetener of choice, 1 tsp cinnamon, 1/4 cup almond flour, 1/4 cup melted coconut oil or butter, 1/4 cup chopped nuts (optional), 1/4 cup raisins or cranberries (optional), Pinch of salt
- 4 cups apples, peeled and sliced: These are the heart of the dish. Peeled slices soften and release their juices as they bake, producing the warm, saucy filling beneath the crisp topping. Peeling is optional if you like a rustic texture, but the recipe as written calls for peeled fruit, which gives a smooth mouthfeel.
- 1 cup rolled oats: Oats provide structure and that lovely toasty flavor in the topping. They soak up a little of the fruit juices and crisp up in the oven.
- 1/2 cup protein powder: This is the simple twist that turns a classic crisp into a higher-protein treat. It blends with the oats and almond flour to add body without changing the method.
- 1/4 cup brown sugar or sweetener of choice: Sweetness balances the tartness of the apples. Brown sugar adds a gentle caramel note, but feel free to use a sweetener you prefer — the exact level of sweetness is flexible.
- 1 tsp cinnamon: A small hit of spice that pairs beautifully with apples; it lifts the flavor without making things complicated.
- 1/4 cup almond flour: Almond flour helps create a tender, slightly nutty crumb in the topping. It also keeps the topping from becoming too dense.
- 1/4 cup melted coconut oil or butter: The fat binds the dry ingredients and helps create golden color as it browns. Choose the fat you enjoy for flavor.
- 1/4 cup chopped nuts (optional): Adds crunch and visual interest, but optional so you don’t feel pressured to include them.
- 1/4 cup raisins or cranberries (optional): Dried fruit adds pockets of chew and sweetness; optional depending on preference.
- Pinch of salt: Tiny but important — salt enhances the flavors and balances the sweetness.
Each ingredient here has a clear role and none are intimidating; you’re simply balancing fruit, grain, protein, fat, and a little sweetness.
Directions
- Preheat your oven to 350°F (175°C)., 2. In a large mixing bowl, combine sliced apples with cinnamon and a pinch of salt., 3. In another bowl, mix rolled oats, protein powder, brown sugar, almond flour, and melted coconut oil until crumbly., 4. Layer the apples in a baking dish, then spread the oat mixture over the top., 5. If using, sprinkle chopped nuts and dried fruits on top., 6. Bake in the preheated oven for about 25-30 minutes, or until the top is golden brown and the apples are tender., 7. Allow to cool slightly before serving, and enjoy your guilt-free dessert!
After you’ve followed the steps above, look for these visual and textural cues so you know you’re on track:
- The apple layer should be soft and slightly bubbling at the edges when done; it won’t be mushy, but it should give when you press a slice with a fork.
- The topping should be a warm golden brown with toasted oat flecks; if a few darker spots appear, that’s okay — the contrast adds charm.
- If the topping still looks pale and the apples are bubbling, you can leave it a few extra minutes. If the top is browning too quickly, tent a piece of foil loosely over the dish for the remaining time.
If things don’t look perfect at first, don’t worry. Maybe your topping is a touch drier than expected — a small drizzle of melted butter or a spoonful of apple juice across the surface before baking can help next time. If the apples are still a bit firm at 30 minutes, simply give them an extra five minutes; ovens vary, and what matters is tenderness and bubbling juices.
Key techniques you’ll practice in this recipe
- Mixing to texture: You’ll learn to judge when a dry topping has reached “crumbly but cohesive” — a handful should stick together when pressed but break apart easily. This visual/feel cue is useful for crisps, streusels, and many baking toppings.
- Layering and evenness: Placing the apple layer evenly teaches you to consider cooking times — when ingredients are similar thickness, they finish together. That skill carries to gratins and casseroles.
- Oven observation: You’ll practice identifying doneness through color and bubbling rather than relying solely on minutes. Learning to read the oven is one of the most useful kitchen skills.
- Simple flavor balancing: Tasting and thinking about tart vs. sweet and how spice (cinnamon) shifts the profile will make seasoning intuitive for future recipes.
These are foundational skills that transfer to many sweet and savory dishes.
Common mistakes and how to avoid them
- Mistake: Apples are unevenly sliced and some pieces are still hard. Solution: Take a few extra seconds to slice apples more evenly. Aim for slices about the same thickness so they cook at the same rate.
- Mistake: Topping is too wet and clumps into a paste. Solution: If your melted fat is hot when added, let it cool a touch so it coats rather than melts the dry ingredients. Stir until you have crumbs, not a batter.
- Mistake: Top browns too quickly while apples remain undercooked. Solution: Tent with foil and give the apples more time to soften. Alternatively, lower the oven temperature slightly and extend time.
- Mistake: Dessert is too sweet or not sweet enough. Solution: Taste an apple slice before peeling next time to gauge sweetness and adjust the 1/4 cup brown sugar up or down in future batches.
- Mistake: Soggy bottom. Solution: Avoid over-layering the apples; they should sit in a single, reasonably compact layer so juices don’t pool excessively. Slight bubbling is fine — that’s what makes it saucy.
If something goes off track, small adjustments typically fix it. You don’t need to start over.
How to adjust confidently without changing the recipe
- Portion scaling concepts: If you want more servings, assemble in a larger dish and add more apples in the same proportions; baking time will increase slightly. For fewer servings, use a smaller dish but expect baking time to decrease. The key concept is surface area: a thinner layer of apples will cook faster.
- Flavor preference adjustments: Think about sweetness and spice as adjustable balances. If you like things more spiced, add a small pinch of nutmeg or cardamom in addition to the cinnamon — a little goes a long way. If you prefer less sugar, reduce the brown sugar fractionally next time. These are conceptual tweaks; you’re not changing the recipe, just learning how to tune it.
- Texture tweaks — conceptually only: For a crunchier top, toast the oats lightly before incorporating; for a more tender topping, increase almond flour slightly. Again, these are ideas to guide you, not changes required now. The recipe as written already aims for a pleasant middle ground.
Small, intentional adjustments are a great way to make the recipe your own while keeping the method the same.
Serving, storage, and reheating made simple
Serve this crisp slightly warm — the aroma is part of the experience; you’ll notice the cinnamon and toasty oats as soon as you remove it from the oven. A scoop of yogurt or a small spoonful of ricotta can add creaminess without overwhelming the protein-focused nature of the recipe. If you want an extra treat, a light drizzle of warm honey is lovely.
To store leftovers: cover the baking dish with foil or transfer portions to an airtight container and refrigerate for up to 3–4 days. The topping may soften over time as it sits with the fruit juices; that’s normal. Reheat single portions in a 325°F oven for about 10 minutes or until warmed through to help revive some of the crispness. For very quick reheating, microwave briefly and then pop in a toaster oven for a minute to refresh texture.
If you enjoy meals that reheat well and are family-friendly, this recipe pairs conceptually with other make-ahead bakes — for inspiration on reheating and meal planning, see my high-protein veggie bake with cottage cheese which uses similar storage and reheating ideas.
Questions new cooks often ask about this recipe
- How do I know when the apples are done? Look for a softened texture and bubbling fruit juices around the edges. A fork should meet little resistance when you test a slice.
- My topping seems pale at 25 minutes — is that okay? Yes, ovens vary. If apples are tender but topping is pale, leave it an extra 3–5 minutes. If the top is browning too fast, tent foil over the dish.
- Can I use different apples? Absolutely. Firmer apples like Granny Smith hold shape better; softer types will break down more. Both are fine — it’s mostly a matter of texture preference.
- Is it normal for the topping to be uneven? Yes. A rustic, uneven crumb is expected and charming. Small imperfect areas are not a problem.
- What equipment do I need? A mixing bowl, a baking dish, and a spatula are enough. No special tools required.
These are all normal concerns and easy to address as you gain experience. Simple observation is often the best tool.
Final encouragement from Carla
You’ve just learned a gentle, reliable recipe that rewards attention more than skill. If your first crisp isn’t identical to a photo you’ve seen, that’s okay — the warm smell, the tender apples, and the golden topping are what matter. Each time you make this, you’ll get a little more confident about judging textures, balancing sweetness, and using your oven. Keep practicing, be kind to yourself when things are slightly imperfect, and remember: cooking is about nourishment and pleasure, not perfection.
Conclusion
For a rapid single-serving idea you can try for comparison, take a look at 10-Minute Microwave Apple Crisp for One, which shows a different approach to a quick apple dessert. If you enjoy the interplay of apple and savory flavors, this version of Kale & Apple Salad with Maple Bacon Pecan Crumble offers a lovely contrast and inspiration for using apple textures in other dishes. For another high-protein apple idea that plays with the same flavor profile in a handheld form, check out Amazing High Protein Apple Crisp Bagels (36G).
Happy baking — and remember, small steps and steady practice lead to big confidence in the kitchen.
High Protein Apple Crisp
Ingredients
Method
- Preheat your oven to 350°F (175°C).
- In a large mixing bowl, combine sliced apples with cinnamon and a pinch of salt.
- In another bowl, mix rolled oats, protein powder, brown sugar, almond flour, and melted coconut oil until crumbly.
- Layer the apples in a baking dish, then spread the oat mixture over the top.
- If using, sprinkle chopped nuts and dried fruits on top.
- Bake in the preheated oven for about 25-30 minutes, or until the top is golden brown and the apples are tender.
- Allow to cool slightly before serving, and enjoy your guilt-free dessert!