Healthy No-Bake Oreo Cheesecake Bites Recipe
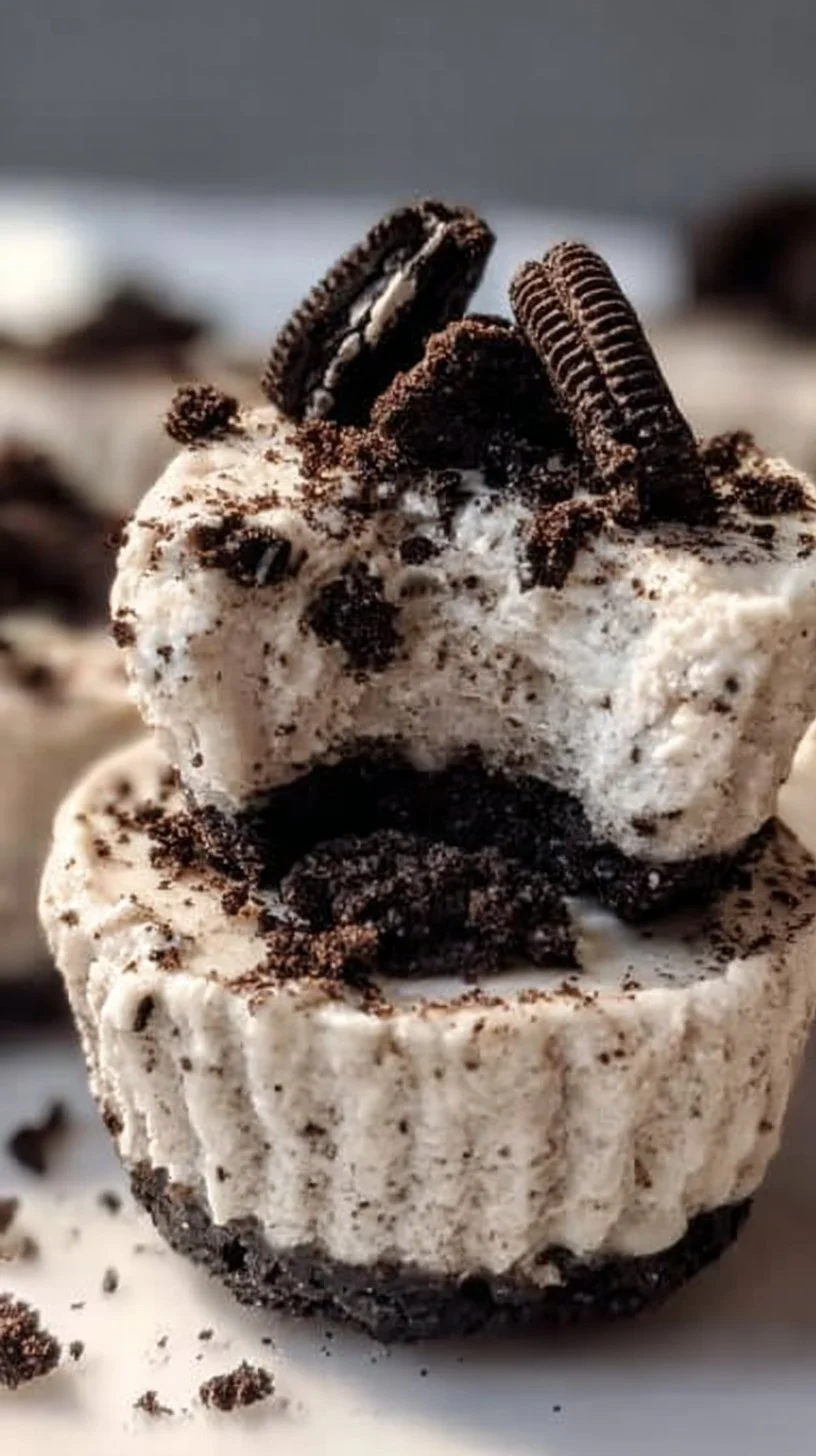
If you love small, sweet treats that don’t require an oven, these Healthy No-Bake Oreo Cheesecake Bites are for you. They’re a gentle introduction to no-bake desserts — simple steps, forgiving textures, and a satisfying finish that feels special without a lot of fuss. Whether you’re new to making desserts or returning after a few kitchen misadventures, this recipe offers an approachable win you can be proud of.
These bites are a great practice run for no-bake cheesecakes and refrigerator desserts. If you enjoy experimenting with light, protein-forward desserts, you might like the way a similar no-bake idea came together in my High Protein Cheesecake Fluff — it’s a good companion if you want to explore other easy, chilled sweets after you try these bites: no-bake high-protein cheesecake fluff. Read on and I’ll walk you through every step, why it works, and how to feel confident as you go.
Why this recipe is easy to get right
This recipe is forgiving because the structure relies mostly on chilled creaminess and Oreo pieces rather than precise baking chemistry. There’s no oven timing to misjudge, no complex sugar stages, and no need for advanced whipping techniques. A few key things make it forgiving:
- Ingredients are straightforward and stable: the cream cheese and cool whip create body without whipping to a particular stiff stage.
- Texture is controlled by chilling, not whipping. Freeze time gives you a consistent result even if the mixture is a touch softer when you spoon it in.
- Portioning into liners is simple — an Oreo at the bottom gives you a stable base and predictable bite.
Where flexibility is allowed: you don’t need exact tool choices (a mixing bowl and hand mixer work fine), and gentle folding of the cool whip can be done with a spatula rather than a perfect technique. Where to be mindful: make sure the cream cheese is softened so it blends smooth; that’s the main place where texture can go wrong. Overall, it’s a recipe that teaches useful skills without punishing mistakes.
How to make Healthy No-Bake Oreo Cheesecake Bites
The process follows three clear phases: set up, mix, and chill.
- Set up: Line your muffin tin with paper liners and place a single Oreo thin in each cup. This is your base and it’s both decorative and practical — it gives each bite a crunchy anchor when you bite into the creamy top.
- Mix: Soften the cream cheese, beat it smooth with salt and vanilla, add yogurt for tang and smoothness, fold in crushed Oreos for flavor and texture, then gently fold in thawed cool whip to keep the filling light. The goal here is a smooth, slightly fluffy mixture with Oreo pieces distributed evenly.
- Chill: Spoon the mixture over the Oreo base, press gently if you like, and top with more crushed Oreos if desired. Freeze for about 3 hours so the bites firm up into neat, easy-to-eat portions.
At each stage, slow down where you need clarity. Beginners should spend a little extra time softening the cream cheese and making sure the cool whip is fully thawed — those simple checks prevent gritty or lumpy textures. Focus on smoothness during the beating stage and on even scooping when filling the liners. If something looks a little uneven, that’s okay — small imperfections are part of homemade charm and won’t affect taste.
If you’re curious about other chilled yogurt-based bites and want inspiration for flavor swaps later, check out this gentle blueberry option I’ve worked on: blueberry swirl yogurt bites.
Ingredients
8 oz. fat free cream cheese, 1/2 cup non fat vanilla Greek yogurt, 1 tsp. vanilla, 1/4 tsp. salt, 8 oz. tub low fat cool whip, 24 Oreo thins
- 8 oz. fat free cream cheese: This provides the creamy, slightly tangy backbone of the bites. Softened, it whips into a smooth base that holds the other ingredients together.
- 1/2 cup non fat vanilla Greek yogurt: Adds extra tang, a hint of natural sweetness, and a lighter texture. It helps thin the cream cheese slightly so the filling is easy to scoop.
- 1 tsp. vanilla: Small but important — vanilla brightens the dairy flavors and makes the dessert taste more dessert-like without adding sugar.
- 1/4 tsp. salt: Salt isn’t salty here; it enhances flavor and balances sweetness so the Oreo flavor and creaminess pop.
- 8 oz. tub low fat cool whip: Acts as a lightening agent. When folded in, it creates air and softness so the filling isn’t dense.
- 24 Oreo thins: Half are placed whole as the base, and the other half are crushed into the filling (and optionally sprinkled on top). They add crunch, chocolate flavor, and familiar cookie notes.
None of these ingredients are intimidating. You’ll find them labeled plainly at the store, and they combine in a predictable, friendly way. They work together by balancing creaminess, air, tang, and crunchy texture so each bite feels complete.
Directions
Place 12 paper cupcake liners into a muffin tin., Add one Oreo thin to each liner and set aside., In a medium size mixing bowl beat softened cream cheese until smooth and creamy with a hand mixer., Add in salt, vanilla, and Greek yogurt. Continue beating until well combined., Pour in the remaining 12 crushed Oreos, and beat until mixed well., Fold in thawed cool whip until ingredients are combined., Evenly scoop cream cheese mixture into each liner and top with crushed Oreos, if desired., Freeze for 3 hours before serving. Enjoy!
Supportive guidance for the steps above:
- Place liners and the Oreo base: When you place the paper liners into the muffin tin, they sit upright and make filling easier. Press each Oreo thin gently into the bottom — no force needed, just a gentle nudge. This step gives the bite a neat base and a lovely surprise when you reach the bottom.
- Beat the cream cheese: Look for a smooth, lump-free texture. If your cream cheese still has small lumps after a minute, stop and scrape the sides of the bowl, then continue. It should look glossy and spreadable. If it feels cool and a little stiff, let it sit 5–10 minutes more until softened — this prevents a grainy texture.
- Add yogurt, salt, vanilla: After adding these, the mixture will loosen and smell fragrant with vanilla. That smell is a good sign the flavors are blending. Beat until even and smooth; no need to overbeat.
- Add crushed Oreos: When you fold in the crushed cookies, you’ll see flecks and small chunks throughout the cream. That’s what you want — textural contrast. If the pieces are too large for your preference, you can press a few through a sieve or chop them finer, but don’t overwork the mixture.
- Fold in cool whip: Use a spatula and gentle folding motions. The goal is to combine without deflating too much air. It will look light and a bit fluffy afterward. It’s okay if there are streaks at first — one or two more folds and it will be uniform.
- Scoop and top: Use a small cookie scoop or two spoons to portion evenly. The mixture should hold its shape on the spoon and ease into the liners. Top with extra crushed Oreos for a pretty finish if you like.
- Freeze: Proper chilling is the final step. Place the tray flat in the freezer and leave it undisturbed. The three-hour freeze firms the bites so they slice clean and hold together when you pop them out of the liners.
Visual cues: the filling should be glossy and hold small peaks before scooping; the finished bite should look set and slightly firm at the surface after freezing.
Key techniques you’ll practice in this recipe
- Softening and smoothing cream cheese: Learning to bring cream cheese to the right consistency — soft but not melted — is useful for dips, frostings, and other no-bake desserts.
- Gentle folding: Folding, especially of delicate whipped ingredients, prevents deflating and keeps textures light. It’s a skill you’ll use in mousses, whipped frostings, and airy batters.
- Even portioning: Filling liners to similar levels gives consistent freezing and serving. Practice with a scoop or spoons to make future portion-controlled treats easier.
- Simple assembly and chilling: This recipe shows how chilling sets a dessert, rather than baking. Once you’re comfortable with chilled treats, you can experiment with other flavor combinations and presentations.
These are foundational skills that translate to many other recipes, so this is both a tasty treat and a confidence builder.
Common mistakes and how to avoid them
- Mistake: Cream cheese too cold and lumpy. Fix: Let it sit at room temperature for about 20–30 minutes, then beat again until smooth. If you’re short on time, microwave in 5-second bursts — just be careful not to melt it.
- Mistake: Cool whip still frozen in the middle. Fix: Fully thaw in the refrigerator or let it sit at room temperature for a few minutes, then fluff gently with a spoon before folding in. If frozen chunks remain, they’ll create unpleasant pockets of ice.
- Mistake: Overmixing after adding cool whip. Fix: Fold gently until the mixture looks uniform; you don’t need to whisk vigorously. Overmixing will make the filling dense.
- Mistake: Bites are too soft after removing from freezer quickly. Fix: Let them sit at room temperature for 3–5 minutes before serving so they’re easier to bite without crumbling.
- Mistake: Uneven portions. Fix: Use a small scoop or tablespoon and aim for consistency. It’s okay if they’re not perfectly identical — they’ll taste the same.
If something looks off, pause and assess. Small fixes (softening, gentle thawing, scraping the bowl) usually save the day without starting over.
How to adjust confidently without changing the recipe
While you must keep ingredients and steps as written here, you can think conceptually about adjustments for future adaptations:
- Portion scaling: If you want more or fewer bites, scale the quantity mentally. For twice as many, double ingredients and use two muffin tins or work in batches. For a smaller batch, halve everything.
- Flavor preferences: You can imagine swapping the vanilla for a splash of almond extract or folding in different cookie crumbs in other iterations. The principle is the same: a creamy base plus cookie pieces.
- Texture tweaks: If you prefer a firmer filling, a longer chill in the freezer will help; for a softer, spoonable bite, shorten the freeze slightly and serve sooner. The idea is that chill time controls firmness, while the ratio of cream cheese to cool whip controls density.
These concepts let you feel comfortable experimenting later on, while keeping this recipe intact for a reliable, repeatable result.
Serving, storage, and reheating made simple
Serving: These bites are best straight from the freezer with a few minutes at room temperature so they’re easy to bite. Arrange them on a small platter for a party or place them on a lined tray for easy self-service.
Storage: Keep leftovers in an airtight container in the freezer for up to two weeks. If you leave them out too long at room temperature, they’ll soften and lose structure, so return extras to the freezer after a short serving window.
Reheating: These aren’t reheated in the traditional sense. If you want a softer texture, move them from the freezer to the refrigerator for 30–60 minutes, or leave at room temperature for 3–10 minutes depending on how soft you like them. Avoid microwaving — it will melt the cream and make the Oreo base soggy.
If you’re collecting more make-ahead breakfast or snack ideas that store well, my breakfast recipes page has plenty of ideas for chilled treats and quick portions: breakfast recipes.
Questions new cooks often ask about this recipe
- How soft should the cream cheese be? It should be soft enough to press with your finger and leave an indentation, but not molten or warm. Think spreadable butter consistency.
- Can I use regular Oreos instead of Oreo thins? Yes — you’ll have thicker cookies, so the base will be a bit more substantial. They’ll still work fine.
- What tool must I have? A hand mixer makes smoothing cream cheese effortless, but you can use a sturdy whisk and a little extra elbow grease if needed.
- Is the freeze time strict? The 3-hour freeze gives consistent firmness, but if you’re in a hurry, 90–120 minutes can work for a softer bite. Plan for the full time for neat, well-set portions.
- Is it normal if the filling looks a little lumpy? Small lumps usually mean the cream cheese wasn’t fully softened or scraped from the bowl. Beat a little longer and scrape the sides — that usually smooths things out.
These are normal questions, and the good news is the fixes are simple: a little extra time or a gentle fold usually sorts things out.
Final encouragement from Carla
You don’t need perfect tools or perfect timing to make something delightful. This recipe is designed so you can succeed on the first try: easy steps, clear checkpoints, and forgiving textures. If your first batch isn’t exactly symmetrical, that’s okay — homemade treats wear those little quirks like a badge of effort. Keep going, try it again, and enjoy the process as much as the bites themselves. Every recipe you make builds your confidence, and these Oreo cheesecake bites are a sweet, low-stress place to practice.
Conclusion
If you want another no-bake Oreo-inspired idea for comparison or inspiration, Aubrey’s version offers a slightly different approach that’s fun to read alongside this one: Oreo Cheesecake Bites – Aubrey’s Kitchen. For a small-batch, no-bake perspective with a similar feel, Baking Mischief has a clear tutorial that pairs well with this recipe as you refine your technique: Small-batch No-bake Oreo Cheesecake Bites – Baking Mischief.
Keep it simple, trust the steps, and enjoy each successful bite — you’ve got this.

Healthy No-Bake Oreo Cheesecake Bites
Ingredients
Method
- Line a muffin tin with 12 paper cupcake liners.
- Place one Oreo thin in each liner.
- In a mixing bowl, beat the softened cream cheese until smooth and creamy using a hand mixer.
- Add in salt, vanilla, and Greek yogurt; continue beating until well combined.
- Pour in 12 crushed Oreos and mix well.
- Gently fold in the thawed cool whip until fully combined.
- Evenly scoop the cream cheese mixture into each liner, pressing gently if desired.
- Top with additional crushed Oreos if desired.
- Freeze for about 3 hours until firm.