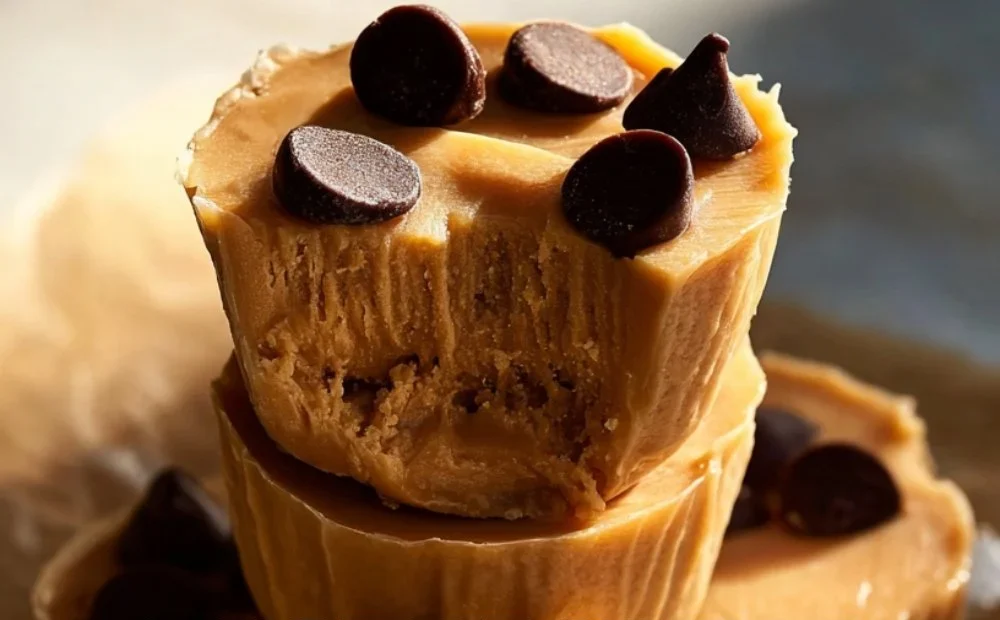
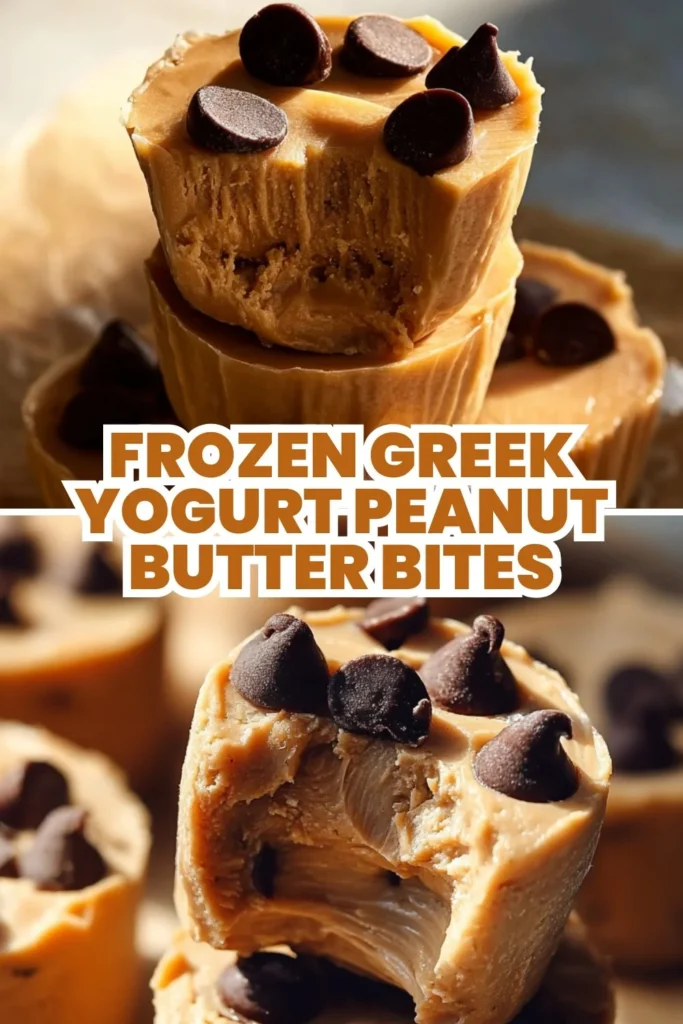
Frozen Greek Yogurt Peanut Butter Bites
Introduction
This little recipe — Frozen Greek Yogurt Peanut Butter Bites — is one I reach for when I want a snack that’s simple, satisfying, and forgiving. It’s for busy parents, for beginners who are still finding their footing in the kitchen, for people who want a quick healthy treat without a long ingredient list, and for anyone who’s worried that frozen snacks are complicated. You don’t need special gadgets or perfect timing to make these; a bowl, a spoon, and a freezer are all it takes.
If you like the idea of small, portion-controlled frozen snacks, you might enjoy how this one compares to other simple yogurt bites like the Blueberry Swirl Yogurt Bites, which use a similar idea with a fruity twist. I’ll walk you through what each step is doing and why small imperfections are totally fine — the end result will still be delicious and easy to enjoy.
Why this recipe is easy to get right
This recipe is forgiving in several ways. First, the ingredient list is short and made of familiar pantry staples: Greek yogurt, peanut butter, a sweetener, vanilla, and an optional mix-in. Those ingredients are robust: small measurement changes won’t ruin the texture or flavor. Second, there are no heat-sensitive steps — no baking, no tempering chocolate, no delicate emulsions. You mix, scoop, and freeze. That means timing isn’t tight; if your freezer needs an extra hour, that’s okay.
Flexibility is built in: you can skip the optional granola or chips, or stir them in gently if you prefer a smoother bite. The bites are also forgiving of visual imperfections — they can be slightly rounded or a little uneven and still look attractive in a jar or container. Because the steps are straightforward, this recipe is suitable for all skill levels, and it’s a helpful recipe if you’re learning how to judge consistency and how to work with frozen treats.
How to make Frozen Greek Yogurt Peanut Butter Bites
At a glance, the process is simple: combine, fold if desired, scoop, freeze, and store. Here’s what happens at each stage and what to focus on.
- First: Combine the creamy ingredients. You’re bringing together Greek yogurt, peanut butter, honey or maple syrup, and vanilla. This is where you create the base texture and flavor. Aim for a smooth, homogeneous mixture — if you see streaks of peanut butter or yogurt, keep mixing until the color evens out. The mixture should be thick enough to hold its shape when scooped.
- Next: Fold in the optional mix-ins. If you’re adding granola or chocolate chips, fold them in gently so they’re distributed without overworking the base. This is a good place to pause and think about texture: if you want every bite to have a chip, stir more evenly; if you prefer a few surprise crunches, fold more loosely.
- Then: Scoop onto a baking sheet. Use a spoon or cookie scoop to drop dollops of the mixture onto parchment. The size you choose affects freezing time, so keep dollops uniform for even results. They don’t need to be perfect spheres; slightly rustic shapes are normal and fine.
- Finally: Freeze and store. Freeze on the sheet until solid, then transfer to an airtight container for long-term storage. Labeling the container with the date helps you keep track. These are ready to eat straight from the freezer — no thawing required unless you prefer them slightly softer.
If you’re new to this, slow down during the mixing and scooping steps. Mixing until smooth and scooping evenly are the two places where a little attention makes a big difference in the final texture.
Ingredients
1 cup Greek yogurt, 1/2 cup peanut butter, 2 tablespoons honey or maple syrup, 1/2 teaspoon vanilla extract, 1/4 cup granola or chocolate chips (optional)
- 1 cup Greek yogurt: This is the base of the bites. Greek yogurt provides creaminess, a slightly tangy flavor, and structure when frozen. Its thicker texture compared with regular yogurt helps the bites hold together and gives them a satisfying mouthfeel.
- 1/2 cup peanut butter: Peanut butter adds richness, fat, and a nutty flavor that pairs beautifully with the tang of the yogurt. It also helps bind the mixture, making the bites easier to scoop and less likely to crumble once frozen.
- 2 tablespoons honey or maple syrup: This is the sweetener and it’s flexible — honey gives a floral sweetness and slightly sticky texture, while maple syrup offers a deeper, caramel-like note. Two tablespoons is enough to sweeten without overpowering the yogurt and peanut butter.
- 1/2 teaspoon vanilla extract: Vanilla is the quiet background note that rounds out flavors. It makes the bites taste complete, lifting the natural flavors of the other ingredients.
- 1/4 cup granola or chocolate chips (optional): These are optional texture enhancers. Granola adds crunch and whole-grain flavor; chocolate chips add pockets of sweetness and a contrasting texture once frozen. Adding them is purely about preference — the base is delicious on its own.
None of these ingredients are complicated or intimidating. They work together by balancing creaminess, sweetness, fat, and texture: the yogurt and peanut butter give structure and mouthfeel, the sweetener and vanilla lift the flavor, and the add-ins provide interest.
Directions
- In a mixing bowl, combine Greek yogurt, peanut butter, honey (or maple syrup), and vanilla extract. Mix until smooth.
- If desired, fold in granola or chocolate chips.
- Using a spoon or cookie scoop, drop dollops of the mixture onto a parchment-lined baking sheet.
- Place the baking sheet in the freezer for about 2-3 hours or until the bites are fully frozen.
- Once frozen, transfer the bites to an airtight container and store them in the freezer. Enjoy as a healthy snack!
Supportive guidance for each step:
- Step 1 — Mix until smooth: When combining the yogurt and peanut butter, you’ll see the mixture change from streaky to uniform. Use a rubber spatula or a spoon, scrape the sides of the bowl, and blend until you no longer see swirls of lighter yogurt or darker peanut butter. The finished texture should be thick but spoonable — not runny, not dry. If the mixture feels too stiff to scoop, a gentle whisking or an extra drizzle of honey/maple syrup can make it easier to handle; this is a flexibility point.
- Step 2 — Fold in add-ins: Folding means gently turning the mix-ins through the base so they’re evenly distributed without breaking them up or overmixing. If you use granola, fold carefully so it keeps some crunch; if you use chocolate chips, folding preserves whole chips rather than melting them into the base. If you skip this step, that’s perfectly fine — the bites will be smoother.
- Step 3 — Scoop onto parchment: Scoop uniform dollops so they freeze at the same rate. If you don’t have a cookie scoop, use two spoons to make small quenelles. The size you choose determines freezing time: larger dollops will need more time. They should hold together on the sheet without spreading — if they spread too much, the mixture was too soft and needs a few minutes in the fridge before re-scooping.
- Step 4 — Freeze until solid: About 2–3 hours is a useful guideline. You can check one bite by pressing gently — it should feel firm and cold all the way through. If they’re only chilled on top, give them more time. Don’t worry if they freeze with slight surface texture or small air pockets; that’s normal.
- Step 5 — Transfer and store: Move fully frozen bites to an airtight, freezer-safe container with parchment between layers if needed. Keep them frozen for up to a month for best quality. If a few stuck together in the container, let them sit at room temperature for 2–3 minutes before pulling them apart gently.
Remember: small imperfections — uneven shapes, slight differences in size — are normal and do not affect taste. The most important checkpoints are a smooth base before scooping and fully frozen bites before transferring.
Key techniques you’ll practice in this recipe
This recipe is a gentle way to practice a handful of foundational kitchen skills:
- Mixing to the right consistency: You’ll learn to judge when ingredients are evenly combined and when to stop. That sense transfers to sauces, batters, and dressings.
- Folding in mix-ins: Folding is a softer mixing technique that preserves texture. It’s useful for stirring nuts into dough or berries into batter.
- Portioning with a scoop or spoon: Uniform portions give consistent cooking or freezing times. Practicing scooping helps with cookies, energy balls, and muffin batters.
- Freezing and transferring: You’ll gain confidence in freezing items on a tray and then storing them properly. This technique is handy for meal prep and freezing individual portions of sauces or dough.
These are simple but widely applicable skills. The success checkpoints — smooth mixture, even scoops, and fully frozen centers — are things you’ll rely on in many recipes.
Common mistakes and how to avoid them
Even with a forgiving recipe, a few mistakes can happen. Here’s how to fix them:
- Mistake: The mixture is too runny and spreads on the sheet.
- Avoidance: Check that your yogurt is thick Greek yogurt. If it is runny, pop the bowl in the fridge for 15–30 minutes so it firms slightly before scooping.
- Recovery: If they spread in the freezer, let them firm until they hold shape, then use a spatula to scrape and re-form them into small scoops on a fresh sheet, and re-freeze.
- Mistake: The peanut butter is too stiff to blend smoothly.
- Avoidance: Use a spoon to slightly warm the peanut butter by stirring it in its jar first; this makes it more pliable. No heat source is needed, just stirring.
- Recovery: If you already added it and see large clumps, keep mixing — a whisk or hand mixer for 10–15 seconds will usually smooth it out. If it’s still lumpy, a small splash of honey/maple syrup can loosen it.
- Mistake: Bites stick together after storage.
- Avoidance: Make sure bites are totally frozen before transferring. Use parchment layers in your storage container to separate them.
- Recovery: If they’re stuck, let the container sit at room temperature for a few minutes and gently pry them apart with a fork or small spatula.
- Mistake: Flavor feels flat.
- Avoidance: Taste the mixture before freezing. If it seems under-sweet, add a little more honey or maple syrup (in small increments) — this is one flexible area.
- Recovery: If already frozen and under-sweet, serve with a drizzle of honey or a sprinkle of chocolate chips on each bite for extra flavor.
Small errors don’t mean failure. Most problems can be corrected with a short pause, a gentle tweak, or a small additional step.
How to adjust confidently without changing the recipe
You asked for guidance without altering the recipe’s ingredients or steps — here are conceptual adjustments you can make confidently.
- Portion scaling: To make more or fewer bites, scale the overall batch up or down in proportion. The key is keeping the same ingredient ratios. If you double, use a larger bowl and ensure you have enough baking sheet space so dollops don’t touch.
- Flavor preferences: If you like a more pronounced peanut taste, choose a robust, natural peanut butter; for a milder note, use a creamier, lighter peanut butter. The recipe’s structure supports either. Vanilla strength can be adjusted subtly — a scant 1/4 teaspoon less or an extra 1/4 teaspoon more will shift the aroma without breaking the base.
- Texture tweaks (conceptual only): For firmer bites, use thicker Greek yogurt or slightly increase the peanut butter proportion (conceptually); for creamier bites, make sure the peanut butter is very smooth and fully blended. Since you’re not changing measured ingredients, you can control texture through chilling time before scooping and freezing time after scooping: colder = firmer.
These adjustments keep the recipe intact while allowing you to personalize results.
Serving, storage, and reheating made simple
Serving: These bites are best straight from the freezer as a cold, refreshing snack. Let them sit 1–2 minutes at room temperature if you prefer a slightly softer texture. Serve them on a small plate, in a bowl, or in a snack bag for lunchboxes.
Storage: Keep them in an airtight, freezer-safe container. If you’re stacking layers, place parchment between them so they don’t stick. Properly stored, they’re best within a month for flavor and texture; they’ll remain safe longer but may pick up freezer flavors.
Reheating: These are meant to be eaten frozen — reheating isn’t necessary. If you prefer a softer texture, allow them to thaw at room temperature for 5–10 minutes. Do not microwave them from frozen, as that will quickly change texture and could make the peanut butter very hot while the center stays cold.
Questions new cooks often ask about this recipe
- How long do they take to freeze? About 2–3 hours for small spoonfuls. Check one to be sure it’s firm through the center.
- What if my yogurt is too runny? Use thick Greek yogurt. If yours is runny, drain it briefly in a fine mesh or use a thicker brand. A short chill in the fridge can help if it’s slightly loose.
- Can I use other nut butters? The structure will be similar with almond or sunflower butter, though flavor and firmness can vary. If you try another, be mindful of how runny or stiff it is.
- Do I need parchment paper? It makes transferring easy and prevents sticking. If you don’t have parchment, a silicone mat works well.
- Is it normal if the bites have little crystals or air pockets? Yes — tiny ice crystals or air pockets can form during freezing. They don’t affect taste and are normal for home-frozen treats.
- What equipment do I need? Just a mixing bowl, spoon or spatula, a baking sheet, and parchment. Simple, minimal gear.
If you worry about making mistakes, remember: this recipe was designed to be approachable. Small adjustments and quick recoveries are part of learning.
Final encouragement from Carla
You don’t need perfection to make something delicious. Frozen Greek Yogurt Peanut Butter Bites are a small, controlled recipe that rewards simple care: mix until smooth, scoop evenly, and freeze until solid. Each time you make them you’ll gain a little more confidence with textures, mixing, and freezing techniques — skills that carry into more recipes.
Keep experimenting gently, and give yourself permission to have fun with the optional add-ins. Celebrate the progress: a tasty, portable snack you made with your own hands is always worth enjoying. If a batch isn’t perfect, it still feeds your family and teaches you what to tweak next time.
Conclusion
If you want more frozen yogurt bite ideas, I find inspiration in similar recipes like this chocolate peanut butter version that mixes yogurt and banana for a fruity twist at Chocolate Peanut Butter Banana Frozen Greek Yogurt Bites. For a slightly different take on peanut butter yogurt bites with straightforward instructions, this version is a helpful reference at Peanut Butter Greek Yogurt Bites Recipe | My Montana Kitchen. And if you’re curious about frozen yogurt bars that lean into a richer chocolate-peanut butter combination, this recipe is a great place to compare techniques at Peanut Butter Frozen Yogurt Bars | Cupcakes & Kale Chips.
You’ve got this — enjoy the process and the tasty results.
Frozen Greek Yogurt Peanut Butter Bites
Ingredients
Method
- In a mixing bowl, combine Greek yogurt, peanut butter, honey (or maple syrup), and vanilla extract. Mix until smooth.
- If desired, fold in granola or chocolate chips.
- Using a spoon or cookie scoop, drop dollops of the mixture onto a parchment-lined baking sheet.
- Place the baking sheet in the freezer for about 2–3 hours or until the bites are fully frozen.
- Once frozen, transfer the bites to an airtight container and store them in the freezer. Enjoy as a healthy snack!