High-Protein Cheeseburger Bowls Recipe – Low-Carb Meal Prep
Introduction
If you’re looking for a low‑carb, high‑protein meal that’s quick to pull together and forgiving when you’re learning, these High‑Protein Cheeseburger Bowls are for you. I’m Carla Carter, founder and recipe developer of RecipesCabin, and my goal here is to walk beside you through the whole process so you feel calm and capable in the kitchen. This recipe works whether you’re cooking for yourself, prepping lunches for the week, or feeding a family; it’s approachable, adaptable, and built around simple, familiar ingredients.
If you enjoy sensible meal prep ideas, you might also like some of my easy dinner ideas that use similar flavors and techniques. This recipe is a gentle introduction to browning meat, assembling balanced bowls, and making a quick pan sauce — all skills that will make many other dinners easier.
Why this recipe is easy to get right
There are a few reasons these cheeseburger bowls are forgiving. First, the flavors are straightforward: seasoned ground meat, fresh vegetables, cheese, and a creamy sauce. None of the components demand precision like a delicate cake or a complicated sauce. Second, you’re assembling layers rather than relying on perfect timing of one single element — if one part is slightly ahead or behind, the bowl still comes together beautifully. Finally, there’s room for flexibility: choose a leafy base or a cooked grain, add or skip the egg, or swap turkey for beef — those choices won’t break the dish.
Because the meat is browned in a skillet and then drained, small differences in fat content or cooking time won’t ruin the texture. The sauce is a whisked combination of pantry staples, so if the proportions are off by a little, it will still taste bright and creamy. This is a great recipe to build confidence because success is visible — the smell of browned meat, the color of fresh tomatoes, and the melty cheese tell you you’re on the right track.
I also find it helpful to browse other simple bowl-style ideas when I want variety, and you may enjoy sampling more from my easy recipes collection as you get comfortable with these techniques.
How to make High-Protein Cheeseburger Bowls Recipe – Low-Carb Meal Prep
Overall, the process breaks into three clear stages: cook the protein, prepare the bases and toppings, then assemble and finish. That order keeps you organized and minimizes stress.
- First: Brown the ground meat. This is where the main flavor builds. You’ll season and break it up in the pan until it’s cooked through and starting to take on a bit of color.
- Next: While the meat cooks, chop and prep your lettuce or cook a grain or cauliflower rice if you’re using that option. Having the base ready before the meat finishes means assembling is quick and steady.
- Last: Whisk the sauce, slice fresh toppings, layer the bowl, and add final touches like cheese, avocado, or a fried egg.
Where beginners should slow down: take your time while browning the meat. Use a spatula to break it into pieces so it cooks evenly and drains well. When assembling, don’t worry about making each bowl identical — aim for balance more than perfection. If you want other assembled bowl ideas for inspiration as you build this skill, see my full recipe archive for more layouts and combinations.
Ingredients
1 lb lean ground beef or turkey (90% lean), Salt, Pepper, Garlic powder, Onion powder, 4 cups chopped lettuce or 2 cups cooked quinoa/brown rice/cauliflower rice, 1 cup cherry tomatoes, halved, ½ cup sliced dill pickles, ½ red onion, thinly sliced, 1 cup shredded cheddar or American cheese, 1 avocado, sliced, 4 strips cooked bacon, Jalapeño slices (optional), 4 fried eggs (optional), ½ cup low-fat Greek yogurt, 1 tbsp mustard, 1 tbsp ketchup, ½ tsp garlic powder, ½ tsp paprika
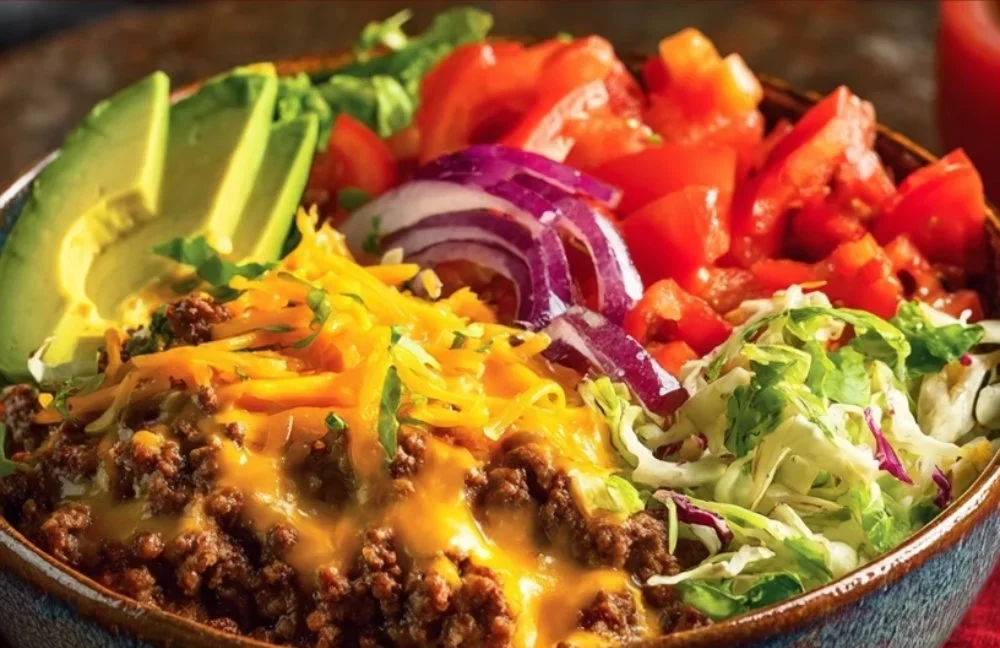
Each ingredient plays a clear role: the ground beef or turkey is your protein and flavor base; salt, pepper, garlic and onion powders season the meat quickly and reliably; the lettuce or grains are your neutral base to carry everything; tomatoes and onion add brightness and crunch; pickles give tang; cheese melts into little pockets of comfort; avocado adds creaminess; bacon and eggs are optional boosts of fat and protein; and the yogurt‑mustard‑ketchup sauce ties the bowl together with a familiar burger flavor in spoonable form. None of these are complicated — they’re pantry staples or easy produce items, and combined they echo the classic cheeseburger in a bowl format that’s easy to manage.
If you’re thinking about the optional eggs as a breakfast-style add-on, you might enjoy checking some of my breakfast recipes for tips on frying eggs and serving them over savory bowls.
Directions
In a skillet over medium heat, brown ground meat with salt, pepper, garlic powder, and onion powder until cooked through (8-10 minutes). Drain excess fat., Chop lettuce or cook grains/cauliflower rice as desired while the meat cooks., Slice tomatoes, pickles, onion, and any optional add-ons., Whisk Greek yogurt, mustard, ketchup, garlic powder, paprika, salt, and pepper until smooth to make the sauce., To assemble bowls, layer base, meat, toppings, and cheese. Drizzle with sauce., Optionally, top with a fried egg, bacon, or avocado for extra protein and flavor.
Supportive guidance around the steps:
Browning the meat: Start with a preheated skillet over medium heat so the meat sizzles when it hits the pan. As the meat cooks, it will change from pink to brown and start releasing small browned bits — that’s flavor. Use a wooden spoon or spatula to break it into crumbles; aim for a mix of small and slightly larger pieces so you get good texture. When you see no pink and the juices run clear, it’s cooked. If there’s a visible pool of fat, tilt the pan and carefully drain it into a heatproof container or use a paper towel to blot — you want flavor without soggy bowls.
Preparing the base: If you’re using lettuce, chop it into bite-sized pieces and pat it dry so the sauce sticks. If you choose grains or cauliflower rice, cook them according to package directions; they’ll be warm when you assemble, which some people prefer. The goal is to have the base ready while the meat finishes so assembly is smooth.
Slicing toppings: Halved cherry tomatoes should be plump and juicy; thinly sliced onion will be crisp and a little sharp — that’s balanced by the pickles’ tang. If you decide on jalapeños, slice them thin so a little heat spreads through the bowl without taking over.
Making the sauce: Whisk the yogurt, mustard, ketchup, garlic powder, paprika, and a pinch of salt and pepper until smooth. The sauce should be thick but pourable; if it’s too thick, thin with a teaspoon of water at a time. Tasting is fine here — adjust salt or mustard slightly to your preference.
Assembling: Layer the base first, then a generous portion of meat, followed by veggies, pickles, and cheese. The cheese will warm from the hot meat and soften; if you prefer it really melty, place the assembled bowls under a broiler for 30 seconds — but this is entirely optional. Drizzle the sauce across the bowl in a gentle zigzag for even coverage.
Visual cues: the meat should have browned edges; the lettuce should look bright, not soggy; the sauce should coat a spoon without running off instantly. If things aren’t perfect — say the meat is slightly drier than you hoped — a little extra sauce or a soft slice of avocado will bring moisture back.
Key techniques you’ll practice in this recipe
- Browning ground meat evenly: Learning how to let meat sear and form small browned pieces teaches you heat control and timing. This skill transfers to tacos, chili, and meat sauces.
- Quick sauce whisking: Emulsifying a yogurt-based sauce is a gentle technique that builds confidence in balancing flavors.
- Layering for texture: Assembling a bowl with hot, cool, crunchy, and creamy elements helps you learn how textures play together — useful for salads, grain bowls, and plated meals.
- Simple knife work: Slicing cherry tomatoes, onions, and avocado gives practice with safe, efficient cuts that improve with repetition.
These are foundational skills. Once you have them down, you’ll notice other recipes come faster and feel less intimidating.
Common mistakes and how to avoid them
- Overcrowding the pan: If you dump a whole pound of meat into a small pan, it steams instead of browns. Use a wide skillet or cook in two batches for a nice sear. If you’ve already crowded it and steam formed, give the meat a minute to release moisture and allow it to brown a bit as it dries.
- Undersalting: Meat needs enough salt to taste like itself. Season while it cooks and taste a small bit (careful — it will be hot) to check seasoning. If you under-season, the bowl can taste flat; add a pinch of salt to the finished dish if needed.
- Soggy greens: If lettuce gets dressed too early, it wilts. Keep the sauce separate until serving and pat greens dry before building bowls.
- Too-thin or too-thick sauce: If your sauce is watery, it won’t cling; if too thick, it won’t drizzle nicely. Adjust with a teaspoon of water to thin or a little extra yogurt to thicken.
- Fear of optional add-ons: Eggs and bacon are optional, not mandatory. If you overcomplicate the meal by doing too much at once, you’ll stress. Start simple, then add extras as you feel ready.
If something goes off track — meat a touch too salty, or a topping forgotten — small fixes work: add more base, a squeeze of lemon or a dash of vinegar to balance salt, or sprinkle extra fresh herbs to refresh flavors. You don’t need to start over.
How to adjust confidently without changing the recipe
You can scale the recipe up or down by thinking in portions: 1 lb of meat will comfortably feed 3–4 people as bowls depending on appetite. To keep balance, keep roughly the same ratio of base to protein — more base if you want a lighter plate, more protein for heartier servings.
Flavor adjustments: If you like more tang, lean toward extra pickles or a splash of vinegar on the tomatoes. Prefer creamier bowls? Add half an avocado per serving. If salt sensitivity is a concern, reduce the added salt in the meat and boost flavor with fresh herbs or extra mustard in the sauce.
Texture tweaks (conceptual only): Want a warmer bowl throughout? Use cooked grains as the base instead of lettuce. Prefer crunch? Add raw cabbage or thinly sliced radishes. These ideas keep the recipe structure intact while letting you make it your own without rewriting the steps or ingredients.
Serving, storage, and reheating made simple
Serve these bowls straight away for the best contrast of warm meat and crisp toppings. If you’re packing meal prep bowls for the week, store bases and toppings separately from the meat and sauce when possible — glass meal prep containers with compartments are helpful. Refrigerate within two hours of cooking and consume within 3–4 days.
To reheat, warm the meat gently in a skillet over medium-low heat until just heated through. If you stored everything together and the lettuce has softened, the bowls are still tasty — consider serving with an extra fresh handful of greens. For a quick microwave reheat, cover the bowl loosely and heat in 30‑second intervals, stirring briefly to distribute heat. If adding a fried egg later, cook it fresh and place on top right before serving for the best texture.
Questions new cooks often ask about this recipe
- How do I know when the meat is done? It’s no longer pink and has a few browned bits. If using turkey, check that there’s no pink color remaining. You can also break a piece and make sure the center is cooked through.
- What pan should I use? A medium to large nonstick or stainless steel skillet works well. A wider surface lets the meat brown instead of steam.
- Is it normal for the sauce to be a little lumpy? If you’re using Greek yogurt, whisk briskly to smooth it; a few small lumps are fine and won’t affect flavor.
- Can I make this vegetarian? The structure of this bowl lends itself to plant proteins like seasoned tempeh or crumbled, cooked lentils — but that would change the ingredients, so try it another time after you’ve mastered the original.
- I’m nervous about frying eggs — any tips? Use a nonstick pan and medium heat. Crack the egg into a small bowl first then gently slide it into the pan. Cook until the whites are set; the yolk can be left runny if you like.
If something feels off — like too much sauce or the meat too dry — small fixes (extra base, a quick squeeze of lemon, a few slices of avocado) will usually salvage the bowl without stress.
Final encouragement from Carla
Cooking is practice, and every bowl you make teaches you something new. These cheeseburger bowls are built to be forgiving and satisfying, so don’t worry about perfection. Focus on the simple checkpoints: browned meat, bright toppings, and a creamy sauce to bring it all together. If a step feels tricky, slow down and repeat it once — then celebrate the meal you made. You’re learning useful skills that will make many future dinners easier and more enjoyable. Keep going, and remember that progress matters much more than perfection.
Conclusion
If you’d like to see another take on a similar idea, this High Protein Burger Bowls with Sauce Recipe – The Protein Chef offers a useful comparison for different sauce proportions and presentation. For a simple low‑carb approach that emphasizes fresh vegetables, take a look at this Cheeseburger Bowls (Easy Low Carb Meal) – Wholesome Made Easy to see how others arrange toppings. If you’re curious about a version that highlights crispy bacon and a slightly different assembly, this Bacon Cheeseburger Bowls – The Skinnyish Dish is a helpful reference.

High-Protein Cheeseburger Bowls
Ingredients
Method
- In a skillet over medium heat, brown the ground meat with salt, pepper, garlic powder, and onion powder until cooked through (8-10 minutes). Drain excess fat.
- While the meat cooks, chop the lettuce or cook grains/cauliflower rice as desired.
- Slice the tomatoes, pickles, onion, and any optional add-ons.
- Whisk Greek yogurt, mustard, ketchup, garlic powder, paprika, salt, and pepper until smooth to make the sauce.
- Layer the base, meat, toppings, and cheese in bowls.
- Drizzle with the sauce.
- Optionally, top with a fried egg, bacon, or avocado for extra protein and flavor.