Frozen Banana Snickers
If you love simple, satisfying snacks that feel a little indulgent without a lot of fuss, Frozen Banana Snickers is for you. This recipe is perfect for busy parents, nervous beginners, or anyone who wants a tasty treat with very little equipment and zero mystery. I’m Carla Carter, Founder & Recipe Developer of RecipesCabin, and I’ll walk you through this recipe in a friendly, steady way so you feel calm and capable at every step.
You don’t need advanced skills to succeed here — just a few common ingredients and a freezer. If you’ve tried other frozen treats like my frozen Greek yogurt peanut butter bites, you’ll recognize how comforting it is when simple components come together to make something special. I’ll explain what to watch for and how to recover from small hiccups, so you can enjoy the process as much as the finished snack.
Why this recipe is easy to get right
Frozen Banana Snickers is forgiving by design. The steps are short and clear, and the ingredients behave in predictable ways. Bananas freeze solid, chocolate hardens, peanut butter stays creamy enough to drizzle, and a pinch of sea salt brings everything into balance. There’s little chance of a dramatic failure — at worst, you’ll have chocolate that needs a little extra time to set, or a peanut butter drizzle that looks rustic instead of neat. Both are completely fine and still delicious.
Flexibility is built in. If your bananas are a touch riper or firmer, the texture will shift slightly but remain pleasant. If your peanut butter is thicker or runnier, that changes the drizzle look but not the flavor. The timing is broad — "at least 2 hours" gives you space. Precision matters most when melting chocolate (don’t burn it), but I’ll show you how to do that safely. Overall, the recipe rewards a calm pace and small checkpoints, which makes it especially suitable for cooks of all levels.
How to make Frozen Banana Snickers
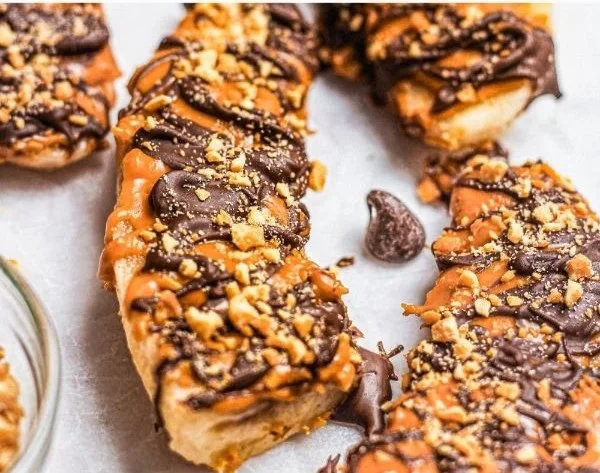
At a glance, the process is straightforward: slice the bananas, dip in chocolate, drizzle peanut butter, sprinkle sea salt, and freeze. The sequence is short, which helps you stay organized. Here’s what happens first, next, and last, and what to focus on at each stage.
First: prepare your workspace. Lay out a piece of parchment paper on a baking sheet so you have a clean surface to place treats as they’re finished. Line up the sliced bananas so you can work efficiently.
Next: melt the dark chocolate. This is the only part where heat is involved. Melt slowly and gently (I’ll give a safe method below). Dip each banana slice so it’s mostly coated, and place it on the parchment. The chocolate starts shiny and wet, and then becomes satin and sets to a matt finish.
Then: drizzle peanut butter over the cooled chocolate-covered bananas. The contrast of warm peanut butter and cooling chocolate is lovely — if your peanut butter is very stiff, thin it lightly with a tiny bit of warm water or microwave for a few seconds to loosen it. This is a place where small flexibility is allowed.
After that: sprinkle a little sea salt. A small pinch helps the sweetness of banana and chocolate pop without making it taste salty. Finally, freeze for at least two hours so each piece reaches a firm, enjoyable texture.
Where beginners should slow down: take your time melting chocolate (don’t rush with high heat), and be gentle when you dip so shapes stay tidy. If anything looks imperfect, know that a rustic appearance is expected and still delicious — the flavors are what matter most.
I also want to note that if you enjoy a range of frozen snacks, this approach is compatible with other favorites like high-protein frozen peanut butter Greek yogurt bites, and your growing skill with techniques here will help you make those too.
Ingredients
bananas, peanut butter, dark chocolate (sugar-free), sea salt
- Bananas: They are the star structural ingredient. When frozen, bananas firm up and take on a creamy, ice-cream-like texture that makes these feel indulgent yet simple. Riper bananas are sweeter and make each bite more dessert-like; slightly firmer bananas will be a bit less sweet and more solid.
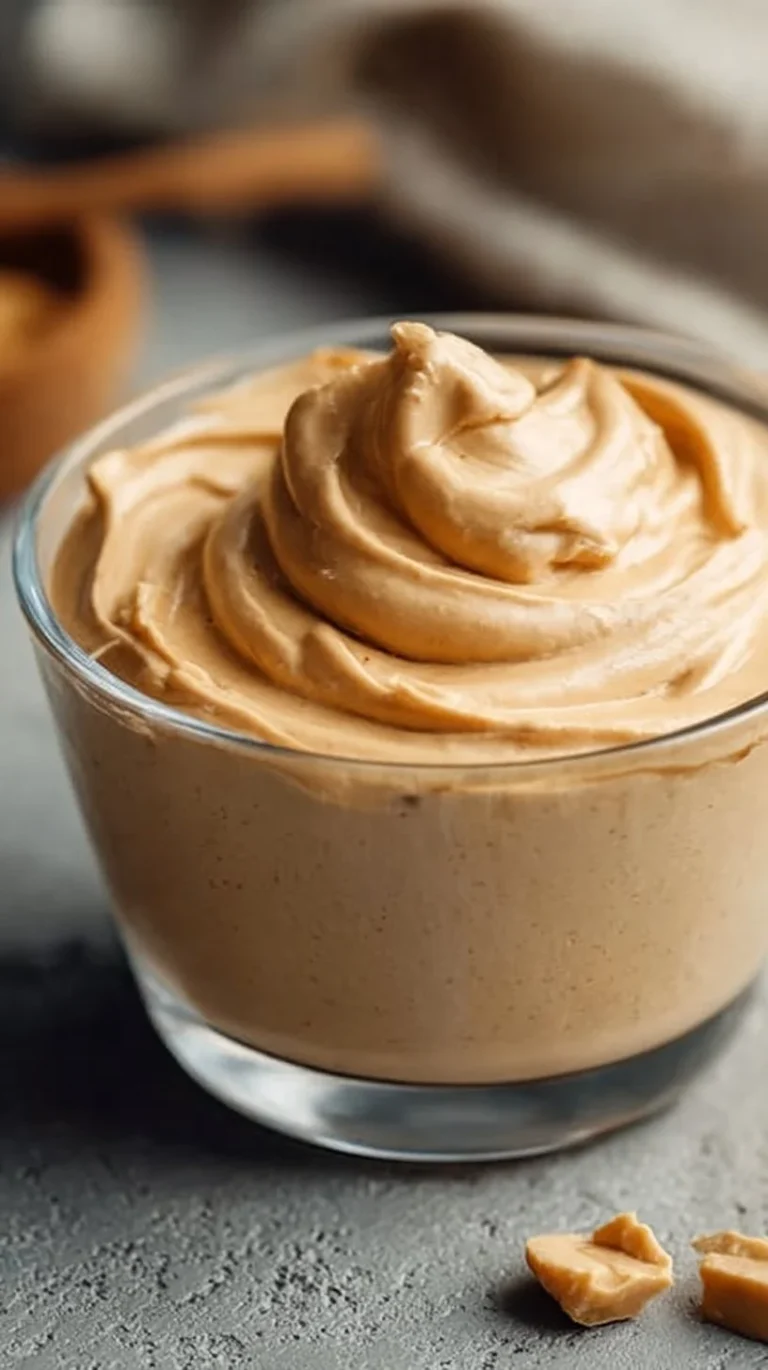
- Peanut butter: This brings richness and a nutty counterpoint to the banana. It also creates a pleasing texture contrast when drizzled over the chocolate. You don’t need anything fancy — a smooth or natural peanut butter both work. If your peanut butter separates, stir it briefly so it’s cohesive and easy to drizzle.
- Dark chocolate (sugar-free): Chocolate coats the banana, providing crunch and a flavor contrast. Sugar-free dark chocolate gives a deep cocoa flavor without additional sweetness, which the banana and peanut butter will balance. Chocolate also serves as a barrier, keeping the banana from sticking and making these bite-sized treats easy to handle.
- Sea salt: Just a sprinkle enhances the flavors and cuts through richness — it’s a small addition that has a big impact. Use a light hand; you want a whisper of salt, not an overtly salty bite.
None of these ingredients are complicated or intimidating. They’re pantry-friendly and familiar, and together they make a cohesive snack where each element plays a clear role: banana for structure and sweetness, peanut butter for richness, chocolate for texture and flavor, and sea salt for balance.
Directions
- Slice bananas into thick pieces., 2. Dip each banana slice in melted dark chocolate and place on a parchment-lined baking sheet., 3. Drizzle peanut butter over the chocolate-covered bananas., 4. Sprinkle a small amount of sea salt on top., 5. Freeze for at least 2 hours or until fully frozen., 6. Serve frozen and enjoy!
Supportive guidance around the steps:
Step 1: Slice bananas into thick pieces. Look for slices that are about 1/2 to 3/4 inch thick — thick enough to handle and to give a satisfying bite once frozen. If your slices are uneven, that’s okay; they’ll freeze just the same.
Step 2: Dip each banana slice in melted dark chocolate and place on a parchment-lined baking sheet. A visual cue: freshly melted chocolate will look glossy and will coat the banana smoothly. After a minute or two at room temperature, it will matte slightly as it begins to set. If a banana needs a thicker coat, you can dip it again, but one even coat usually works well.
Step 3: Drizzle peanut butter over the chocolate-covered bananas. If your peanut butter is thick, warm it for 5–10 seconds in the microwave or stir it until it flows enough to drizzle. A fork or spoon held about an inch above the banana will give a casual, attractive drizzle. The peanut butter will sit on top of the chocolate; if the chocolate is very warm, the two will merge slightly, which is fine.
Step 4: Sprinkle a small amount of sea salt on top. Use tiny flakes or a pinch from your fingers. This is a finishing touch — it should be subtle. If you add too much, a quick brush or a paper towel can remove a bit, but remember that even a visible grain or two can be delicious.
Step 5: Freeze for at least 2 hours or until fully frozen. The two-hour mark is your checkpoint. After this time, test one piece: it should be firm and cold all the way through. If it still gives a bit in the center, give it another hour. Freezing times vary with freezer temperature and how thick the pieces are.
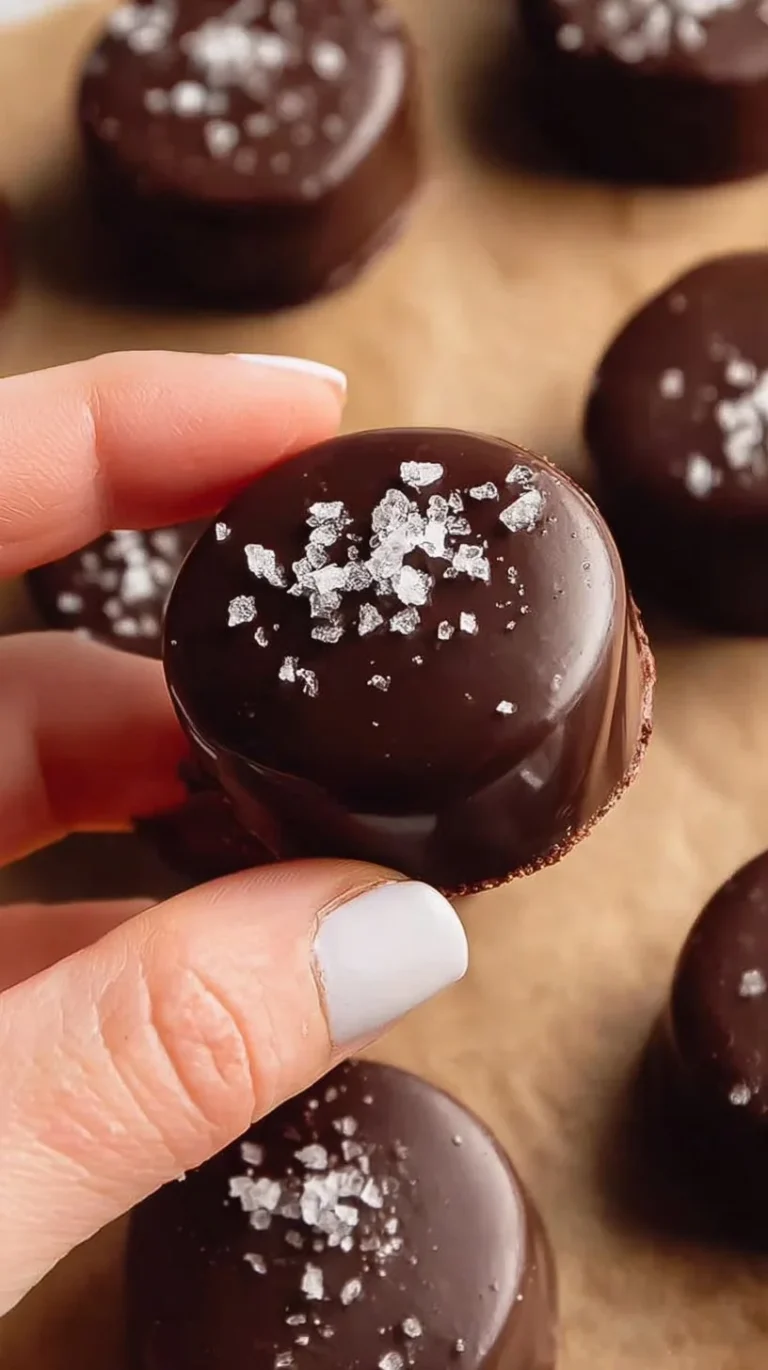
Step 6: Serve frozen and enjoy! The finished pieces will be firm, with a cold, creamy center and a crisp chocolate shell. If you leave them out too long at room temperature, the banana will soften; a brief 1–2 minute rest at room temperature can make them easier to bite if they’re very cold.
If things don’t look perfect immediately — for example, if the chocolate is streaky or the peanut butter drizzle is uneven — that’s okay. As they freeze, appearance evens out somewhat, and the flavors are forgiving.
Key techniques you’ll practice in this recipe
- Melting chocolate gently: You’ll learn to warm chocolate slowly so it stays smooth and glossy instead of grainy. This technique is used in many no-bake desserts and candy work.
- Dipping and coating: Dipping small pieces evenly builds a steady hand and helps you learn how to manage a spoon or fork for coating — valuable for fruit, cookies, or truffles.
- Drizzling: Learning to control the thickness of a drizzle by adjusting the flow of peanut butter or the height of your spoon will carry over to sauces and dressings.
- Freezing to set texture: Understanding how freezing changes texture (soft to firm, moist to more solid) is useful for a broad range of cold desserts and snacks.
These are gentle, foundational skills. They matter because they build confidence: once you’re comfortable melting and tempering your approach to coatings and drizzles, many other recipes will feel much less intimidating.
Common mistakes and how to avoid them
- Chocolate burns or seizes: This happens when chocolate overheats or contacts water. Avoid it by melting over low heat or using short bursts in the microwave and stirring frequently. If chocolate seizes, you can sometimes smooth it with a small splash of neutral oil or warm milk, but prevention is best.
- Banana slices are too thin and break: Thick slices are more forgiving. If a slice splits during dipping, press it gently back together and keep going — freeze it slightly longer to firm it up.
- Peanut butter won’t drizzle: Warm it briefly in the microwave (5–10 seconds) or stir to combine the oil so it flows. Avoid adding a lot of liquid; a tiny splash is enough if necessary.
- Treats stick to the parchment: Use a fresh piece of parchment and allow the chocolate to set a minute before moving pieces. If they still stick, slide a thin spatula underneath to lift them carefully.
- Freezing time is insufficient: If they’re soft after 2 hours, give them more time. Freezers vary, and thickness of the slices plays a role; this is an area where flexibility is fine.
If something goes off track — for example, the chocolate isn’t smooth — take a breath and assess. Often warming gently and stirring is all that’s needed. If a batch is cosmetically imperfect, freeze and taste; it will likely be delicious anyway.
How to adjust confidently without changing the recipe
You’re not changing ingredients or steps, but you can think about scaling and small preference changes conceptually:
- Portion scaling: If you want more servings, multiply the number of bananas and work in batches on your baking sheet. Working in batches prevents the chocolate from cooling too much between dips. If you’re making fewer, you can keep small amounts of chocolate warm over very low heat or reheating briefly.
- Flavor preference adjustments: Although the ingredients remain the same, you can vary their intensity by choosing a darker or milder chocolate or a peanut butter with a more pronounced roast. These are choices that affect the final taste while keeping the recipe identical.
- Texture tweaks (conceptually): Thicker banana slices make a chewier, more substantial bite; thinner ones give a lighter, quicker-freezing treat. If you prefer a firmer texture, slice a bit thicker. If you like a quicker snack, cut slightly thinner.
None of these are changes to the formal recipe — they’re thoughtful ways to tune the experience to your preferences while following the steps exactly.
Serving, storage, and reheating made simple
Serving: These are best served straight from the freezer. Arrange them on a plate or platter just before eating so they stay firm. They make a lovely party finger food or a quick solo snack. If you leave them on the counter for too long, the chocolate will soften and the banana will begin to warm; a short 1–2 minute rest is fine if very cold bites are hard to bite.
Storage: Store in an airtight container in a single layer if possible, or separated by parchment layers if stacking. Keep them in the coldest part of your freezer for best texture. Stored properly, they keep well for several weeks; over time the banana may darken a little, but the flavor remains enjoyable.
Reheating: You don’t need to reheat — these are intended to be eaten frozen. If you prefer a softer center, leave them at room temperature for 2–3 minutes before serving. Avoid microwaving, which melts the chocolate unevenly and warms the banana too much.
Questions new cooks often ask about this recipe
- How long does it take to melt the chocolate? It depends on the method. In short microwave bursts (10–15 seconds), stirring between bursts, expect a minute or two total. On the stovetop over very low heat with a double boiler, allow several minutes and stir constantly. Slow is safe.
- What if my peanut butter is separated? Stir it back together — a cohesive texture is all you need to drizzle. A quick microwave for just a few seconds will help if it’s very stiff.
- Will the chocolate crack when I bite into it? A thin chocolate shell can snap or just yield pleasantly; both are normal. If the chocolate is thick, it will have a more defined snap. Either texture is fine.
- Can I make these ahead? Yes — they’re ideal for making ahead and storing in the freezer. Just keep them airtight and separated by parchment if you stack them.
- Is it normal for the chocolate to look streaky at first? Yes. As it sets, appearance improves. Don’t worry about perfect shine; flavor is what matters.
Final encouragement from Carla
If you’re new to these kinds of snacks, breathe easy — this recipe is short, predictable, and forgiving. Small imperfections in appearance don’t affect the joy of eating them. Each time you make a simple recipe like this, you build confidence in the kitchen: you learn how chocolate behaves, how freezing changes texture, and how small finishing touches like sea salt can elevate a flavor. Trust the process, work at a relaxed pace, and remember that progress matters more than perfection.
Keep going, and enjoy each delicious step. You’re doing great.
Conclusion
If you want to see another perspective on Frozen Banana Snickers, this Frozen Banana Snickers Recipe – Jar Of Lemons offers a similar approach with helpful photos. For a variation that highlights pairing banana and peanut butter in a snack-like format, I also recommend this Banana Snickers – Lovely Delites page for inspiration. And if you’re collecting healthy frozen treats, this Frozen Banana Snickers Recipe | Healthy Little Peach is another useful reference to compare techniques and ideas.
Frozen Banana Snickers
Ingredients
Method
- Prepare your workspace by laying out parchment paper on a baking sheet.
- Slice bananas into thick pieces, about 1/2 to 3/4 inch thick.
- Melt the dark chocolate slowly using a microwave or double boiler until glossy.
- Dip each banana slice in the melted chocolate, coating it mostly, and place it on the parchment-lined baking sheet.
- Drizzle warmed peanut butter over the chocolate-covered bananas.
- Sprinkle a small amount of sea salt on top.
- Freeze for at least 2 hours or until fully frozen.
- Serve frozen and enjoy!