Greek Yogurt Brownies
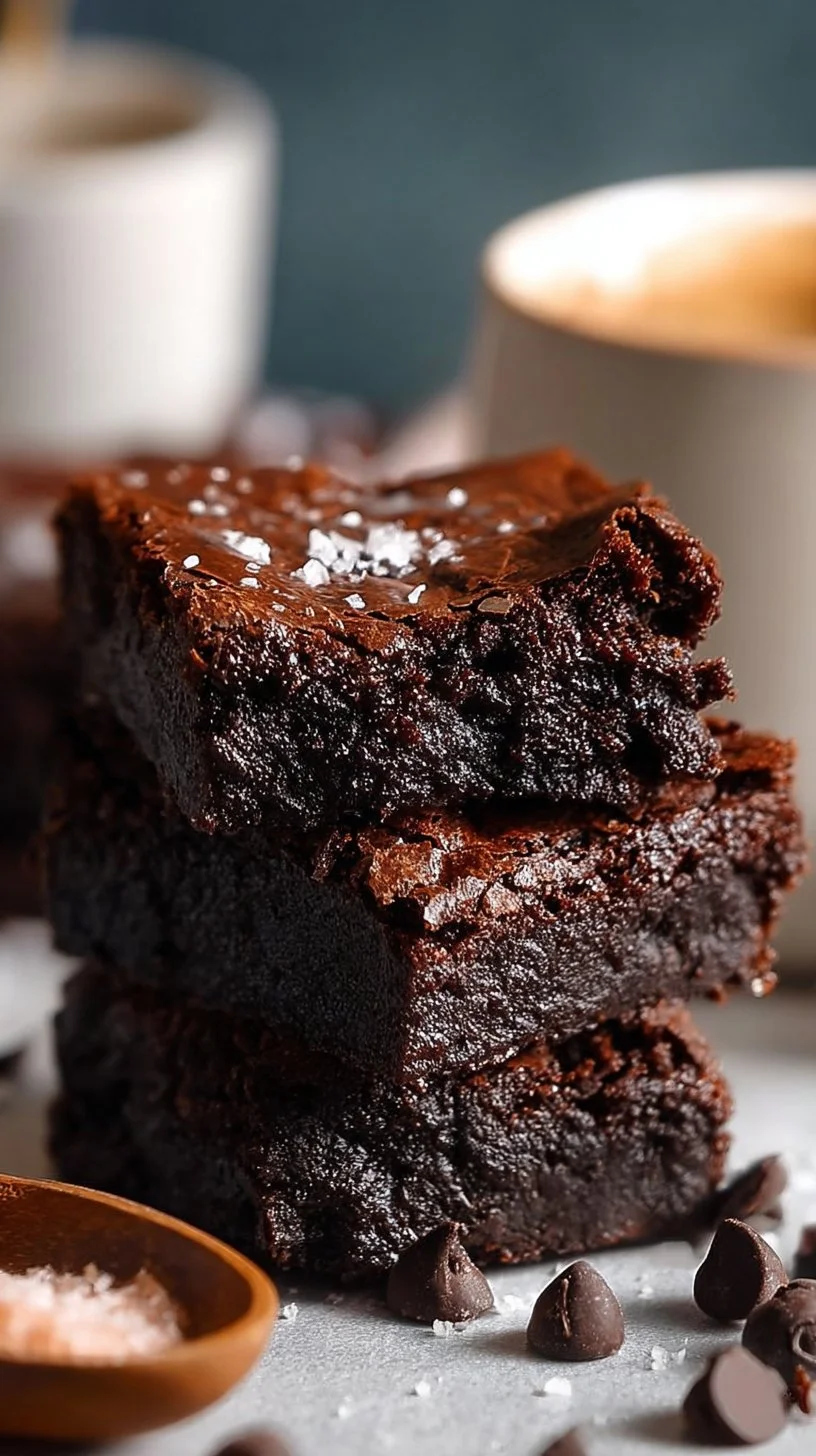
If you’re the kind of home baker who wants a chocolate fix without a lot of fuss, these Greek Yogurt Brownies are for you. I’m Carla Carter, founder and recipe developer at RecipesCabin, and I love recipes that teach you a few simple techniques while delivering reliable, delicious results. This is a brownie recipe that welcomes beginners, forgives the occasional small slip, and still produces a moist, chocolatey square everyone will reach for.
You don’t need special equipment or a long ingredient list. If you enjoy easy Greek yogurt swaps and want more ideas using that tangy, protein-rich ingredient, check out my post on more Greek yogurt brownie variations for inspiration. Read on and I’ll walk you through what to expect at every stage so you can feel calm and confident at the oven.
Why this recipe is easy to get right
This recipe is forgiving in three important ways: it uses a sturdy wet base (Greek yogurt and egg) that keeps brownies moist, it mixes by hand so overworking the batter is easy to avoid, and it bakes quickly so there’s less room for timing mistakes. The oat flour option is naturally a little denser than all-purpose flour, which helps the brownies stay fudgy rather than cakey even if you slightly overbake them.
Flexibility shows up where it matters least: swapping milk types, using different sweeteners, or switching between oat and all-purpose flour. These choices change texture or flavor subtly but won’t ruin the brownie. The chocolate is split between melted and chips, which creates a built-in fudgy base and pockets of melty chocolate—this split makes the finished texture more interesting and more forgiving.
Because the directions keep steps simple—melt, mix dry, combine wet, fold—this recipe is especially good for cooks who are returning to the kitchen after a break. You’ll practice measuring, melting chocolate gently, and gentle folding—skills that build confidence quickly.
How to make Greek Yogurt Brownies
Overall, the process follows a clear, steady flow: prepare the pan and chocolate, measure and whisk the dry ingredients, combine the wet ingredients, fold together, bake, and cool. First, you get the oven and pan ready so you’re not scrambling once the batter is mixed. Next, you melt part of the chocolate with oil—this creates a shiny, fudgy base when mixed with the yogurt. Then the dry ingredients are whisked separately so the cocoa and flour distribute evenly; this step helps avoid pockets of unblended cocoa.
When you bring the wet and dry ingredients together, the key is “until just combined.” You’re looking for a batter that’s mostly smooth with a few streaks disappearing—this prevents a tough texture. After folding in the remaining chocolate chips, you pour the batter, bake briefly, and cool.
If you like frozen Greek yogurt desserts, this method of balancing wet and dry ingredients will help with other recipes like Frozen Greek Yogurt Peanut Butter Bites, where controlling moisture and texture matters, too. Beginners should slow down when melting chocolate (don’t overheat) and when folding the batter (don’t overmix). Those two moments are where you have the most control over the final texture.
Ingredients
2/3 cup Sugar-Free Chocolate Chips (divided), 1 teaspoon Coconut Oil, 3/4 cup Plain Greek Yogurt, 1 large Egg, 1/4 cup Almond Milk (or soy milk, or any milk of choice), 1/2 cup Granulated Sweetener (sugar-free brown erythritol or coconut sugar or brown sugar), 1 teaspoon Vanilla Extract, 1/2 cup Oat Flour (or all-purpose flour lightly packed, swept), 1/2 cup Unsweetened Cocoa Powder, 1 teaspoon Baking Powder, 1/4 teaspoon Salt
Here’s what each ingredient does and why none of them are intimidating:
- Sugar-Free Chocolate Chips (divided): Some chocolate is melted into the batter for a fudgy base; the rest are stirred in whole so you get melty pockets. The sugar-free chips still provide chocolate flavor without changing the technique.
- Coconut Oil: Used to help melt and smooth the chocolate. It adds shine and a touch of richness, and a teaspoon is a small, manageable amount.
- Plain Greek Yogurt: The star swap here. Greek yogurt adds moisture, tang, and structure because of its protein content. It keeps the brownies tender and gives them lift without needing extra butter.
- Egg: The binder. One egg adds structure and helps the brownies set while keeping them soft.
- Almond Milk (or other milk): Adds a little looseness to the batter so it pours easily. Any milk you have on hand is fine.
- Granulated Sweetener (options provided): You can use sugar-free erythritol, coconut sugar, or brown sugar—each adds sweetness and slightly different flavors, but the role is the same and none require special handling.
- Vanilla Extract: Pure vanilla brightens flavors and balances chocolate—small but important for aroma.
- Oat Flour (or all-purpose flour): Oat flour is a heartier, slightly chewy option; all-purpose makes a more classic brownie crumb. The recipe gives both choices so you can pick what you prefer.
- Unsweetened Cocoa Powder: The main chocolate taste; it’s dry and needs to be evenly mixed with flour so it doesn’t clump.
- Baking Powder: A small lift agent to keep brownies from being too dense. Because there’s only a little, it doesn’t make them cakey.
- Salt: Enhances all flavors, even sweet ones. A quarter teaspoon is enough to make chocolate more pronounced.
Together, these ingredients create balance: fat and chocolate for richness, yogurt and egg for structure and moisture, and dry components for body. Nothing here is exotic—just pantry-friendly items that work well together.
Directions
- Preheat the oven to 350°F (180°C). Line an 8-inch x 8-inch brownie pan with parchment paper and slightly oil the pan. Set aside., 2. In a microwave-safe bowl, melt 1/3 cup chocolate chips and coconut oil. Set aside to cool for a few minutes., 3. In a mixing bowl, whisk the dry ingredients: oat flour, cocoa powder, sweetener, baking powder, and salt. Set aside., 4. In another large bowl, whisk together the plain Greek yogurt, egg, vanilla extract, almond milk, and the cooled melted chocolate mixture., 5. Sift the dry ingredients into the wet ingredients and stir with a silicone spatula until just combined., 6. Stir in the remaining 1/3 cup chocolate chips and distribute evenly in the batter., 7. Pour the batter into the prepared brownie pan., 8. Bake for 20-23 minutes or until a toothpick inserted comes out clean., 9. Cool on a wire rack for an hour before cutting.
Supportive guidance for the steps above:
- Step 1: Preheating and preparing the pan first means you won’t be rushing once the batter is ready. The parchment helps remove brownies cleanly; a little oil keeps the paper from sliding.
- Step 2: When melting chocolate in the microwave, do short bursts (10–15 seconds) and stir in between. The chocolate should be smooth and warm, not scorching. Letting it cool a few minutes prevents it from curdling the yogurt when mixed.
- Step 3: Whisking dry ingredients helps avoid clumps of cocoa or baking powder. It makes the batter uniform and removes the need for overmixing later.
- Step 4: Whisk the wet ingredients until smooth. You’re looking for a silky mixture where yogurt has loosened slightly with milk and the melted chocolate is evenly incorporated.
- Step 5: Sifting the dry over the wet is a gentle way to combine without overworking gluten (if using all-purpose flour). “Just combined” means the batter looks even and there aren’t big streaks of flour—small streaks are okay.
- Step 6: Stirring in the remaining chips should be even but light. They will settle a bit during baking and create pockets of melted chocolate.
- Step 8: Baking time is short so check at the lower end. A toothpick “comes out clean” in this case means no raw batter clinging; a few moist crumbs are fine. Overbaking dries them out.
- Step 9: Cooling fully is worth the patience—cutting too soon can make pieces crumble. An hour on a rack lets structure set while keeping moistness.
If the batter looks thicker or thinner than you expected, trust the cues: it should pour slowly into the pan and settle evenly.
Key techniques you’ll practice in this recipe
- Gentle melting: learning to melt chocolate without seizing teaches temperature control and patience.
- Whisking and sifting: these simple techniques distribute dry ingredients and make a smoother batter.
- Folding until just combined: a gentle motion that prevents toughness—this skill transfers to muffins, cakes, and quick breads.
- Quick bake timing: recognizing the toothpick test and visual cues for doneness builds confidence for future bakes.
Each of these techniques is small but foundational. Mastering them makes many desserts feel more approachable.
Common mistakes and how to avoid them
- Mistake: Overheating the chocolate. Fix: Microwave in short bursts and stir; stop when most is melted and residual heat will finish it.
- Mistake: Overmixing after adding flour. Fix: Stir with a silicone spatula until streaks mostly disappear; stop then.
- Mistake: Baking too long. Fix: Check at 20 minutes and use the toothpick test—some moist crumbs are okay. Err on the side of slightly underbaked for fudgier brownies.
- Mistake: Cutting too soon. Fix: Let the pan cool on a rack for an hour; chilling briefly after cooling will make cleaner cuts.
- Mistake: Skipping parchment. Fix: Parchment makes removal easy and prevents sticking; it’s a small step that saves frustration.
If something goes off track—say the batter seems too thick—don’t start over. A tablespoon or two of extra milk can loosen it slightly. If brownies are dry, turn them into a trifle-style dessert with yogurt and berries to rescue the batch.
How to adjust confidently without changing the recipe
Portion scaling: To double the batch, multiply every ingredient by two and use a 9×13 pan; baking time will increase, so start checking at 25–30 minutes. For half the recipe, bake in a smaller pan and reduce bake time slightly—watch for the toothpick test.
Flavor adjustments: Additions like a teaspoon of instant coffee can deepen chocolate flavor, or a sprinkle of flaky salt on top highlights the sweetness. These are conceptual tweaks; they don’t change the core method.
Texture tweaks: If you prefer a cakier brownie, use all-purpose flour and bake a minute or two longer. For fudgier results, use oat flour and reduce baking time slightly. These adjustments are about understanding moisture and structure, not rewriting the recipe.
Remember: the recipe’s proportions are thoughtfully balanced, so small tweaks will shift texture or flavor gently rather than break the outcome.
Serving, storage, and reheating made simple
Serving: These brownies are lovely slightly warm or at room temperature. A dusting of cocoa or a spoonful of Greek yogurt and berries elevates them without much effort. They pair nicely with coffee or a glass of milk.
Storage: Store cooled brownies in an airtight container at room temperature for 2–3 days. For longer storage, refrigerate up to a week; the yogurt keeps them moist. For freezing, wrap individual squares in plastic and place in a freezer-safe bag for up to three months.
Reheating: Warm a brownie for 10–15 seconds in the microwave to revive a just-baked softness, or place on a baking sheet in a 300°F oven for 5–7 minutes. If refrigerated, let sit at room temperature a few minutes before serving to take the chill off and restore tenderness.
Questions new cooks often ask about this recipe
- How do I know when the chocolate is “cooled” enough? It should be warm to the touch but not hot—if you can comfortably hold a small spoon in it for a second without discomfort, it’s fine. Hot chocolate can break yogurt.
- Can I replace the oat flour with all-purpose? Yes. The recipe gives both options; expect slightly different crumb but follow the same steps.
- My batter has small lumps—should I keep mixing? A few small lumps are fine. If they’re dry flour pockets, gently stir until they mostly disappear. Avoid vigorous mixing.
- What is the ideal toothpick result? Look for a clean pick or one with a few moist crumbs attached. Wet batter means more time; dry crumbs mean slight overbake.
- Can I make the batter ahead? You can prepare the batter and keep it covered in the fridge for a few hours, but bring it to room temperature before baking to ensure even cooking.
- Is it normal for edges to be a bit firmer than the center? Yes. Edges bake faster because they contact the hot pan. That’s normal and often desirable for texture contrast.
If you feel unsure, give yourself permission to learn. Each bake teaches you more about timing and texture.
Final encouragement from Carla
Baking is a series of small, teachable moments. These Greek Yogurt Brownies are designed to help you succeed without stress—simple steps, forgiving ingredients, and comforting results. If something looks different than you expected, it’s usually a tweak, not a failure. Trust the visual cues, take your time with the chocolate and folding, and enjoy the process as much as the brownies themselves.
You’re building useful kitchen habits, and every batch teaches you something new. Keep going, and savor the small wins.
Conclusion
For a lighter take on a chocolate treat, you might enjoy this Greek Yogurt Brownies (Under 100 Calories!) from The Big Man’s World, which offers another perspective on Greek yogurt in brownies. If you want a fudgier, chocolate-forward version, check out the Fudgy Greek Yogurt Brownies recipe at Pitchfork Foodie Farms for ideas on texture and technique. For fruit-forward inspiration using yogurt in brownies, see the Black Cherry Yogurt Brownies post on I am a Honey Bee. And if you’re collecting variations for a recipe box, this Greek Yogurt Brownies roundup at Healthy Fitness Meals is a helpful resource to compare approaches and tips.
Greek Yogurt Brownies
Ingredients
Method
- Preheat the oven to 350°F (180°C). Line an 8-inch x 8-inch brownie pan with parchment paper and slightly oil it.
- In a microwave-safe bowl, melt 1/3 cup of chocolate chips and coconut oil together. Set aside to cool for a few minutes.
- In a mixing bowl, whisk the dry ingredients: oat flour, cocoa powder, sweetener, baking powder, and salt. Set aside.
- In another large bowl, whisk together the plain Greek yogurt, egg, vanilla extract, almond milk, and the cooled melted chocolate mixture.
- Sift the dry ingredients into the wet ingredients and stir with a silicone spatula until just combined.
- Stir in the remaining 1/3 cup chocolate chips and distribute evenly in the batter.
- Pour the batter into the prepared brownie pan.
- Bake for 20-23 minutes or until a toothpick inserted comes out clean.
- Cool on a wire rack for an hour before cutting.