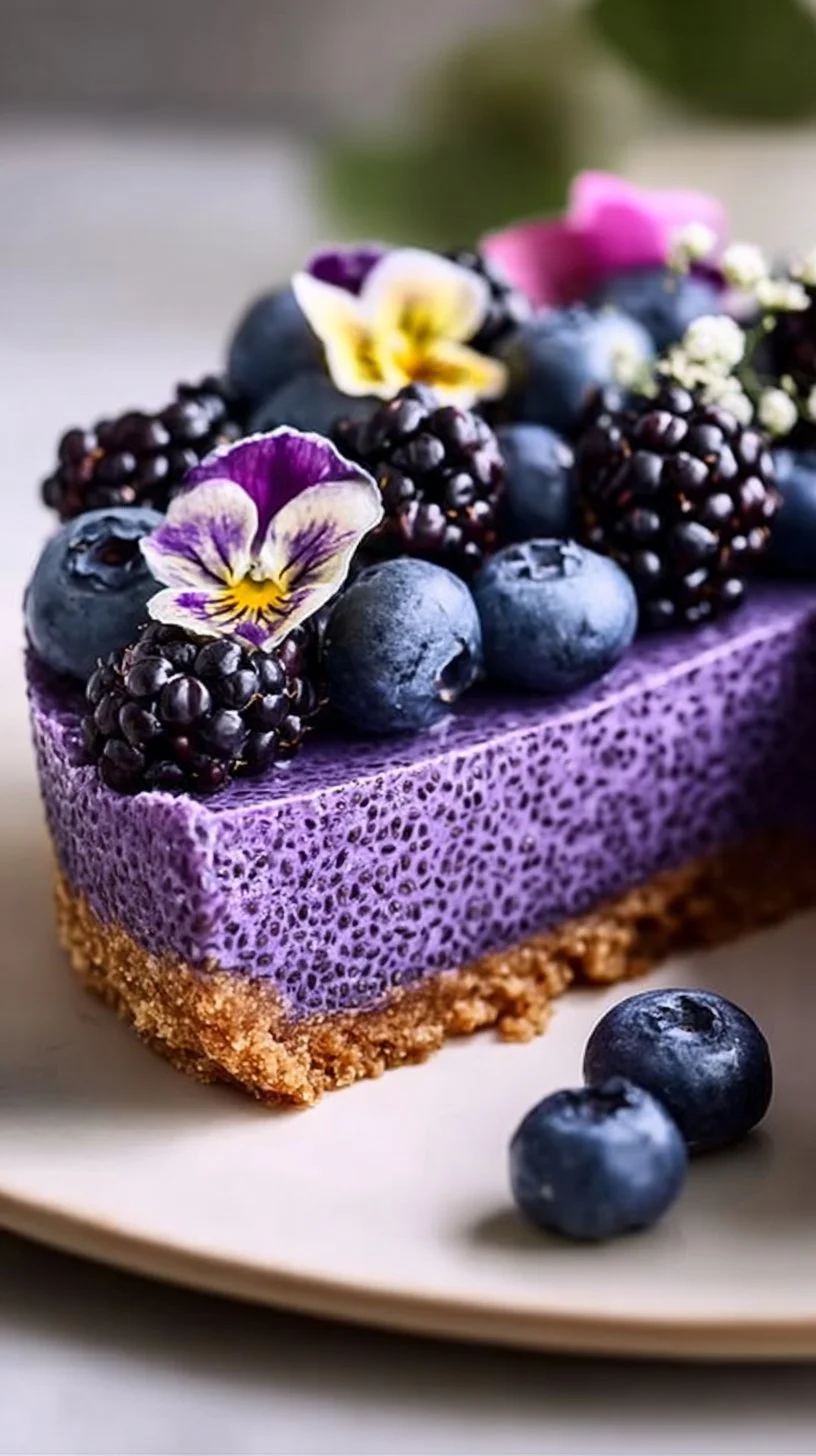
No-Bake Blueberry Chia Seed Pie
If you’re looking for a gentle, forgiving dessert to build confidence in the kitchen, this No-Bake Blueberry Chia Seed Pie is for you. It’s made with a short list of pantry-friendly ingredients, needs no oven time, and gives you a lovely, fresh result with minimal fuss. I created recipes like this to help cooks who feel nervous about baking — you don’t need perfect equipment or years of experience to succeed here. If you enjoy blueberry-forward breakfasts and desserts, you might also like a heartier option like my blueberry cottage cheese breakfast bake for mornings when you want more substance: blueberry cottage cheese breakfast bake.
This pie is approachable because it relies on simple reactions — chia seeds swelling, blueberries blending into a puree, and a crust that needs only a firm press. I’ll walk you through every stage so you know what to expect and how to read the small signals the food gives you. Small imperfections are part of home cooking; a slight wobble or a few uneven edges won’t affect how delicious the pie is.
Why this recipe is easy to get right
There are several reasons this recipe is forgiving. First, it’s a no-bake dessert: you won’t be watching a timer for browning or worrying about oven hotspots. The filling sets in the fridge, so texture develops slowly and predictably. Chia seeds are patient — they thicken the filling over time rather than requiring precision at the moment of mixing.
Second, the crust is press-and-go. Whether you use crushed graham crackers or almond flour, the recipe’s crumb-to-fat ratio means you can press it firmly and it will hold. If your press isn’t perfectly even, the filling will disguise small dips or bumps.
Finally, flavor adjustments are flexible. The recipe gives a balance of sweet, tangy, and rich notes, but a little more or less honey, lemon, or vanilla won’t break the structure. That makes it a great recipe for practicing judgment calls: taste, adjust, and learn how small changes shift the final result.
How to make No-Bake Blueberry Chia Seed Pie
Overall process — first you make the crust, next the filling, and last you let it rest in the fridge to set. Here’s what happens at each step and what to watch for.
First: prepare the crust. Combine the crumbs or almond flour with melted coconut oil and a pinch of salt. The goal is an even, cohesive mixture that will hold when you press it into the pan. It should feel like damp sand when you press a little between your fingers — not oily, not dry. If it seems too loose, press firmly into the pan; if it’s too oily, you may have warmed the coconut oil too much. A few seconds at room temperature will help.
Next: make the filling. The blender will turn fresh blueberries, chia seeds, sweetener, vanilla, and lemon into a smooth, spreadable mixture. Here you’re aiming for a bright color and even texture. It will look glossy and pourable — thicker than a juice but thinner than pudding before it chills. If you’re new to blenders, blend in short bursts and scrape down the sides so everything is fully incorporated.
Last: assemble and chill. Pour the filling into the crust and smooth the top. When you refrigerate, the chia seeds absorb liquid and thicken the filling; this takes hours, not minutes. A gentle jiggle is normal when you first take it out of the fridge; the pie will continue to firm up slightly as it cools.
Where beginners should slow down: take your time pressing the crust so it’s even, and scrape the blender well to avoid pockets of unmixed chia or vanilla. These small pauses make a big difference in texture and presentation.
If you enjoy blueberry treats in other formats, this recipe shares familiar steps with things like pancakes and yogurt bites — if you’d like a fluffy breakfast version, try my blueberry maple pancakes to practice balancing blueberry flavor and batter texture: blueberry maple pancakes.
Ingredients
2 cups fresh blueberries, 1/4 cup chia seeds, 1/4 cup honey or maple syrup, 1 teaspoon vanilla extract, 1 tablespoon lemon juice, 1 1/2 cups crushed graham crackers or almond flour, 1/4 cup melted coconut oil, Pinch of salt
2 cups fresh blueberries: They provide the fresh, bright flavor and the liquid the chia seeds need to thicken. Fresh berries give a lively color and a slightly sweet-tart profile that’s very forgiving — frozen berries can be used in a pinch but may make the filling a touch darker.
1/4 cup chia seeds: Chia seeds are the gentle thickener here. They soak up liquid and form a gel, turning a thin puree into a sliceable filling. They’re easy to work with because they don’t require boiling — they simply hydrate in the fridge.
1/4 cup honey or maple syrup: This is the sweetening element. Honey gives a floral warmth; maple syrup brings a deeper, earthy sweetness. Either one blends smoothly into the puree and helps the filling set with a balanced taste.
1 teaspoon vanilla extract: Vanilla rounds the bright blueberry notes and keeps the flavor from tasting one-dimensional. It’s a small addition with a noticeable comforting effect.
1 tablespoon lemon juice: Lemon brightens and balances the sweetness. Think of it as giving the pie a lift — it makes the blueberry flavor sing.
1 1/2 cups crushed graham crackers or almond flour: This is your crust base. Graham crackers create a classic, slightly sweet, sandy texture; almond flour gives a nuttier, more tender crust. Both are simple to press into place and pair beautifully with the blueberry filling.
1/4 cup melted coconut oil: This binds the crumbs or flour and helps the crust hold its shape. It solidifies as it chills, giving the base structure without baking.
Pinch of salt: A tiny salt boost brings out sweetness and deepens the blueberry flavor. It won’t be noticeable as salt — it will just make the whole pie taste balanced.
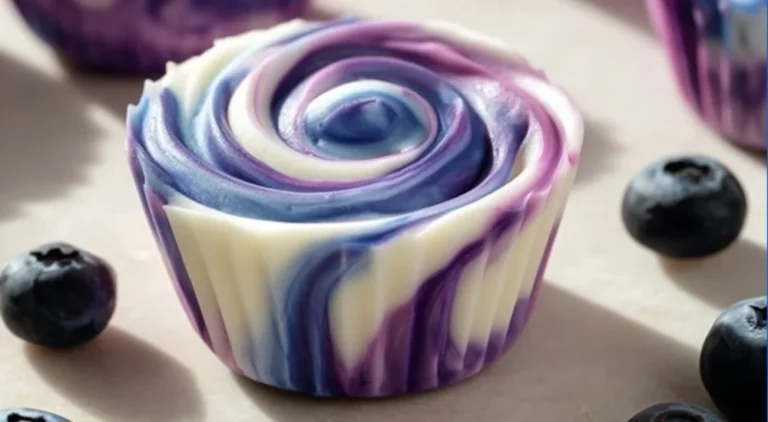
None of these ingredients are intimidating — they’re easy to source and straightforward to measure. If you like a lighter, creamier texture in blueberry preparations, consider exploring a chilled snack like these blueberry swirl yogurt bites for another simple technique that uses fruit and gentle setting agents: blueberry swirl yogurt bites.
Directions
- In a medium bowl, mix crushed graham crackers or almond flour with melted coconut oil and a pinch of salt until combined. Press this mixture into the bottom of a pie pan to form the crust.
- In a blender, combine blueberries, chia seeds, honey or maple syrup, vanilla extract, and lemon juice. Blend until smooth.
- Pour the blueberry mixture into the prepared crust and spread evenly.
- Refrigerate for at least 2-3 hours, or until set.
- Slice and enjoy your delicious No-Bake Blueberry Chia Seed Pie!
Supportive guidance around the steps:
Visual cues to watch for: For the crust, look for an even, pressed surface that doesn’t crumble when you press an edge with a spoon. The filling should be bright purple or blue, glossy, and smooth when it leaves the blender.
Texture and timing hints: Before chilling, the filling will be pourable but noticeably thicker than a juice. After 2–3 hours in the fridge, it should hold a gentle slice and not run. If it’s still quite loose at the 2-hour mark, give it another hour — chia often needs time to fully hydrate.
Reassurance if things don’t look perfect immediately: Small bubbles or a top that isn’t perfectly smooth will disappear slightly as it chills. If the crust is a little uneven, your first slice will cover those imperfections. The taste won’t be affected by minor texture variations.
If you find the filling too loose after the minimum chill time, resist the urge to add more chia seeds immediately — they thicken over time. Instead, give it more refrigeration time and check again in 30 minutes.
Key techniques you’ll practice in this recipe
Pressing a crust: You’ll learn how firm pressure creates an even base that holds together. This is useful for tarts, bars, and many no-bake desserts.
Blending fruit into a smooth puree: Controlling blender bursts and scraping down the sides teaches even incorporation, which carries over to smoothies, sauces, and fillings.
Hydrating seeds or thickeners: Watching chia seeds absorb liquid and knowing how long to wait is a transferable skill for puddings, overnight oats, and jam-like spreads.
Taste balancing: You’ll practice adjusting sweetness and acidity in a fruit-based recipe — a small skill that improves countless dishes.
These are fundamental, approachable techniques that will make other recipes feel easier as you practice them here.
Common mistakes and how to avoid them
Crust falls apart: This usually means the crust wasn’t pressed firmly enough or the coconut oil ratio felt off (either too cold and not binding, or too warm and greasy). Press with a flat-bottomed measuring cup or spoon and chill the crust briefly before adding the filling if it feels loose.
Filling is too runny after refrigeration: Patience first — chia takes time. If it’s still loose after an extra hour, gently stir in a small pinch more chia seeds and chill again. Don’t add too much at once; chia swells and will firm up more overnight.
Filling separates or leaks liquid: This is rare but can result from over-blending or using very watery berries. If you see a little separation, let the pie sit in the fridge — the chia will reabsorb moisture and the texture will even out.
Bland flavor: Taste the blended filling before pouring it into the crust. If it needs a lift, add a touch more lemon or a splash more sweetener. A final taste check prevents an underwhelming pie.
If something goes off track, small adjustments usually fix it. The structure of this pie is forgiving, so recovery often means chilling a bit longer or adding a small, measured tweak.
How to adjust confidently without changing the recipe
Portion scaling concepts: To make a larger pie, multiply ingredients by the same factor and use a larger pan. Keep the same proportions between crust and filling. For an individual serving, divide the recipe by half and use small ramekins; chilling time may shorten slightly because of the smaller volume.
Flavor preference adjustments: You can choose honey or maple syrup based on the flavor direction you prefer. If you like a brighter tartness, a touch more lemon (start with small additions) will help. For nuttier notes, choose almond flour for the crust.
Texture tweaks — conceptually only: If you prefer a firmer set, allow more refrigeration time or let it sit overnight. Want a silkier filling? Blend a little longer for an ultra-smooth finish. Want more bite? Briefly fold in a handful of whole blueberries after blending to introduce texture.
Remember: these are conceptual adjustments — don’t change the ingredient amounts or steps listed in the recipe. Small tweaks in timing and technique are where you can safely exercise judgment.
Serving, storage, and reheating made simple
Serving: Slice with a steady, sharp knife — warming the blade under hot water and wiping it dry between cuts gives clean slices. Serve chilled; a slight room-temperature rest (5–10 minutes) can soften the filling without melting it.
Storage: Keep the pie covered in the refrigerator for up to 3–4 days. The crust may soften slightly over time as it absorbs moisture from the filling, but it will still taste wonderful.
Transporting: For travel, keep it on a flat surface in a covered container with a cold pack underneath to maintain structure.
Reheating: This is a chilled pie meant to be eaten cold, so reheating isn’t recommended. If you’d like a warmer feel, tent a single slice with foil and let it sit at room temperature for 10–15 minutes — it will lose some chill but keep its texture.
Questions new cooks often ask about this recipe
How long does it really take to set? The recipe says at least 2–3 hours. Expect that edge-of-slice firmness around 3 hours, with the best texture after a longer chill (overnight is ideal if you have the time).
Can I use frozen blueberries? Yes, but thaw and drain them slightly first to reduce extra water in the filling, and give the pie a bit more chilling time.
Do I need a high-powered blender? No. A standard blender will work fine; blend in short bursts and scrape down the sides to ensure everything gets mixed.
Is it normal if the top has small bubbles? Yes — tiny air bubbles from blending are normal and will reduce as the filling settles in the fridge.
Can I make this ahead? Definitely. It keeps well in the fridge and can be assembled the day before. If making further in advance, cover it tightly so it doesn’t pick up flavors from the fridge.
If you’re ever unsure, stop, taste, and observe the textures — these little checks are the best way to stay on track.
Final encouragement from Carla
Cooking is a practice, not a performance. This No-Bake Blueberry Chia Seed Pie is a gentle place to practice consistency, timing, and tasting. Mistakes here are simple to fix, and successes are immediate and delicious. Trust the process, take your time pressing the crust and blending the filling, and remember that each pie you make teaches you something small and valuable. Keep experimenting with small adjustments and celebrate the progress — it all adds up to more confidence in the kitchen.
Conclusion
If you’d like more inspiration for no-bake blueberry desserts in a slightly different format, this Blueberry Chia Pudding Cake | No-Bake Pie shows a close relative of the technique used here. For another raw, berry-forward pie approach that stays light and fresh, see this Raw Vegan Blueberry Pie – super healthy.

No-Bake Blueberry Chia Seed Pie
Ingredients
Method
- In a medium bowl, mix crushed graham crackers or almond flour with melted coconut oil and a pinch of salt until combined.
- Press this mixture into the bottom of a pie pan to form the crust.
- In a blender, combine blueberries, chia seeds, honey or maple syrup, vanilla extract, and lemon juice.
- Blend until smooth, achieving a bright and glossy texture.
- Pour the blueberry mixture into the prepared crust and spread evenly.
- Refrigerate for at least 2-3 hours, or until set.