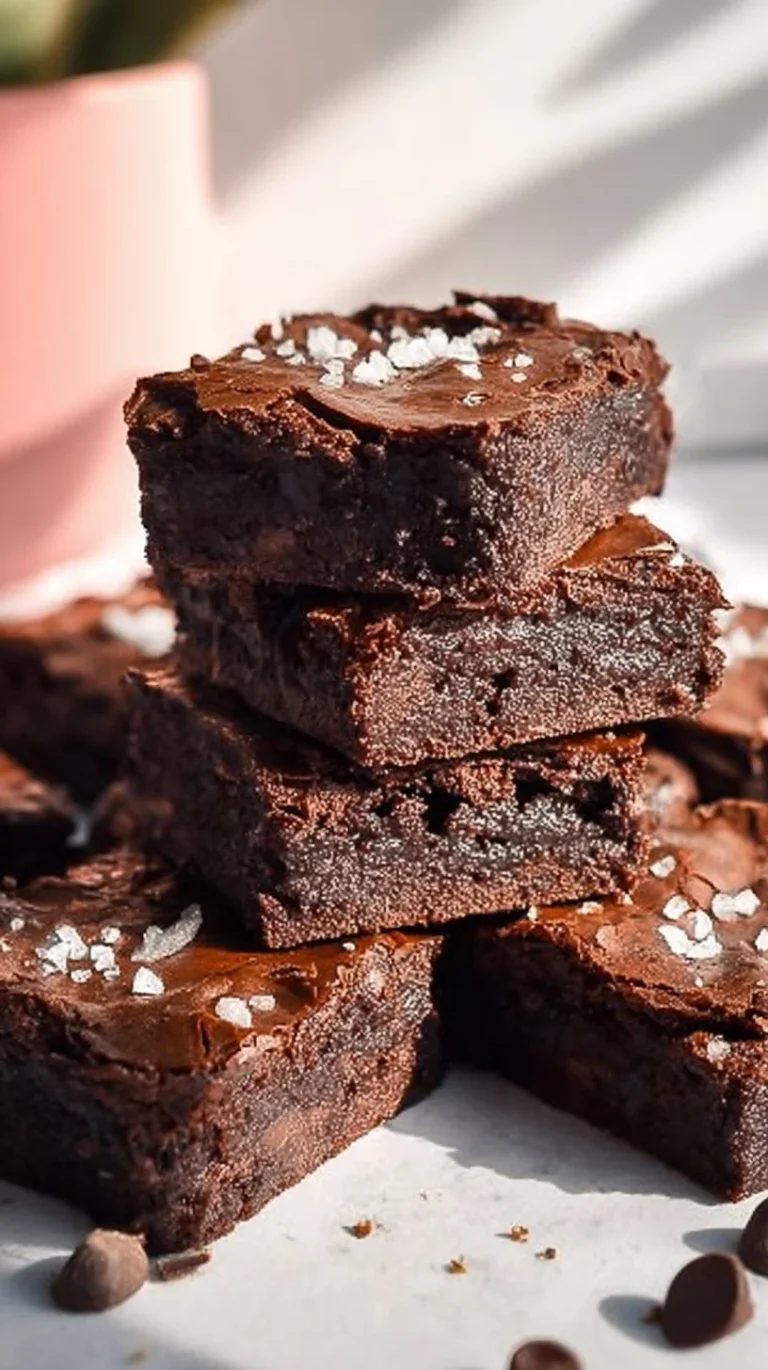
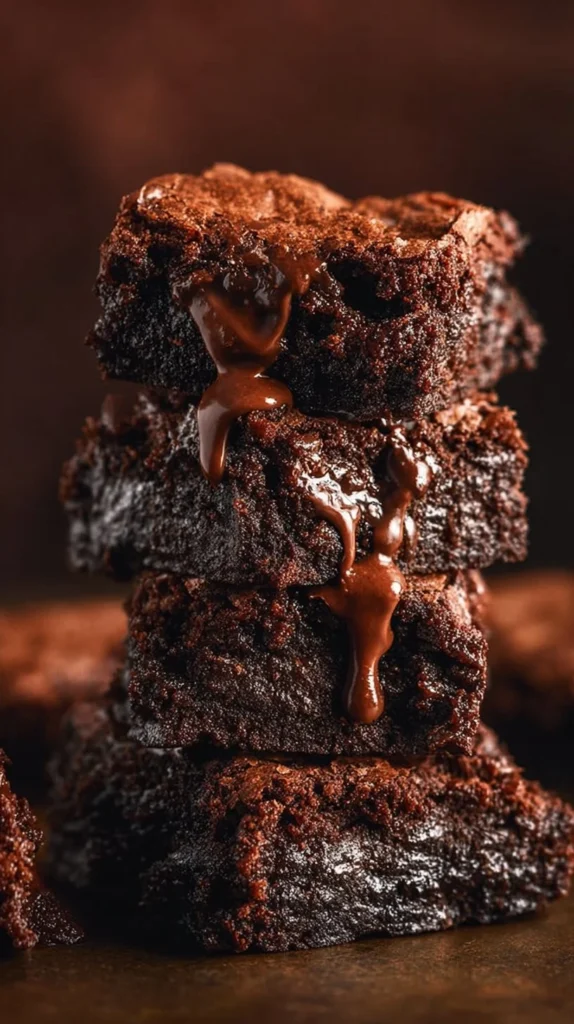
Low Calorie Greek Yogurt Brownies

As a busy parent and weeknight planner, I’m always looking for treats that feel indulgent without being complicated or time-consuming. These Low Calorie Greek Yogurt Brownies are one of those recipes that quietly does the heavy lifting: familiar chocolate flavor, fudgy texture, and a straightforward method that rarely goes wrong. They’re perfect when you want something home-baked after dinner but don’t want a recipe that eats into bedtime routines.
This recipe works for busy families because it uses ingredients most people already have or can easily keep on hand, and the steps move in a single, logical direction—no fussy folding or multiple mixing bowls required. If you enjoy this take and want to see a slightly different texture and ingredient mix, I often point readers to a closely related variation, like these Greek yogurt brownies that offer another family-friendly option.
You’ll find this dessert useful for weeknights, casual gatherings, or even as a make-ahead sweet that tucks into lunchboxes. Kids love the chocolate flavor and the soft squares are easy to portion; adults appreciate the simplicity and predictable results. I’ll walk you through why each step matters and how to keep things moving smoothly when you’re balancing dinner, homework, and bedtime.
How to make Low Calorie Greek Yogurt Brownies
Think of this as a short, friendly journey: mix the wet, mix the dry, combine gently, bake briefly, and cool. The whole process is focused on speed and reliability, which is why I recommend a few places to pause and check the texture rather than rush through.
Start by preheating the oven and prepping your pan so everything else moves quickly. When you’re combining ingredients, pay attention to how the wet mix looks: it should be glossy and homogenous before the eggs go in. Once the eggs are in, you’ll notice the batter smooths out and thickens a bit—that’s your cue that the structure is forming.
When you bring the dry ingredients into the wet, go slowly and mix until just combined. Overmixing can make brownies tougher; you want even pockets of cocoa and almond flour without a rubbery crumb. Pouring and smoothing the batter is simple—use a spatula and a gentle press to even things out.
Keep an eye on bake time. These are not a dense, hour-long brownie; the relatively short bake keeps them moist and tender. A toothpick test gives a clear answer: clean means done here. Allowing them to cool before cutting helps them set and keeps the squares neat when you serve them. If you need to save time in a busy evening, I’ll point out a couple of easy shortcuts as we go—like using room-temperature eggs to speed emulsifying and a silicone pan for quick release.
If you’re juggling small hands while baking, this is a safe, manageable project to involve kids in: stir, scoop, and smooth are all tasks that build confidence and make the final result feel like everyone’s victory. If you’d like a freezer-friendly treat you can pop out by the handful later, check a complementary snack idea I use often, the frozen Greek yogurt peanut butter bites.
Ingredients
1 cup Greek yogurt, 1/2 cup cocoa powder, 1/2 cup sugar or sugar substitute, 1/4 cup almond flour, 1/2 tsp baking powder, 1/4 tsp salt, 1/2 tsp vanilla extract, 2 large eggs
Here’s what each ingredient does in plain home-cook language:
- Greek yogurt: This is the base that keeps the brownies moist and tender without a lot of added oil. It brings a bit of tang that balances the chocolate and helps give the crumb a soft, almost fudgy quality.
- Cocoa powder: The chocolate flavor comes from here. Unsweetened cocoa gives rich color and depth without extra sugar—choose a good-quality cocoa for the best flavor.
- Sugar or sugar substitute: Adds sweetness and helps with the tender texture. If you use a sugar substitute follow the package guidance for volume equivalency; I list it alongside regular sugar to keep choices flexible for families.
- Almond flour: A light, nutty flour that gives structure without gluten. It keeps the brownies from getting cakey while adding subtle richness.
- Baking powder: Just a small lift so the brownies aren’t overly dense. Since we don’t use a lot of leavening, this keeps them slightly tender rather than spongy.
- Salt: Brings out all the flavors—don’t skip it, even in sweet recipes.
- Vanilla extract: A little vanilla warms the chocolate and makes the taste familiar and homey.
- Eggs: Eggs bind everything together and add a bit of richness. They’re essential here for the right texture and stability.
All of these are pantry-friendly and familiar—exactly what you want when the goal is a reliable dessert that slips into a busy week without drama. If you’re cooking for children with allergies or preferences, you can discuss swaps later in the “Why families love this dish” section, but keep the original recipe as written for the most consistent outcome.
Directions
- Preheat the oven to 350°F (175°C). Grease a baking pan., 2. In a large bowl, mix Greek yogurt, sugar, and vanilla until combined., 3. Add in eggs, and mix until smooth., 4. In another bowl, whisk together cocoa powder, almond flour, baking powder, and salt., 5. Gradually add the dry ingredients to the wet ingredients, mixing until just combined., 6. Pour the batter into the prepared baking pan and smooth the top., 7. Bake for 20-25 minutes, until a toothpick inserted in the center comes out clean., 8. Cool, cut into squares, and enjoy your healthy brownies!
A few friendly notes on these exact steps:
- Step 1: Preheating is non-negotiable for predictable bake time. Greasing the pan ahead of time saves stress when the batter is ready to go.
- Steps 2–3: Mixing the wet ingredients first gives you a smooth base to incorporate the eggs easily. Look for a glossy, evenly mixed texture before moving on.
- Step 4: Whisking the dry ingredients separately ensures even distribution of cocoa and baking powder so every bite tastes the same.
- Step 5: “Just combined” is the phrase to watch for. Stop mixing when there are no big streaks of flour or cocoa—that will keep the brownies tender.
- Steps 6–7: Smooth the top so they bake evenly. The toothpick test is straightforward here; even a few moist crumbs are fine because overbaking dries them out.
- Step 8: Cooling is important for clean cuts. If you try to cut them hot, they’ll be too soft and crumbly.
Common small mistakes to avoid: don’t skip the salt, avoid overmixing, and keep the bake time tight. If your oven runs hot or cool, adjust by a couple of minutes and use the toothpick test rather than the clock alone.
Why families love this dish
There are a few reasons this recipe becomes a favorite in busy homes. First, the flavors are classic and comforting—chocolate that hits the spot without complicated layers or a lot of fuss. Kids recognize and love that flavor, and parents appreciate the predictable, simple list of ingredients.
Second, the texture is forgiving. These brownies come out tender and moist, not dry or overly dense, which means even beginner bakers get good results. The recipe scales well: you can double it for a crowd or make a single batch for a week’s worth of snacks.
Third, it’s versatile without being complicated. You can serve a plain square with milk for quick after-school snacks, add a dollop of yogurt and fruit for a dessert that feels lighter, or dress them up with a quick drizzle of melted chocolate for a birthday. If you need to lean into picky-eater territory, a little extra cocoa or a sprinkle of chocolate chips (added to the batter before baking) will usually win over hesitant eaters—just keep the core recipe the same for consistent results.
These brownies also fit into real family schedules because they’re quick to assemble and bake, and they store well for a few days, making them easy to portion into lunchboxes or after-school snack containers.
Pairing ideas for a complete, satisfying meal
Brownies might feel like a treat, but they can fit into balanced family meals as the sweet finish. Keep things simple so the whole meal stays kid-friendly and quick:
- For a quick weeknight dinner: Serve with a big green salad, roasted vegetables, and a protein like grilled chicken or tofu. The brownies make a nice finish without being heavy.
- For a cozy weekend brunch: Pair with yogurt parfaits and fresh fruit. Cut brownies into small squares and let kids add berries and a spoonful of yogurt.
- To round out a packed school lunch: One brownie square, a piece of fruit, and a small sandwich make a well-balanced box that feels special.
- Add-on ideas: A scoop of vanilla ice cream, a smear of peanut butter, or a handful of sliced strawberries transforms the brownies without extra effort.
These pairings are designed to be flexible—simple swaps let you match what’s already on your family’s plate without adding time or new ingredients.
Make-ahead tips, leftovers, and storage
These brownies are forgiving in the fridge and freezer, so they’re great for planning ahead. Store them in an airtight container at room temperature for up to 2 days, or in the refrigerator for up to 5 days—cooling fully before sealing helps maintain texture. If you plan to freeze, wrap squares individually in plastic wrap and place them in a freezer-safe bag for up to 2 months.
To thaw, move wrapped squares to the refrigerator overnight or leave them at room temperature for an hour. If you want a warm square quickly, microwave for 10–15 seconds from chilled or 20–30 seconds if frozen, keeping a close eye so they don’t dry out.
If you’re building a dessert drawer of reliable items for the week, pair these with other make-ahead ideas—muffins and bars that use Greek yogurt are a nice complement. I often suggest readers explore similar make-ahead bakes like Greek yogurt protein muffins when planning a batch-baking session.
Common questions home cooks ask about this recipe
Q: My brownies came out a little cakey—what happened?
A: Cakey brownies usually mean too much mixing or too much flour-type ingredient. Mix until just combined and measure the almond flour accurately (spoon and level if needed). Baking them a minute or two longer can also make them drier, so rely on the toothpick test.
Q: Can I use a different sweetener?
A: Yes—use a sugar substitute with the same sweetness volume and follow the manufacturer’s guidance. Keep in mind texture can shift a little depending on the sweetener.
Q: Can I make these nut-free?
A: The recipe uses almond flour, which provides structure and a tender crumb. For nut-free households, you can experiment with a 1:1 gluten-free flour blend—but results will vary and may change the texture. If nut allergies are a concern often, other Greek yogurt-based bakes can be swapped in for a safer option.
Q: How do I scale the recipe for a larger pan?
A: Double the ingredients and use a larger, deeper pan. Watch the bake time carefully—larger pans may take a bit longer, so test with a toothpick.
Q: Will these freeze well?
A: Yes—wrapped squares freeze nicely and thaw quickly. See the make-ahead section for storage tips.
These are practical, everyday answers—no fuss, just clear steps to help you feel confident repeating this recipe.
Final thoughts from Sarah
I love recipes that become quietly dependable, and these Low Calorie Greek Yogurt Brownies fit that description. They’re easy to make, forgiving in the oven, and friendly to families who need a quick dessert without a long ingredient list. Whether you’re finishing a weeknight dinner, preparing a bake sale item, or just wanting a small treat to share, this recipe is the kind of dependable, comforting dish that earns a regular spot in the rotation.
If you try them, give the timing and mix a close eye the first time—after that, it becomes second nature. Happy baking, and here’s to more simple dishes that make family life a little sweeter.
Warmly,
Sarah Collins
Conclusion
For more ideas and variations on Greek yogurt-based brownies, this version from The Big Man’s World is a useful reference: Greek Yogurt Brownies (Under 100 Calories!) – The Big Man’s World.
If you’re curious how other cooks are using Greek yogurt to make lighter brownies, Sweet As Honey’s take is worth a look: Greek Yogurt Brownies (Only 49 kcal) – Sweet As Honey.
And for a flourless approach that still leans on Greek yogurt for texture, check this recipe at MattsfitChef: Flourless Greek Yogurt Brownies – MattsfitChef.
Low Calorie Greek Yogurt Brownies
Ingredients
Method
- Preheat the oven to 350°F (175°C). Grease a baking pan.
- In a large bowl, mix Greek yogurt, sugar, and vanilla until combined.
- Add in eggs, and mix until smooth.
- In another bowl, whisk together cocoa powder, almond flour, baking powder, and salt.
- Gradually add the dry ingredients to the wet ingredients, mixing until just combined.
- Pour the batter into the prepared baking pan and smooth the top.
- Bake for 20-25 minutes, until a toothpick inserted in the center comes out clean.
- Cool, cut into squares, and enjoy your healthy brownies!