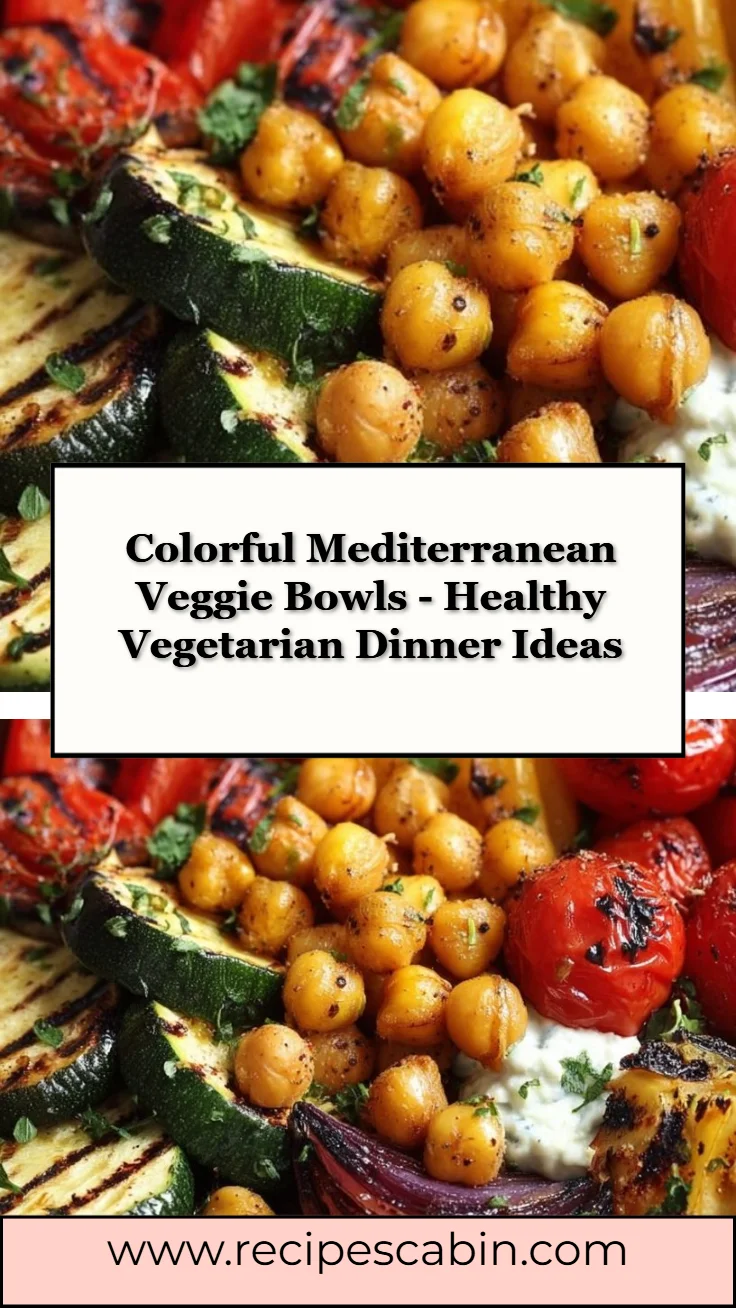
Mediterranean Veggie Bowls

Hello — I’m Carla Carter, Founder & Recipe Developer of RecipesCabin. If you’re looking for a colorful, wholesome weeknight meal that doesn’t intimidate, these Mediterranean Veggie Bowls are for you. They’re made with vegetables that are familiar and forgiving, layered with simple staples like grains, beans, and bright herbs. This recipe is approachable whether you’re cooking for the first time in months, trying to get dinner on the table quickly, or building confidence with basics in the kitchen.
If you’ve enjoyed other easy veggie-forward recipes, you might like the texture and balance in this bowl in the same way you’d enjoy a hearty casserole like the high-protein veggie bake with cottage cheese. Throughout this article I’ll walk you through why this recipe works, what to look for at each stage, and how to feel calm and capable as you cook.
Why this recipe is easy to get right
This bowl is forgiving in small ways that matter. Vegetables don’t need to be cut perfectly; the flavors are layered so if one component is a touch undercooked or a little more seasoned than you planned, the other elements will balance it. Grain and bean bases anchor the bowl and tolerate a range of textures — a slightly softer grain still tastes great, and beans add creaminess even if drained imperfectly.
Flexibility lives in the small choices: you can swap a vegetable for one you have on hand, change herbs to suit your palate, or use pre-cooked grains to save time. Because each element is prepared separately, mistakes are contained: one over-roasted pepper doesn’t ruin the whole dish. Finally, flavors build as you assemble, so you can taste and adjust at the end rather than trying to perfect a single step.
How to make Mediterranean Veggie Bowls
Start by getting organized. Lay out your ingredients, rinse grains and beans if needed, and preheat your oven or stovetop so nothing stalls. First, prepare the base — typically a cooked grain like rice, quinoa, or bulgur — because it’s the time-consuming part; once it’s simmering, you can move to the vegetables.
Next, handle the vegetables in batches. Roasting concentrates their sweetness and adds color; if you’re using raw crisp vegetables, rinsing and slicing them uniformly helps them sit together nicely in the bowl. While vegetables roast or sauté, prepare cool elements like chopped cucumber, tomatoes, herbs, and any dressing or sauce. These fresh components provide contrast to the warm base.
Last, assemble with intention. Start with the grain and beans, add warm vegetables, then top with fresh herbs, a drizzle of dressing, and any crunchy elements like toasted nuts or seeds. Focus on balancing temperature, texture, and flavor at this stage — a spoonful of tangy dressing or a squeeze of lemon will pull everything together. Beginners should slow down at assembly: taste as you go and make small adjustments rather than big ones.
If you’d like examples of bowls that balance heat and glaze with vegetables, the flavor-contrast idea is similar to the way a saucy salmon bowl comes together in the honey sriracha salmon bowls recipe.
Ingredients
Even though I won’t change the ingredients you’re using for this recipe, it helps to understand what each one does so you feel confident when you handle them.
- Grains (rice, quinoa, or bulgur): These are the comforting backbone of the bowl. They soak up dressing and juices from roasted vegetables, giving every bite some heft.
- Beans or legumes: They add protein and creamy texture, and they’re forgiving — whether slightly firmer or softer, they still add body and nutrition.
- Assortment of vegetables: Think of a mix of sturdy and tender veggies. Sturdy ones (like eggplant or carrots) may need longer cooking; tender ones (like cherry tomatoes or spinach) can be added at the end or served fresh for contrast.
- Fresh herbs and greens: These brighten the dish. Herb leaves and lettuce add color, fragrance, and a fresh bite that lifts the warm, roasted flavors.
- Olive oil and basic seasonings: Oil helps with roasting and flavor distribution; salt and pepper are your friends here. A splash of acid (lemon or vinegar) at the end wakes everything up.
- Optional toppings: Nuts, seeds, crumbled cheese, or olives introduce texture and saltiness that complete the bowl.
None of these ingredients are technical or intimidating. They’re everyday items that work together through contrast — warm and cool, soft and crunchy, rich and bright. When you’re assembling, think of balance more than precision.
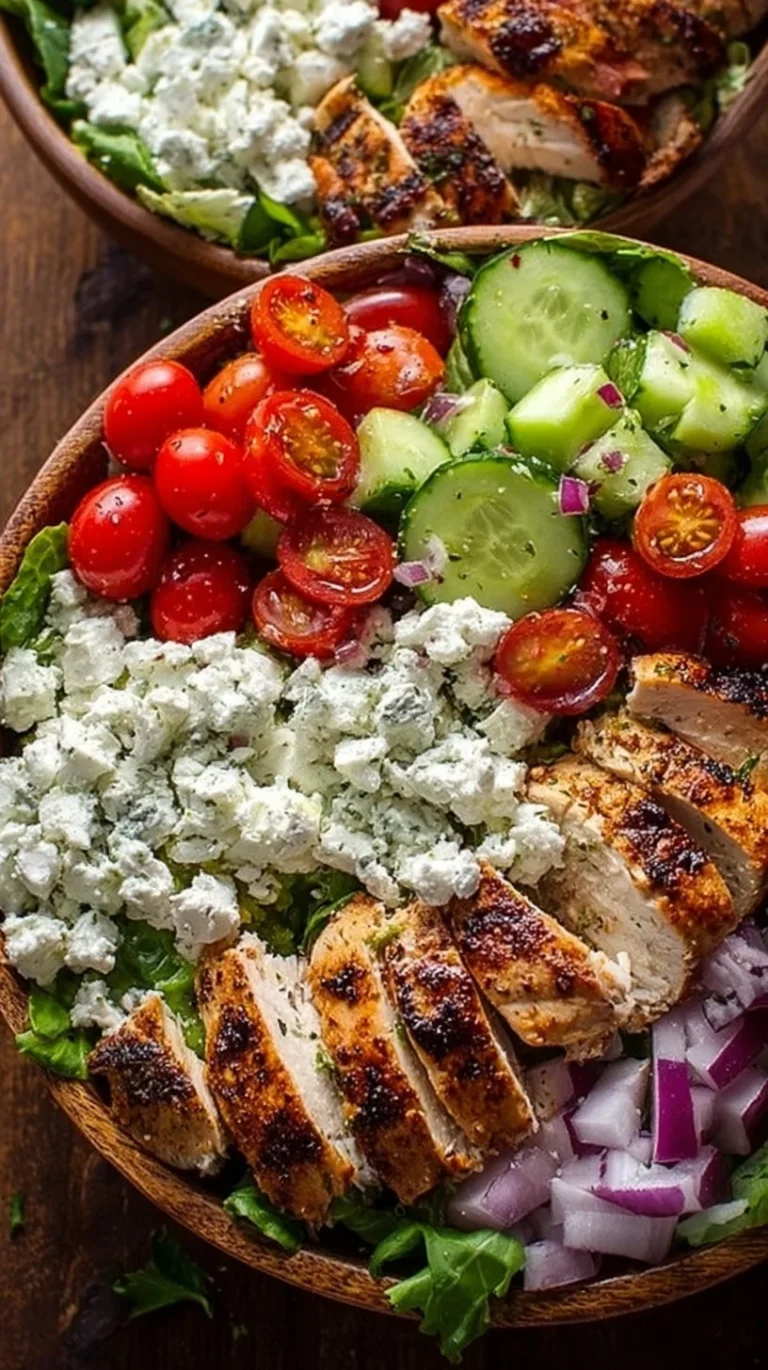
For another example of how ingredients come together to create satisfying bowls with complementary textures, refer to this low-carb Greek chicken bowl recipe, which uses similar principles even though the protein differs.
Directions
I won’t change the directions you have, but I’ll add supportive guidance so you know what to look for and how to feel confident at each step.
- Visual cues to watch for: When roasting vegetables, they should develop golden-brown edges and a slight char where they touch the pan. That caramelization is flavor. If they’re just barely soft and not browning, give them a few more minutes — warm colors and soft centers are the goal.
- Texture hints: Grains should be tender but not mushy. If you taste them and they feel dense or undercooked, add a splash of hot water, cover, and let them steam for a few more minutes. Beans should be creamy when lightly mashed; dry or chalky beans likely need more liquid or a longer simmer if you’re cooking from dry.
- Timing guidance: Cook longer for root vegetables and shorter for quick-cooking greens. Work in parallel — while grains simmer, roast vegetables and prep fresh toppings.
- Reassurance for imperfections: If one roasted vegetable overcooks slightly, chop and fold it into the warm grain where it will blend in. If your dressing is a bit tangy, a pinch of sweetness or a tablespoon of olive oil will round it out. Small fixes are easy — you rarely need to start over.
- Taste and adjust at assembly: Add salt, pepper, and acid incrementally. A light hand at first gives you control; remember you can always add more.
If a step doesn’t look perfect, pause and compare with the checkpoints above. The recipe relies more on simple sensory cues than precise timing.
Key techniques you’ll practice in this recipe
This bowl is a practice ground for a few fundamental kitchen skills:
- Roasting vegetables: Learning to get a good roast — golden, slightly caramelized edges — is a kitchen superpower. It deepens flavor and transforms simple veggies.
- Cooking grains: You’ll get comfortable watching a pot go from bubbling to gently steaming, and you’ll learn how grains absorb seasoning and liquids.
- Layering flavors: Building a balanced bowl is about combining textures and tastes. You’ll practice finishing with acid and adjusting seasoning.
- Knife basics: Even rough chopping teaches consistent cook times and nice presentation. You’ll learn that neatness matters for even cooking, but perfection is unnecessary.
- Taste-based seasoning: This recipe encourages tasting and adjusting rather than following exact measurements, a useful skill for many dishes.
Mastering these techniques makes many other recipes easier and boosts kitchen confidence.
Common mistakes and how to avoid them
Beginners often worry about overcooking or under-seasoning. Here’s how to prevent common issues and how to recover if they happen.
- Vegetables not browning: Don’t overcrowd the pan. Spread vegetables in a single layer and give them space to caramelize. If they steam instead of roast, remove a few pieces and give them space.
- Soggy grains: If grains are mushy, you likely used too much water or overcooked. For next time, reduce liquid slightly or shorten the cooking time. To salvage slightly soggy grains, spread them on a baking sheet and warm briefly in the oven to dry excess moisture.
- Bland final bowl: Taste as you assemble. If it’s flat, add a squeeze of lemon or a pinch of salt. A little acidity liven things up quickly.
- Uneven chopping: Different-sized pieces cook differently. Aim for similar sizes, and when in doubt, cut slightly smaller so everything cooks through.
- overdressed or too salty: Dress lightly at first and add more if needed. If it ends up too salty, add an unsalted element (plain grains or more vegetables) to balance it.
If something goes off track, small corrective steps usually fix it — there’s no need to toss everything and start over.
How to adjust confidently without changing the recipe
You may want to scale servings, adapt flavors, or tweak textures. Here are safe ways to adjust while keeping the recipe intact.
- Portion scaling concepts: If you double the vegetables, also double the grain and beans to maintain balance. The simplest rule is to keep a roughly equal ratio of base (grains/beans) to vegetables so each bite feels complete.
- Flavor preference adjustments: If you like brighter flavors, increase the acidity slightly with more lemon or vinegar at the end. Prefer milder flavors? Reduce strong herbs and add a neutral element like extra grains.
- Texture tweaks (conceptual): For a crunchier bowl, add toasted nuts or raw cucumber. For creamier texture, mash a handful of beans into the grain before assembling. These are texture ideas — they don’t change the steps or ingredient list, just how components are used at the end.
These adjustments let you personalize the bowl while keeping the recipe’s structure intact.
Serving, storage, and reheating made simple
Serving: Arrange bowls with warm grains and veggies as the base and fresh elements on top. Serve dressings on the side if guests may want to add more or less. A wedge of lemon on the side invites a finishing squeeze.
Storage: Store components separately when possible — keep grains and roasted vegetables in airtight containers in the fridge for up to 4 days. Fresh herbs and any crunchy toppings are best added just before serving to preserve texture.
Reheating: Gently reheat grains and roasted vegetables in a microwave or on a stovetop with a splash of water to prevent drying. Avoid overheating greens and fresh toppings; add them after reheating. If the bowl seems dry after reheating, a drizzle of olive oil or a squeeze of lemon revives it.
Questions new cooks often ask about this recipe
Q: How do I know when vegetables are done?
A: Look for golden edges and a tender center. Pierce with a fork — there should be little resistance, and the vegetable should feel warm throughout.
Q: Do I need special equipment?
A: No. A baking sheet, a sharp knife, a medium pot for grains, and a skillet are sufficient. A rimmed baking sheet helps with roasting, but any oven-safe pan will work.
Q: Is it normal for the dressing to separate?
A: Yes. Oil and acid separate naturally. Give it a quick shake or whisk before using.
Q: What if my bowl tastes too salty or too acidic?
A: Add more grains or beans to dilute saltiness, or a small pinch of sugar to counter excess acidity. Adjust slowly.
Q: How long will leftovers keep?
A: When stored properly, components will keep 3–4 days. Fresh herbs and crunchy toppings should be stored separately and added just before serving.
Final encouragement from Carla
Cooking bowls like this one are practice in balance and patience. Small imperfections are part of learning; a slightly uneven chop or a tiny scorch on a vegetable won’t ruin the meal. Each attempt builds muscle memory and intuition. Be gentle with yourself — focus on taste, texture, and the simple joy of creating something nourishing.
You’re not chasing perfection; you’re making progress. Enjoy the process and the bowl.
Conclusion
If you want to read a similar take on a Mediterranean-style vegetable and grain bowl for inspiration, this article on a roasted Mediterranean bowl is a useful reference: Pečená středomořská bowl je jídlo, které zachrání každý den. For additional ideas on how roasted vegetables and grains can carry a meal, that same page offers helpful visuals and tips: inspiration for roasting and assembling bowls. If you’d like more guidance on planning balanced bowls and ingredient swaps, this resource provides practical examples you can adapt: a practical roasted bowl reference.
Happy cooking — I’m proud of you for trying something nourishing today.

Mediterranean Veggie Bowls
Ingredients
Method
- Get organized by laying out your ingredients and rinsing grains and beans.
- Preheat your oven or stovetop.
- Cook the grains according to package instructions.
- Roast or sauté vegetables in batches until golden-brown and tender.
- Prepare cool elements like chopped cucumber, tomatoes, and herbs.
- Start with grains and beans as the base.
- Layer warm vegetables on top, followed by fresh herbs and a drizzle of dressing.
- Add any optional toppings like nuts or cheese.