Lemon-Cream Chia Pudding
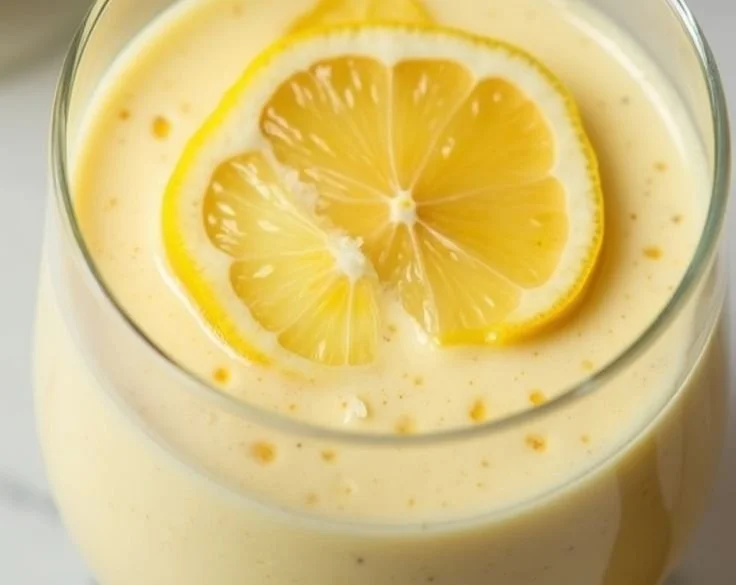
This Lemon-Cream Chia Pudding is for the home cook who wants something bright, simple, and reliably soothing to make — whether you’re new to the kitchen or returning after a break. It’s a breakfast or snack that feels a little special but doesn’t demand a lot of technique or equipment. If you’ve ever been nervous about custards or puddings because they seemed fussy, this is a gentle place to start. The recipe combines creamy almond milk, lemon brightness, and the magic of chia seeds to create a textured pudding that sets in the fridge with very little hands-on time.
What makes it approachable is that the steps are short and predictable: mix, wait, stir, and serve. There’s room for personality in the toppings, and small imperfections — a slightly looser set or a few tiny clumps at first — are normal and easy to fix. I’ll walk you through what to expect at each stage, what to look for, and how to troubleshoot so you can feel confident making this the first time and every time.
Why this recipe is easy to get right
This recipe is forgiving in several important ways. Chia seeds thicken liquids predictably without precise temperatures, and the only real “time” requirement is refrigeration. If you whisk a little more or a little less, or use the milk you have on hand, you’ll still end up with a pleasant final dish. The lemon flavor is fresh but not overpowering, so small variations in zest or juice won’t derail the pudding.
Flexibility shows up in toppings and milk choice: almond milk is suggested but any milk works — that lets you use what’s on hand or what you prefer for taste and texture. The recipe doesn’t rely on delicate techniques like tempering eggs, so there’s less risk of something going wrong. The most important checkpoint is giving the mixture enough time to rest in the fridge so the chia seeds can absorb the liquid and swell. As long as that happens, you’ll have a satisfying pudding.
How to make Lemon-Cream Chia Pudding
At a glance, the process is three acts: combine, thicken, and finish.
- First: combine the ingredients so the chia seeds are evenly distributed in the liquid. This is where a good whisking helps prevent clumps and gives each seed a chance to hydrate.
- Next: refrigerate and let the chia do the work. As it sits, each seed absorbs liquid, forming a gel around itself. The mixture will change from pourable to spoonable — that’s the transformation you’re aiming for.
- Last: stir and top. A final stir evens out the texture and brings any looser parts into harmony with the thicker pudding. Add toppings for contrast: fresh fruit for brightness, nuts for crunch, or granola for today’s breakfast feel.
Beginners should slow down at the mixing stage. Take an extra 30–60 seconds to whisk thoroughly, scraping the sides and bottom of the bowl, so you don’t end up with a clump of dry seeds. Also, give the fridge time — patience here is how you succeed.
Ingredients
1/4 cup chia seeds, 1 cup almond milk (or any milk of choice), 2 tablespoons honey or maple syrup, 1 teaspoon vanilla extract, Zest of 1 lemon, Juice of 1 lemon, Optional toppings: fresh fruits, nuts, or granola
Each ingredient plays a clear role:
- Chia seeds: These are the structural heart of the pudding. When they meet liquid, the seeds swell and develop a soft, gel-like coating that thickens the mixture into a pudding. They’re simple to work with and store well.
- Almond milk (or any milk of choice): The liquid provides the body and creaminess. Almond milk keeps the flavor light and the texture silky, but cow’s milk, oat milk, or other plant milks also work and will slightly change the mouthfeel. None of those choices are complicated — use what you prefer.
- Honey or maple syrup: These sweeten the pudding. Honey gives a floral warmth, while maple syrup adds a rounded sweetness. Two tablespoons is enough to balance the lemon without making it cloying; you can taste and adjust next time if you like slightly sweeter or tarter.
- Vanilla extract: A small amount of vanilla deepens the overall flavor and rounds the brightness of the lemon. It’s one of those background flavors that makes the pudding feel complete.
- Zest of 1 lemon: Zest brings concentrated lemon oils — bright, fragrant, and fresh. It’s what gives the pudding a sunlit note without adding acidity.
- Juice of 1 lemon: Juice adds acid and lift, keeping the pudding bright. The combination of zest and juice gives a layered lemon experience.
- Optional toppings: fresh fruits, nuts, or granola: These let you tailor texture and sweetness. Fresh berries bring extra tang, nuts add crunch and protein, and granola gives a toasty crunch that turns this into a more substantial snack.
None of these ingredients are intimidating. They’re common, easy to measure, and forgiving in small variations.
Directions
- In a bowl, combine chia seeds, almond milk, honey, vanilla extract, lemon zest, and lemon juice., 2. Whisk the mixture well to avoid clumping., 3. Cover the bowl and refrigerate for at least 2 hours or overnight., 4. Once the pudding has thickened, stir well and serve with your choice of toppings. Enjoy!
Supportive guidance around these exact steps:
- Step 1: When you combine the ingredients, put the chia seeds in the bowl first, then pour the milk over them. This helps the seeds start hydrating evenly. Add the honey (or maple syrup), vanilla, lemon zest, and juice on top. The zest may cling to a microplane or grater — use a clean hand to scrape the last fragrant bits into the bowl so none of that brightness is lost.
- Step 2: Whisking is about more than speed — it’s about making sure every seed meets liquid. Whisk in a smooth circular motion for at least 30 to 60 seconds, scraping the sides and bottom of the bowl so no dry pockets remain. If you notice a few tiny clumps, that’s okay; they usually hydrate during refrigeration and will break up when you stir later.
- Step 3: Covering and refrigerating is the passive magic moment. Chia seeds work slowly and steadily in the cold. After about 2 hours you’ll notice a clear change: the mixture goes from liquid to a thicker, spoonable consistency. Overnight gives a fuller set and deeper flavor melding. If you check earlier, the texture may still be loose — be patient, and check again after another hour.
- Step 4: Once thickened, a final stir brings everything together. Use a spoon to fold and lift the pudding so it’s uniform; you may find a slightly creamier texture if you stir with a fork to break clumps gently. Then add toppings and enjoy.
Visual cues: the wet mixture will look glossy at first and then transform to a matte, pudding-like surface with tiny bead-like seeds visible. Smell the lemon when you uncover the bowl — that bright scent is a good sign it will taste lively.
Key techniques you’ll practice in this recipe
- Whisking to hydrate: You’ll practice even mixing so small particles (chia seeds) are dispersed and hydrated. This simple technique prevents clumps and produces a consistent texture.
- Judging set vs. unset: Recognizing when a mixture has thickened enough comes from looking and feeling. You’ll learn to tell the difference between a still-pourable mix and one that holds a spoon.
- Balancing flavors: Measuring and tasting teach you how acid (lemon) and sweet (honey or maple) work together. This recipe is an easy way to learn contrast in flavor without advanced steps.
These skills serve you well beyond pudding — they’re transferable to sauces, dressings, custards, and any recipe that needs even hydration and thoughtful balancing.
Common mistakes and how to avoid them
- Mistake: Not whisking enough, leaving clumps of dry chia. Fix: Spend an extra 30–60 seconds whisking and scrape the bowl’s bottom. If you still see small clumps after refrigeration, a vigorous stir or a quick blend with an immersion blender will smooth things out without harming the texture.
- Mistake: Checking too early and assuming it failed. Fix: If it’s still loose after 1 hour, return it to the fridge and check again at 2 hours. Chia needs time to absorb liquid.
- Mistake: Over-sweetening because you worry it won’t set. Fix: The setting doesn’t depend on sugar — it depends on time and chia-to-liquid ratio. Use the listed amount of sweetener; you can always add a little more when serving.
- Mistake: Too tart from too much lemon juice. Fix: If your first try is tangier than you prefer, add a small extra drizzle of honey or a splash more milk when stirring before serving to soften the acidity.
- Mistake: Storing in an open container and picking up fridge smells. Fix: Cover the bowl or use airtight containers so the pudding maintains fresh lemon aroma.
If something seems off, don’t panic. Small fixes — another stir, a bit more sweetener, or more time in the fridge — are usually all that’s needed.
How to adjust confidently without changing the recipe
Portions: Conceptually, scaling up or down works by keeping ratios similar. If you double the entire recipe, double every ingredient so the chia-to-liquid balance remains the same. For a single-serving, halve the ingredients. The key idea is maintaining the proportion of chia seeds to liquid for the same set.
Flavor preferences: If you like it tangier, the conceptual adjustment is adding a touch more lemon juice or zest, but follow the recipe exactly the first time to learn its baseline. Next time, small increases are safer than large jumps. If you prefer milder lemon, reduce zest slightly or add a splash more milk when serving.
Texture tweaks: To make it creamier in concept, use a richer milk like oat or full-fat dairy. For a lighter set, use a bit more milk relative to the chia, keeping in mind that more liquid means more time to thicken. Again, these are ideas to try after you’ve made the recipe as written to learn how your adjustments change the result.
None of this changes the instruction or ingredient list — it simply helps you understand how to tweak with confidence.
Serving, storage, and reheating made simple
Serving: Spoon the pudding into bowls or jars and top with fresh berries for contrast, a sprinkle of chopped nuts for crunch, or granola for a heartier bite. The lemon zest on top looks pretty and adds an aromatic lift.
Storage: Store the pudding covered in the refrigerator for up to 4–5 days. Use airtight containers or cover the bowl tightly so it stays fresh and doesn’t absorb other flavors from the fridge. The texture may thicken slightly over time; a quick stir loosens it up.
Reheating: This is typically served cold, but if you prefer it slightly warmed, remove a portion to a microwave-safe bowl and heat briefly (10–15 seconds), stir, and check. Be gentle — overheating can change the texture. For a warm version, consider stirring in a little hot milk rather than microwaving, which warms the pudding without changing the set as much.
Questions new cooks often ask about this recipe
- How long is “at least 2 hours”? Two hours is the minimum; overnight gives the fullest set. If you check at 2 hours and it’s almost there, giving it another hour often finishes the job.
- Do I have to use almond milk? No — almond milk is a suggestion. Any milk works; the texture will vary a little. Oat milk yields a creamier mouthfeel, while skim cow’s milk gives a lighter set.
- Is it normal to see separated liquid at first? Yes. If the mixture separates a bit in the fridge, a good stir brings it back together. Separation can happen if it sits a long time; stirring restores consistency.
- What if my pudding is too thick? Stir in a splash of milk to loosen it to your preferred consistency.
- Do I need special equipment? No. A bowl, whisk (or fork), and spoon are all you need. If you have jars, they’re handy for individual servings and storage.
These are all normal questions, and each has an easy, practical answer. Small adjustments are part of learning.
Final encouragement from Carla
Making a simple recipe like this Lemon-Cream Chia Pudding is a wonderful way to build kitchen confidence. It asks for patience more than precision, and that’s a kind of ease that lets you focus on enjoying the process. If the first batch isn’t perfect, remember that small changes and a calm approach will get you to exactly the texture and flavor you like. Keep practicing these basic skills — they add up quickly. I’m cheering for you in the kitchen, and I hope this pudding becomes a reliable, bright part of your week.
Warmly,
Carla Carter
Founder & Recipe Developer, RecipesCabin
Conclusion
If you’d like a variation that uses oat milk, this Lemon Cream Chia Pudding Recipe with Oat Milk – Cultured Guru offers a creamy alternative to try once you’re comfortable with the base recipe. For another straightforward take and serving inspiration, see this bright Lemon Chia Pudding recipe. And if you’re looking for more lemon-chia ideas with vibrant photos, check out this Lemon Chia Pudding – Jenn Eats Goood post for yet another simple perspective.
Lemon-Cream Chia Pudding
Ingredients
Method
- In a bowl, combine chia seeds, almond milk, honey, vanilla extract, lemon zest, and lemon juice.
- Whisk the mixture well to avoid clumping.
- Cover the bowl and refrigerate for at least 2 hours or overnight.
- Once the pudding has thickened, stir well and serve with your choice of toppings.