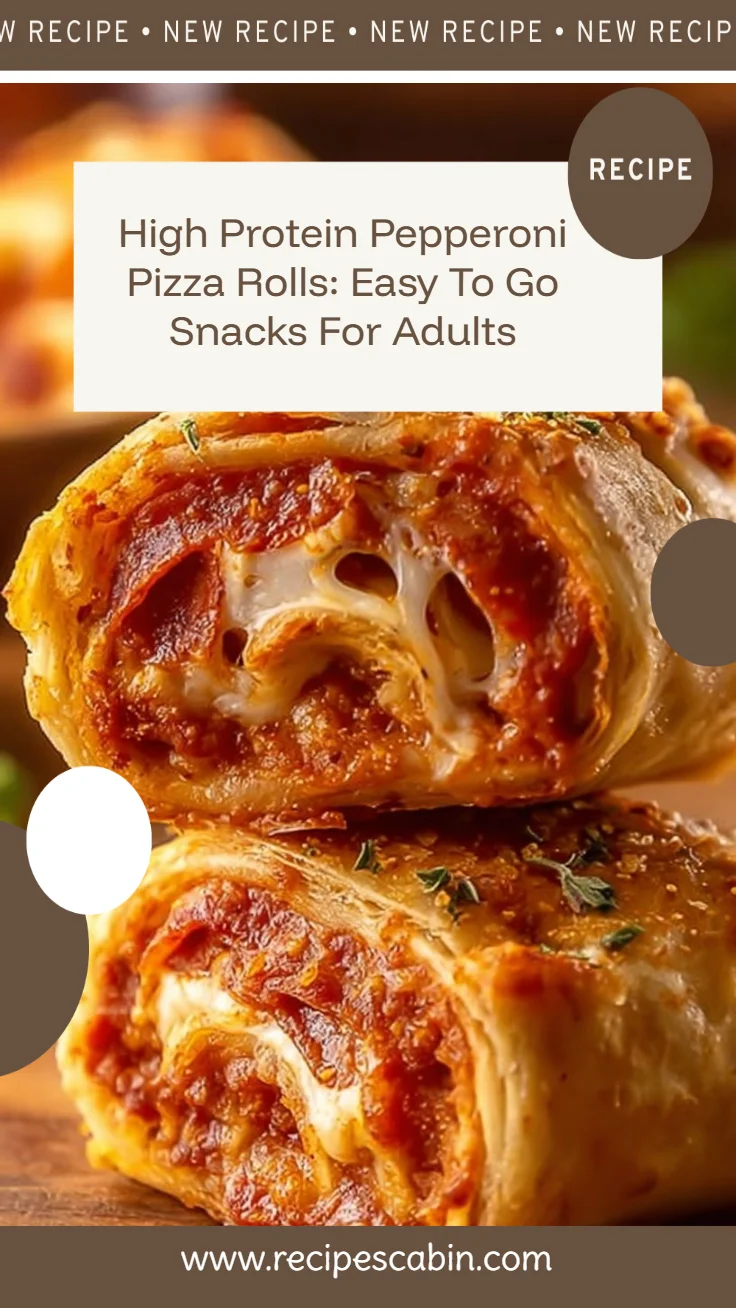
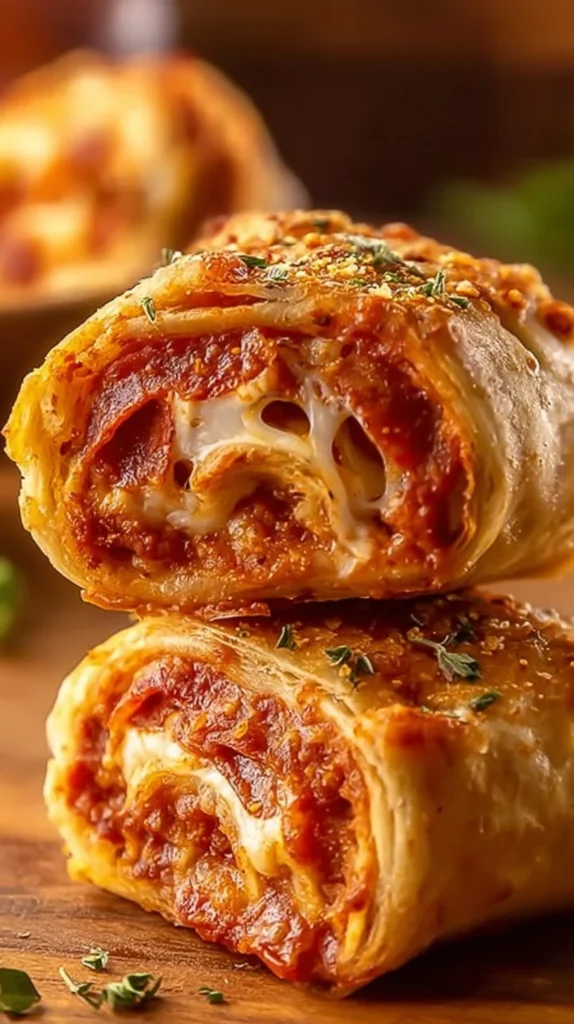
High Protein Pepperoni Pizza Rolls

I’m Sarah Collins, and if there’s one kind of recipe that tends to earn a permanent spot in a busy weeknight rotation, it’s something simple, satisfying, and easy for hands that might be juggling homework, soccer practice, or a late conference call. High Protein Pepperoni Pizza Rolls hit all those notes. They give you the familiar, comforting flavors of pizza — melty cheese, pepperoni, a touch of Parmesan and Italian seasoning — packaged into neat little pockets that are easy to hold, hard to make messy, and quick to bake.
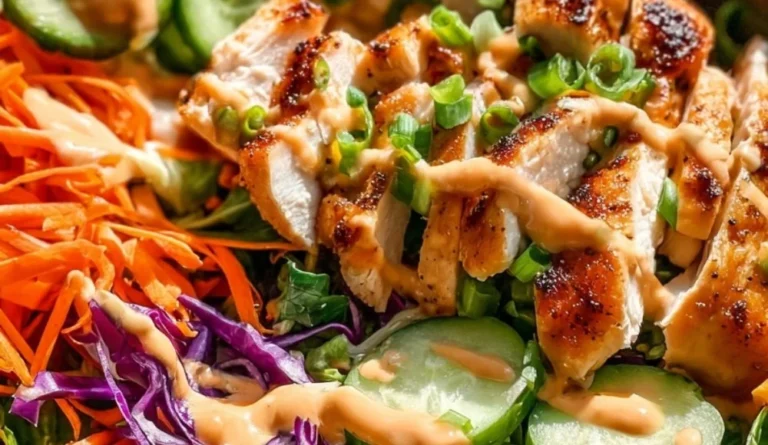
These rolls are especially useful on weeknights when you need something fast and famil y-friendly, or on weekends when little hands want to help roll and tuck. They’re also excellent for gatherings and make-ahead trays: people love a warm, handheld snack. If you like shortcuts that still taste homey, you might enjoy recipes like my easy high-protein cottage cheese pizza bowl, which follows the same idea of familiar pizza flavors in a more deconstructed, speedy format.
What makes these pizza rolls a go-to is their reliability. The steps are straightforward, the flavors are family-approved, and you can scale the batch easily. For busy parents and home cooks, that means fewer decisions at dinner time and more predictable results. I’ll walk you through the why and how in a way that keeps things calm and simple — no stress, just good food.
How to make High Protein Pepperoni Pizza Rolls
Making these rolls is very much about rhythm: prep, assemble, bake. There are three clear stages — getting your dough ready, building the little pockets, and baking — and each one has a few small, friendly rules to keep everything predictable.
Stage 1 — Prep: You’ll preheat the oven and get your work surface lightly floured so the dough doesn’t stick. This is the quick stage where you gather ingredients and set up a small assembly line: a stack of cheese, a bowl for the egg wash, the pepperoni close at hand. If you’re short on time, do the little things first — preheat, line the baking sheet — so the oven’s ready when you are.
Stage 2 — Assembly: Roll the dough and cut it into squares. Place fillings in the center, fold, and seal. Beginners should slow down here and focus on sealing the edges; a firm pinch keeps the cheese inside while baking. There’s a natural shortcut: if you’re pressed, make larger pockets instead of many small ones so assembly is faster and there are fewer seams to seal.
Stage 3 — Bake and finish: Brush with egg for that golden, glossy finish and bake until golden brown. Watch the first batch to learn how your oven behaves; 15–20 minutes is the range, but your oven might be a minute or two different. If you like the idea of similar handheld dinners, try my take on high-protein pizza hot pockets, which uses the same steps with slight shape differences.
Throughout, the goal is ease and consistency: set up, assemble calmly, bake confidently. That’s how you get a plate of warm, cheesy rolls your family will ask for again.
Ingredients
2 cups pizza dough, 1 cup mozzarella cheese, shredded, 1/2 cup pepperoni slices, 1/4 cup Parmesan cheese, grated, 1 egg (for egg wash), 1 tablespoon Italian seasoning, 1/2 cup marinara sauce (for dipping)
Plain-language explanation of what each ingredient does and why it matters:
- 2 cups pizza dough: This is the vessel. Store-bought or homemade both work; dough gives structure and a soft, golden exterior when baked. It should be cool and slightly relaxed so it rolls without snapping back.
- 1 cup mozzarella cheese, shredded: Mozzarella brings the classic stretchy, melty texture we love in pizza rolls. Shredded is faster and distributes evenly.
- 1/2 cup pepperoni slices: The flavor anchor — salty, slightly spicy, and familiar to kids and adults alike. Thin slices tuck neatly into pockets and crisp a little in the oven.
- 1/4 cup Parmesan cheese, grated: A little sharpness and savory punch that plays nicely with the mozzarella and pepperoni.
- 1 egg (for egg wash): Brushing the dough with beaten egg gives a shiny, golden finish and helps edges look appealing to both kids and dinner guests.
- 1 tablespoon Italian seasoning: A small herb lift that makes the rolls taste unmistakably “pizza” without needing extra chopping or steps.
- 1/2 cup marinara sauce (for dipping): Keeps the eating experience fun and communal — warm marinara invites dipping and stretches the flavor.
All of these are pantry-friendly and familiar, which is part of why the recipe feels so accessible in a busy household.
Directions
- Preheat the oven to 400°F (200°C)., 2. Roll out the pizza dough on a floured surface and cut it into squares., 3. Place a slice of mozzarella cheese and a few pepperoni slices in the center of each square., 4. Sprinkle some Parmesan cheese and Italian seasoning on top., 5. Fold the dough over the filling to form a pocket and seal the edges., 6. Brush the tops with beaten egg., 7. Place the rolls on a baking sheet lined with parchment paper., 8. Bake for 15-20 minutes, or until golden brown., 9. Serve warm with marinara sauce for dipping.
Friendly guidance around the steps — what to watch for and how to know you’re on track:
- Step 1: When the oven reaches the set temperature, it’s ready to give the rolls an even rise and a crisp outside. If your oven has a fan setting, you can use it, but the conventional setting works perfectly.
- Step 2: Dust your surface lightly with flour so the dough rolls easily. If it springs back, let it rest 5 minutes and try again — it relaxes and becomes easier to work with.
- Step 3–4: Think of the fillings as the pleasantly familiar center. Don’t overload each square; a modest amount of cheese and a couple of pepperoni slices keeps the pocket from bursting while still giving great flavor.
- Step 5: To seal, press firmly and, if you want, give the edges a quick fork press for an extra-tight seal. Sealing well prevents cheesy escapees in the oven.
- Step 6: Egg wash gives color and helps seasonings stick. If you need a lighter sheen, a milk brush works too, but the egg wins the golden look.
- Step 7: Lining the baking sheet with parchment prevents sticking and makes cleanup a breeze — a small time-saver for busy cooks.
- Step 8: The visual cue is the best cue: golden brown all over and the dough sounded springy when touched gently. If you have a reliable oven thermometer, you’ll get consistent results batch to batch.
- Step 9: Serve warm for maximum gooey-ness. Let the first batch sit a minute so the filling cools enough to hold, especially for little ones.
Common small mistakes to avoid: overfilling, failing to seal, and skipping the parchment. None of these are dramatic — they’re just small things that make the outcome neater and more predictable.
Why families love this dish
There’s something comforting about a handheld food that everyone recognizes: the flavors of pizza in a neat package. Kids love the finger-food aspect and the familiar combination of cheese and pepperoni; adults appreciate that it’s easy to make larger batches and to pair with a simple salad for a balanced dinner. These rolls are forgiving — if one isn’t perfectly sealed, it’s still delicious — and they travel well for school functions, potlucks, or car-side dinners during practices.
The simplicity of the seasonings keeps it approachable to picky eaters while the Parmesan and Italian seasoning give adults a little more depth. For families who rotate through the same few meals, these pizza rolls offer variety in form without asking for new ingredients or complicated techniques. If you’re experimenting with similar kid-pleasing bites, take a peek at these cheesy pepperoni pizza bombs to see another way to package the same comforting flavors.
Smart substitutions and simple variations
Keep in mind I won’t change the core ingredients or steps for you, but there are ways to tweak the experience without complicating things:
- Cheese swaps: If mozzarella is what you have, stick with it for the melt. You can mix in a little sharper cheese with the mozzarella (like a bit of cheddar) as a variation, but keep the primary cheese mild so the roll still tastes like classic pizza.
- Pepperoni alternatives: If someone in your family doesn’t eat pork, use turkey pepperoni or small slices of cooked sausage as a reliable swap. The process and timing remain the same.
- Herb lift: If you want a fresher note, add a few torn basil leaves inside before sealing or sprinkle a bit of dried oregano along with the Italian seasoning.
- Size adjustments: Make larger pockets if you’re short on time, or smaller bite-sized rolls for party platters. Larger ones may need an extra minute or two in the oven; watch for color rather than timing alone.
These changes keep the recipe reliable while accommodating preferences and pantry limitations. The goal is to make the dish family-friendly, not fussy.
Pairing ideas for a complete, satisfying meal
A few simple sides turn these pizza rolls into a balanced family meal without extra cooks or much thought:
- Quick green salad: Toss baby greens with a light vinaigrette — olive oil, lemon, salt — and you’ve got a bright counterpoint to the warm, cheesy rolls.
- Raw veggie platter: Sliced carrots, cucumbers, and bell peppers are easy dippers for kids and adults and add crunch and freshness.
- Steamed or roasted broccoli: A crowd-pleasing vegetable that pairs well with Italian flavors; roast with a little olive oil and salt while the rolls bake.
- Garlic bread alternative: Serve a very small piece of crusty bread or a buttered dinner roll if kids want more of a classic pizza night feel.
- Simple fruit: Grapes or apple slices make a sweet, hydrating finish for young palates.
A light salad and a vegetable plus the marinara for dipping is usually all you need to round out a filling, kid-approved dinner.
Make-ahead tips, leftovers, and storage
One of the things parents love about pizza rolls is their make-ahead friendliness. Here are practical ways to fit them into a busy routine:
- Assemble ahead: Make and seal the rolls, place them on the baking sheet, then cover and refrigerate for up to 24 hours before baking. This saves active time on the day you need dinner.
- Freeze for later: Arrange assembled, unbaked rolls on a parchment-lined tray and freeze until firm. Transfer to a zip-top bag and freeze for up to 2 months. Bake from frozen — add a few extra minutes to the bake time and watch for golden color.
- Leftovers: Kept in an airtight container in the fridge, leftovers stay good for 3–4 days. Reheat in a 350°F oven for 8–10 minutes to get the exterior crisp again without overcooking the filling.
- Reheating tips: Avoid microwaving for long, as it can make the dough gummy. If time is tight, a quick 30–45 second zap to warm the center followed by a minute in a hot skillet or oven will refresh the texture.
- Lunchbox uses: Cool fully, wrap in parchment, and pack with a small container of marinara for dipping. They make for a comforting, handheld lunch that’s familiar to kids.
These small storage and reheating habits keep the rolls tasting fresh and make weekday meal planning easier.
Common questions home cooks ask about this recipe
Q: How long should the dough be rolled?
A: Roll until the dough is roughly 1/8–1/4 inch thick — thin enough to fold neatly, but not so thin it tears. If it tears, patch it with a small piece of extra dough and press to seal.
Q: My rolls leak cheese. What went wrong?
A: Usually that’s from overfilling or not sealing tightly. Use a modest amount of filling and press the edges firmly. A fork press can help if you’re worried about seal integrity.
Q: Can I make them ahead and freeze?
A: Yes — freeze unbaked, arranged on a tray until firm, then transfer to a bag. Bake from frozen, adding a couple minutes to the baking time.
Q: How do I scale the recipe?
A: Double or triple the ingredients and work in batches on your countertop. Use multiple baking sheets or bake in shifts, keeping finished rolls warm in a low oven (200°F) for short periods.
Q: How will I know when they’re done?
A: Golden brown is the clearest sign. The tops should be deepened in color and the dough should sound slightly hollow when tapped.
These are practical, no-nonsense answers that help you feel confident making the recipe again and again.
Final thoughts from Sarah
I love recipes that respect a busy life — they’re simple enough to slot into a weeknight routine and still deliver that homey, comforting feeling everyone at the table recognizes. High Protein Pepperoni Pizza Rolls do just that: approachable steps, reliable techniques, and flavors that satisfy both kids and adults. Keep your mise en place, don’t rush the sealing step, and remember that a little practice smooths out the rhythm.
If you tuck this into your repertoire, you’ll find it’s one of those dishes you call on when you want a crowd-pleaser that’s easy to scale. Make a double batch for the freezer, and you’ll save yourself one frantic evening down the line. Enjoy the process, and don’t be surprised if these become a requested favorite.
Warmly,
Sarah Collins
Conclusion
If you’re looking for other takes on protein-forward pizza roll ideas, Avocado Skillet has an imaginative version to compare with these rolls at Avocado Skillet’s cottage cheese pizza rolls. For a minimalist, 7-ingredient homemade approach that still captures that pizza-roll comfort, see the recipe at Chelsey Amer Nutrition’s 7-ingredient pizza rolls. And if you want another high-protein inspiration to adapt techniques from, Chef Jack Ovens offers a useful perspective at Chef Jack Ovens’ high protein pizza rolls.
High Protein Pepperoni Pizza Rolls
Ingredients
Method
- Preheat the oven to 400°F (200°C) and lightly flour your work surface.
- Gather all ingredients and set up an assembly line.
- Roll out the pizza dough on the floured surface and cut it into squares.
- Place a slice of mozzarella cheese and a few pepperoni slices in the center of each square.
- Sprinkle some Parmesan cheese and Italian seasoning on top.
- Fold the dough over the filling to form a pocket and seal the edges.
- Brush the tops with beaten egg.
- Place the rolls on a baking sheet lined with parchment paper.
- Bake for 15-20 minutes, or until golden brown.
- Serve warm with marinara sauce for dipping.