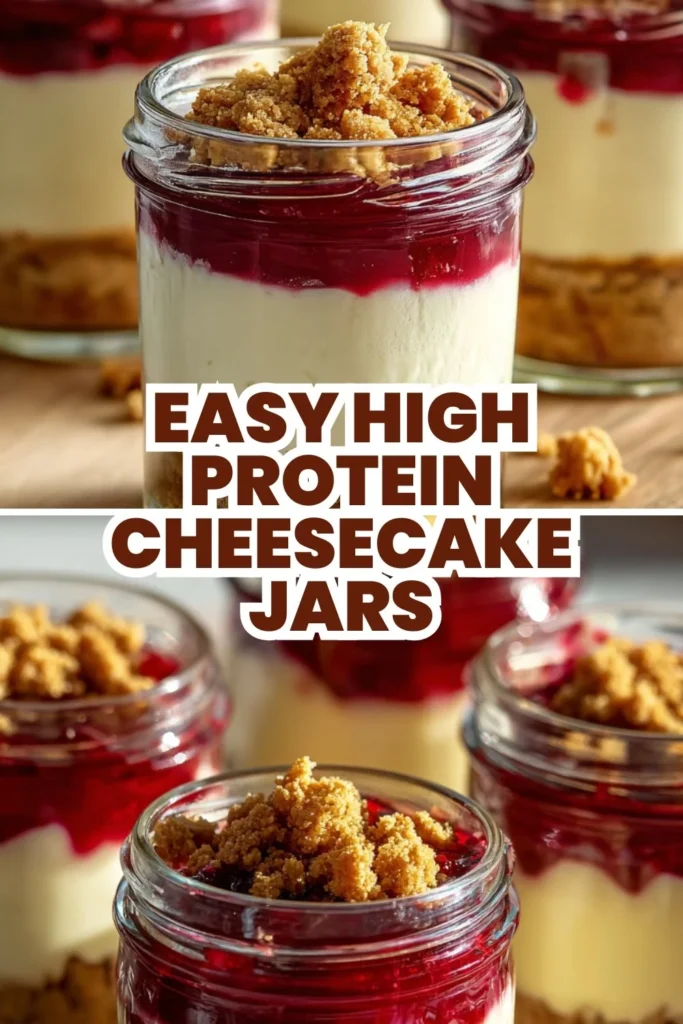
Easy High Protein Cheesecake Jars: TikTok’s Favorite Snack, but Better – Q8Rashaqa
Introduction
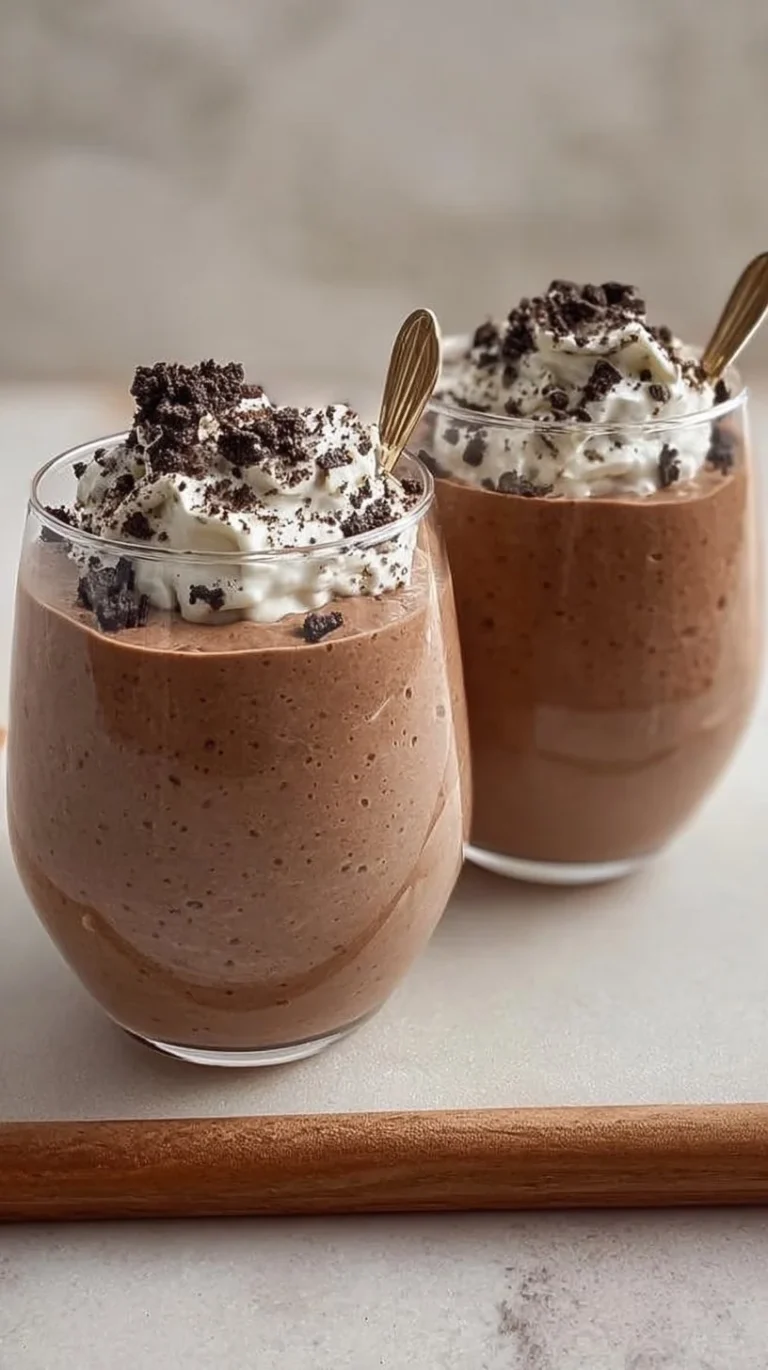
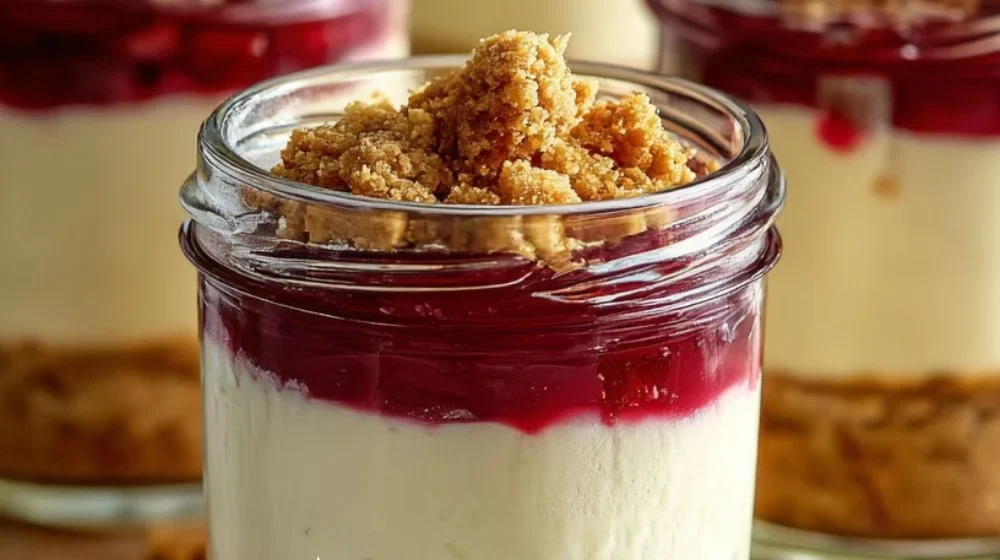
I like recipes that feel simple, sensible, and a little bit indulgent without tipping into heaviness. These Easy High Protein Cheesecake Jars — TikTok’s favorite snack, but better — are an honest example of that approach. They give you the creamy, familiar comfort of cheesecake in a compact, no-fuss format that works for mornings, quick lunches, or a light dessert after dinner.
What makes these jars useful in everyday cooking is how easily they fit into routines: they’re portion-controlled by design, require minimal equipment, and can be prepped ahead. If you appreciate make-ahead ideas, you’ll find this one as friendly as a batch of morning waffles — and if you’ve enjoyed the texture of other no-bake desserts, this sits comfortably in that family. For another no-bake take with a similar profile, I like the texture of a no-bake high-protein cheesecake fluff recipe that shares the same spirit of creamy simplicity.
I’ll walk through how this recipe works, why each ingredient plays a role, and how to keep the jars feeling light but satisfying. The goal is a reliable, repeatable snack that brightens your week without fuss.
How this recipe fits into a balanced lifestyle
This recipe supports a balanced approach to eating because it pairs a filling protein-rich base with a small, comforting sweet element. Instead of treating “light” as absence, think of it as balance: a higher-protein filling stabilizes appetite and keeps the mouthfeel rich, while a modest crust and fruit topping deliver texture and sweetness without overwhelming the portion.
It feels lighter without sacrificing flavor by relying on ingredient quality and texture contrast rather than sheer richness. The tang of cream cheese or cottage-based filling, a touch of citrus, and fresh berries all work together to make each spoonful interesting. Because these jars are single-serve, they help with portion awareness naturally, and they’re easy to slot into a weekly rotation — pack a few for snacks, split them after a heavier meal, or use them as a satisfying afternoon pick-me-up.
In a varied weekly routine, these jars pair well with savory breakfasts or simple lunches. They’re practical for meal prep days when you want a ready-to-eat sweet that still supports your energy needs. If you enjoy pairing textures, try serving one after a salad or a bowl of warm soup to round out a meal without feeling overfull.
How to make Easy High Protein Cheesecake Jars: TikTok’s Favorite Snack, but Better – Q8Rashaqa
The overall flow of the recipe is straightforward: make the crust, blend the filling until smooth and airy, assemble in jars, and chill. Where simplicity matters most is in the blending and assembly — aim for a velvety filling and tidy layers rather than complicated decoration.
Start by preparing your crumb base: a quick stir with melted butter is all that’s needed to bind crumbs together. The filling benefits from a short blitz in a blender or food processor to avoid lumps and to create some volume; that aeration gives the cheesecake a lighter mouthfeel without adding more fat. Layering is forgiving here — jars make it easy to improvise while keeping portions consistent.
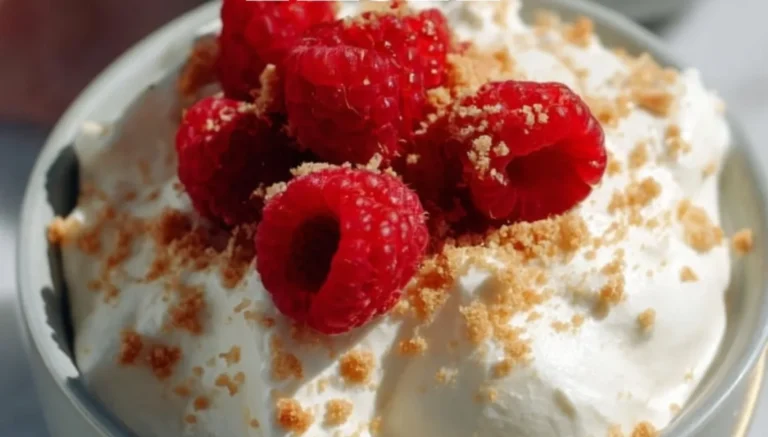
Don’t overthink the garnish. Fresh berries, a spoonful of jam, or a sprinkle of extra crumbs gives you enough contrast. Let the jars chill; that’s when the filling firms up and the flavors meld.
Ingredients
- 1 cup graham cracker crumbs or digestive biscuits, crushed
- 3 tablespoons unsalted butter, melted
- 8 ounces cream cheese, softened
- 1 cup cottage cheese
- 1 cup plain Greek yogurt
- 1/2 cup vanilla protein powder
- 1/3 cup honey or maple syrup
- 2 teaspoons vanilla extract
- 1 tablespoon lemon juice
- Pinch of salt
- Fresh berries or jam for topping
- Extra crushed biscuits or chopped nuts for garnish
Each item here is chosen to contribute to texture, flavor, or structure:
- Graham cracker crumbs and melted butter form the base that gives the jars a familiar, crunchy contrast to the creamy filling. The small amount of butter helps the crumbs hold together without making the overall jar feel oily or dense.
- Cream cheese is the backbone: it provides the classic tang and creamy mouthfeel we expect from cheesecake. Using a softened cream cheese keeps the blending step quick and smooth.
- Cottage cheese brings body and protein without adding heavy cream. When blended, it contributes creaminess and a subtle curd-like quality that feels substantial but not heavy.
- Greek yogurt lightens the mixture and adds bright tang and a spoonable, approachable texture. It also increases the protein and helps the filling stay smooth.
- Vanilla protein powder boosts the protein content and gives the filling a firmer structure once chilled. It’s an easy way to make the jars more filling without relying solely on fat.
- Honey or maple syrup is a straightforward sweetener that blends well with dairy. Because this recipe uses modest amounts, the sweetness balances the tang rather than masking it.
- Vanilla extract and lemon juice are small but meaningful flavor enhancers: vanilla rounds the profile while lemon brightens and keeps the overall taste from feeling stodgy.
- A pinch of salt sharpens the flavors in a subtle, important way.
- Fresh berries or jam add freshness, acidity, and a pop of color, and extra crumbs or nuts add crunch and texture contrast at the end.
These ingredients together create balance through combination rather than restriction: protein and dairy for satiety, a small crust for texture, and fruit for brightness.
Directions
- Combine the graham cracker crumbs (or crushed digestive biscuits) with the melted butter in a bowl until the mixture resembles damp sand. Press an even layer into the bottom of each jar to create the crust.
- In a blender or food processor, combine the softened cream cheese, cottage cheese, plain Greek yogurt, vanilla protein powder, honey (or maple syrup), vanilla extract, lemon juice, and a pinch of salt. Blend until the mixture is very smooth and slightly airier.
- Spoon the cheesecake filling over the crust in each jar, smoothing the top with the back of a spoon or an offset spatula.
- Refrigerate the jars for at least 2 hours, or overnight, to allow the filling to set and the flavors to meld.
- Before serving, top each jar with fresh berries, a spoonful of jam, and/or extra crushed crumbs or chopped nuts.
As you go through these steps, keep a few practical things in mind. When pressing the crust into jars, aim for an even thin layer; you want the crunch but not a thick, buttery base that competes with the filling. In the blending step, stop and scrape the sides once or twice to make sure everything is incorporated — this helps avoid little pockets of unblended cottage cheese.
When spooning the filling into jars, don’t over-fill. Leaving a little room at the top makes the jars easier to transport and leaves space for the garnish. Chilling is crucial: the filling firms up considerably and the texture becomes pleasantly cheesecake-like, so try not to skip that rest time.
The role of preparation in keeping this dish light
Preparation here directly influences how “light” the jars feel. Blending the filling until smooth and slightly aerated reduces perceived density: tiny air bubbles make the texture feel less heavy on the palate. Choosing a modest crust and using cottage cheese and Greek yogurt to stretch the cream cheese reduces overall richness without sacrificing that classic tang.
Technique matters. For example, using a food processor or high-speed blender makes the cottage cheese negligible in texture — if you skip that step, you’ll get a chunkier result that feels denser. Pressing the crust gently (not compacting it) keeps it crumbly rather than brick-like. And chilling — while sometimes overlooked — is the moment the recipe comes together; it allows the protein powder and dairy to set so each bite has structure without being cloying.
Small choices make a difference: a smaller amount of butter in the crust, a spoonful of jam instead of a thick syrup, and fresh fruit in place of sugary toppings all maintain satisfaction while keeping the jars feeling balanced.
Simple ways to adjust without losing balance
You can tweak this recipe while keeping the same balanced intent. Swap the graham cracker crumbs for crushed whole-grain cereal or nut-based crumbs to change the texture and add complexity. Use a flavored protein powder (like vanilla bean or mild chocolate) to shift the flavor profile without additional sugar. If you prefer a tangier filling, increase the lemon juice slightly — a little goes a long way.
Keep modifications flavor-forward rather than calorie-forward. For instance, fold in a small amount of citrus zest to brighten flavor, or add a teaspoon of instant espresso powder to the crust crumbs for depth. If you want a dairy-free adaptation conceptually, think about using a plant-based yogurt and a neutral plant-based cream alternative (note: this will change texture and set), but avoid heavy substitutions that would alter the recipe’s intention.
For a brunch-friendly presentation, layer a little granola between the filling and the fruit for crunch. Or, if you’re serving these at a casual gathering, let guests choose a topping bar with berries, nut butter drizzles, and chopped nuts — the core recipe stays the same, and each person can balance sweetness to taste. If you like to pair desserts with other protein-forward recipes, try these jars alongside a batch of homemade protein waffles for a rounded, texture-rich spread.
Remember: these suggestions are conceptual. Don’t change the core steps or the ingredient proportions if you want the same dependable texture and set.
Pairing ideas for a complete, well-rounded meal
These jars work well on their own or as part of a composed plate. For a light breakfast, pair one jar with a small omelet or scrambled eggs and a piece of fruit. The jars’ protein content complements eggs and keeps the meal interesting. For a lunch or snack approach, serve a jar beside a simple green salad with a bright vinaigrette; the contrast of savory and tangy salad with creamy, sweet cheesecake is satisfying.
If you’re serving as dessert after a vegetable-forward dinner, a jar alongside a small espresso or herbal tea feels proportionate. For a brunch spread, include the jars with whole-grain toast, nut butter, and fresh fruit to give guests options without pushing portions too far.
Think about textures when you pair: something crisp (toasted seeds, a small slice of apple) or a savory element (smoked salmon on whole-grain crackers) can make the jars feel part of a broader, balanced menu rather than the only sweet item on the table.
Storage, leftovers, and next-day enjoyment
These jars store well in the refrigerator for 3–4 days. Keep them sealed with lids or plastic wrap to avoid absorbing other fridge aromas. If you make a larger batch, store garnishes separately and add fresh fruit just before serving; fruit can release moisture over time which will change the texture of the top layer.
Freezing is possible but not ideal for texture — the creamy filling may become grainy once thawed. If you do freeze, expect a change in mouthfeel and allow plenty of time to thaw in the fridge.
To refresh a jar that feels a bit firmer after chilling, remove it from the fridge about 10–15 minutes before serving so it softens slightly. If the crust has lost some crunch, sprinkle a few extra fresh crumbs or toasted nuts on top to restore contrast.
Common questions about lighter everyday cooking
- How much is an appropriate portion? These jars are designed as single servings. A standard 4–8 ounce jar portion gives you a satisfying amount without encouraging mindless over-eating. If you’re adding sides, keep them light and complementary.
- How do I avoid repetition in weekly meal prep? Change your toppings and accompaniments. Fresh berries one day, a spoonful of citrus curd another, or a sprinkle of toasted walnuts provides variety without altering the base.
- Can I double the recipe for guests? Yes — scale the ingredients and use a larger container for an assembled trifle-style dessert or keep them in jars for individual servings. Allow extra chilling time if you increase volume.
- How do I keep lighter meals satisfying? Combine protein with a small amount of fat and something texturally contrasting. This recipe does that naturally: protein-rich filling, a bit of butter in the crust, and fresh, bright fruit on top.
Final thoughts from Daniel
Cooking intuitively means learning which small choices make a big difference in how a dish feels. These Easy High Protein Cheesecake Jars do that: a little technique in the blender, modest crust, and fresh topping turn familiar flavors into a balanced, everyday treat. They’re reliable, simple to scale, and forgiving — which is exactly the kind of recipe I lean on when I want something that feels both lighter and satisfying.
Conclusion
If you want to explore similar flavor ideas that use cottage cheese and no-bake formats, I find the No-Bake Cottage Cheese Brownie Batter Protein Bites – Q8Rashaqa to be a clever snack that follows the same practical spirit. For a baked alternative that leans into the same dairy-forward, balanced approach, check out this Cottage Cheese Banana Bread, which demonstrates how simple swaps can keep flavor and satisfaction at the center of everyday cooking.
Easy High Protein Cheesecake Jars
Ingredients
Method
- Combine the graham cracker crumbs (or crushed digestive biscuits) with the melted butter in a bowl until the mixture resembles damp sand.
- Press an even layer into the bottom of each jar to create the crust.
- In a blender or food processor, combine the softened cream cheese, cottage cheese, plain Greek yogurt, vanilla protein powder, honey (or maple syrup), vanilla extract, lemon juice, and a pinch of salt.
- Blend until the mixture is very smooth and slightly airier.
- Spoon the cheesecake filling over the crust in each jar, smoothing the top with the back of a spoon or an offset spatula.
- Refrigerate the jars for at least 2 hours, or overnight, to allow the filling to set and the flavors to meld.
- Before serving, top each jar with fresh berries, a spoonful of jam, and/or extra crushed crumbs or chopped nuts.