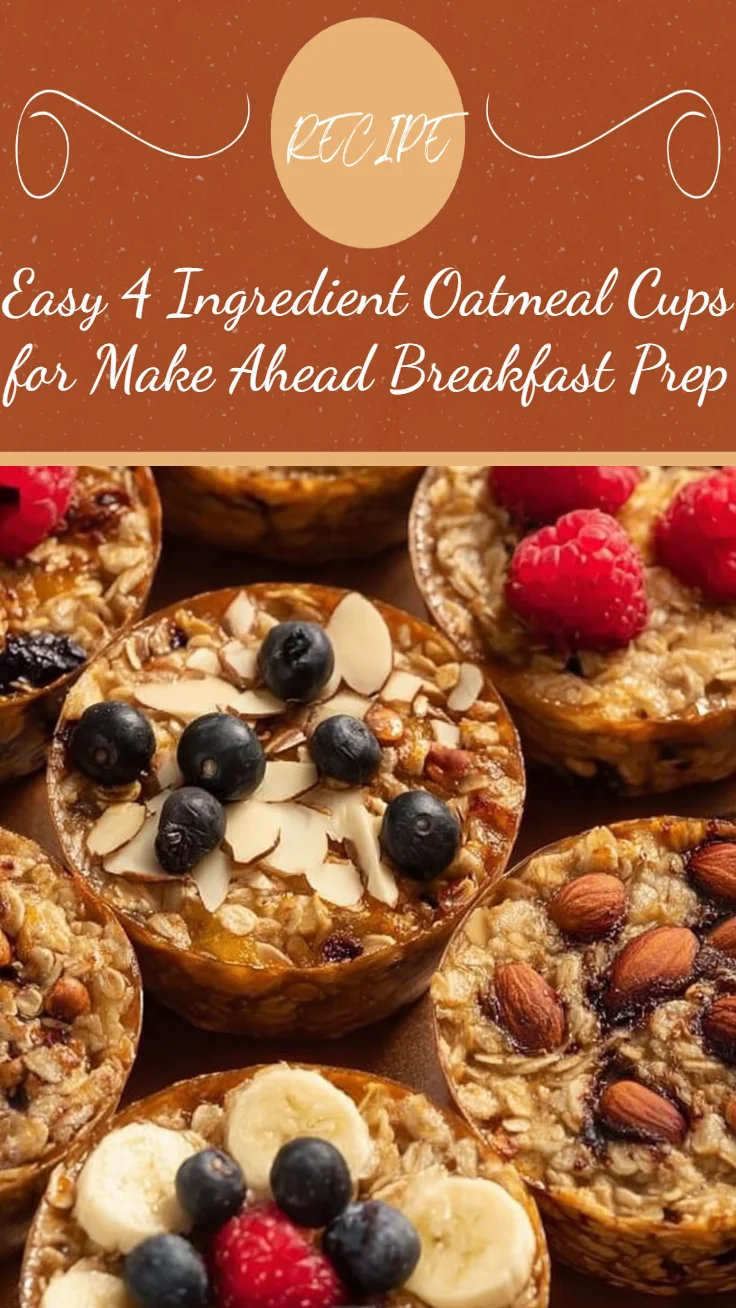
Easy 4 Ingredient Oatmeal Cups

This Easy 4 Ingredient Oatmeal Cups recipe is one of those quiet, reliable options I reach for when I want breakfast or a snack that feels thoughtful without a lot of fuss. It’s built from pantry-stable basics — oats, bananas, milk, and vanilla — and turns into portioned cups that are easy to grab, warm, or tuck into your bag. They land comfortably between something light and something filling: substantial enough to steady your morning, but not overly dense or heavy.
What I appreciate most about this recipe is how practical it is. There’s no special equipment, no long list of components, and very little hands-on time. That makes it perfect for weeknight prep, for batch-making on a Sunday, or for keeping in rotation as a simple lunchbox item. For anyone looking for meals that feel lighter yet still comforting, these oatmeal cups hit the balance: familiar flavor, uncomplicated texture, and an adaptable base that plays nicely with your routine.
How this recipe fits into a balanced lifestyle
These oatmeal cups are designed around moderation and usability. A couple of cups alongside fresh fruit and a spoonful of yogurt can make a satisfying breakfast. One cup paired with a piece of fruit and a handful of nuts makes a well-rounded afternoon snack. The idea isn’t to be restrictive; it’s to offer a reliable, portioned option that supports your day without demanding much cognitive load in the kitchen.
They feel lighter for a few simple reasons: the base is mostly whole grains and fruit, which give fiber and natural sweetness without relying on added sugars or heavy fats. The milk adds creaminess and a touch of protein for sustained energy, while vanilla lifts the flavor so each bite feels rounded. Because the recipe yields individual cups, portion control happens naturally without the need for measuring each time you eat.
This fits into a varied weekly routine because it’s neutral and forgiving. One day you may warm a cup and top it with nut butter and sliced banana; another day you might crumble a cup over berries with a spoonful of ricotta. Eating the same base several times a week doesn’t have to feel monotonous when the approach is flexible and flavor-forward.
How to make Easy 4 Ingredient Oatmeal Cups
At their core, these oatmeal cups follow a simple flow: combine, portion, bake, and cool. That’s it. The simplicity is intentional — it’s where the recipe does the heavy lifting for you. Mix the mashed bananas with oats and milk, add a splash of vanilla, portion into muffin liners, and let the oven do the rest.
Simplicity matters most in two places: the mixing and the baking. When you mix, you’re aiming for an evenly moistened batter so each cup bakes uniformly. When you bake, you’re watching for gentle browning at the edges rather than a dark crust; that keeps them tender and not dry. Approach the recipe without overthinking substitutions or extra steps. Follow the basic rhythm, and then tweak how you serve them.
Treat the process as a short ritual rather than a chore. A few minutes of mashing and stirring, a half hour of baking and cooling, and you have several ready-to-eat portions. That predictability makes it easy to fit into weekly prep sessions or to assemble quickly when time is limited.
Ingredients
2 cups rolled oats, 2 ripe bananas, mashed, 1 cup milk (or a dairy-free alternative), 1 tsp vanilla extract
Each of these ingredients plays a clear, practical role:
2 cups rolled oats: The oats are the structural base. Rolled oats absorb liquid, soften in the oven, and create the familiar slightly chewy texture that makes these cups satisfying. Oats are a whole grain that give bulk and keep the mouthfeel pleasant without heaviness.
2 ripe bananas, mashed: Bananas do double duty as both sweetener and binder. When mashed, they distribute natural sugars and moisture throughout the mix, which reduces the need for added sweeteners. Ripe bananas also contribute a comforting flavor depth that complements the oats.
1 cup milk (or a dairy-free alternative): Milk adds creaminess and helps hydrate the oats so the cups bake into a tender interior instead of a dry crumb. Using a dairy-free milk substitute works just as well; the choice simply affects subtle flavor and mouthfeel rather than the recipe’s structure.
1 tsp vanilla extract: Vanilla is a small but impactful ingredient. It rounds the flavors and makes the overall profile taste finished. That little bit of aromatics goes a long way in keeping a simple four-ingredient dish from tasting one-dimensional.
This recipe is a reminder that balance is often achieved through thoughtful combinations rather than strict restrictions. Each ingredient has a purpose that contributes to texture, flavor, or both. When you keep the component list short and intentional, it’s easier to produce consistent results that feel lighter and more natural.
Directions
- Preheat your oven to 350°F (175°C) and line a muffin tin with paper liners., 2. In a mixing bowl, combine the rolled oats, mashed bananas, milk, and vanilla extract. Mix until well combined., 3. Divide the mixture evenly among the muffin tin slots, filling each about 3/4 full., 4. Bake in the preheated oven for 15-20 minutes, or until the edges are golden., 5. Allow to cool slightly before removing from the tin., 6. Serve warm or allow to cool completely and store in the refrigerator or freezer.
Around these steps, here’s what I look for and how to keep things uncluttered:
Step 1: Preheat and line. Preheating is important because a consistent oven temperature helps the cups rise and set evenly. Paper liners make for easy removal and cleaner storage. If you prefer, a light spray of oil in the tin works too, but liners are fuss-free.
Step 2: Combine. Mash the bananas until fairly smooth; you want enough texture to be pleasing but not so many big lumps that the oats won’t hydrate evenly. Stir until you don’t see dry pockets of oats. The mixture should be sticky and moist — not soupy.
Step 3: Portion. Filling each slot about three-quarters full gives the cups room to puff slightly without overflowing. Use a small scoop or two spoons to portion evenly; consistent portions result in consistent bake times.
Step 4: Bake. Watch for golden edges rather than a deep brown top. The centers will firm up as they cool, so avoid overbaking in the hope of crispness. Fifteen to twenty minutes is usually the sweet spot; if your oven runs hot, check at the lower end.
Step 5: Cool. Letting them sit for a few minutes in the tin before removing helps them hold together. If you try to unmold them too soon, they can be softer and tear.
Step 6: Serve or store. These work warm right from the oven or chilled later in the week. If freezing, cool completely first, then wrap or store in freezer-safe containers for quick reheating.
Keep the process straightforward. The more you try to manipulate the texture mid-bake, the more likely you are to overcomplicate things. Trust the recipe and focus on even mixing and modest browning.
The role of preparation in keeping this dish light
Preparation techniques subtly shape how “heavy” a dish feels. With these oatmeal cups, a few mindful choices help them stay light and satisfying:
Gentle hydration: Using an appropriate ratio of milk to oats prevents a dry, dense result. Proper hydration gives a tender bite without making the cups gummy. Letting them cool slightly allows the structure to set, which keeps them from feeling weighty.
Minimal added fats: This recipe deliberately avoids added oils or butters. That keeps the mouthfeel clean and lets the banana’s natural creaminess do the work. When you want richness later, adding a small topping at the time of eating (a teaspoon of nut butter, a dollop of yogurt) gives control without loading the whole batch.
Even mixing: Making sure oats are fully moistened ensures consistent texture across all cups. Pockets of dry oats can make individual bites feel chalky or heavy, which works against the goal of lightness.
Portioning: Baking individual cups naturally controls portion size. That’s a practical way to keep servings balanced without measuring each time you eat. Individual portions also make it easier to combine with lighter sides — fruit, yogurt, or a small salad — to create a complete meal that’s not too much.
Technique matters as much as ingredients. A modest roast in the oven, careful timing, and cooling all help the finished product feel fresh rather than dense.
Simple ways to adjust without losing balance
You can personalize these oatmeal cups without straying from the spirit of the recipe. Here are some ideas that tweak flavor and texture while keeping things light:
Add a handful of warm spices at mixing (cinnamon, cardamom, or a pinch of nutmeg). Spices increase flavor depth without extra calories or heaviness.
Stir in a small amount of grated apple or pear for moisture and natural sweetness. Fruit adds interest and a pleasant variation in texture.
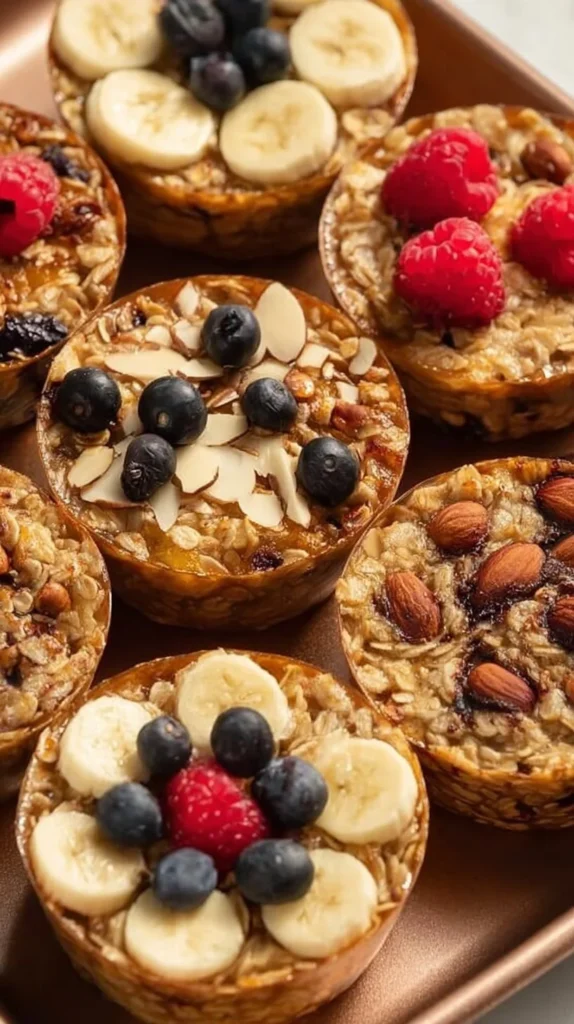
Fold in a tablespoon or two of chopped nuts or seeds after mixing for crunch. Keep the additions modest to avoid changing the portion’s balance.
At serving, top with fresh berries, a spoonful of plain yogurt, or a thin smear of nut butter. These toppings let you vary the experience without altering the base recipe.
All of these are conceptual tweaks; they don’t change the ingredient list or steps for the original recipe. Instead, they offer ways to layer flavor and texture while keeping portion control and ingredient quality at the center.
Pairing ideas for a complete, well-rounded meal
One of the strengths of these oatmeal cups is how naturally they integrate into a balanced plate. Here are pairing ideas that are light, flavorful, and satisfying:
Breakfast duo: Warm an oatmeal cup and pair it with a small bowl of Greek yogurt and a scattering of fresh berries. The yogurt brings creaminess and protein; the berries provide brightness and acidity.
Snack plate: One chilled oatmeal cup alongside a sliced apple and a few almonds offers sweetness, crunch, and a little protein — an easy mid-afternoon reset.
Light lunch: Crumble a cup over a bowl of mixed greens, add roasted chickpeas and a lemon-tahini drizzle for a grain-forward salad that’s still on the lighter side.
Sweet but simple dessert: Warm a cup and top with a spoonful of ricotta and a drizzle of honey for a comforting, portion-controlled treat.
The goal with pairings is to introduce complementary textures (creamy, crunchy, fresh) and to add protein or acidity to balance the oat’s natural sweetness. That keeps meals feeling complete without piling on extra heaviness.
Storage, leftovers, and next-day enjoyment
These oatmeal cups are forgiving in storage, which is part of what makes them practical:
Refrigeration: Store in an airtight container for up to 4–5 days. They stay pleasant and can be eaten cold or reheated.
Freezing: Cool completely, then freeze in a single layer on a tray before transferring to a freezer-safe bag or container. Frozen cups keep well for up to 2–3 months. Thaw in the refrigerator overnight or reheat from frozen with a few minutes in a microwave or oven.
Reheating: For a softer, just-baked feel, reheat in the oven at 300°F (about 150°C) for 8–10 minutes, or microwave for 30–60 seconds depending on your appliance. Add a splash of milk or a dollop of yogurt to restore moisture if needed.
When planning ahead, make batches you can mix up in how you serve them. Fresh fruit or a little nut butter at serving time keeps each meal varied and prevents “leftover fatigue.”
Common questions about lighter everyday cooking
Q: How many cups should I eat for a meal?
A: It depends on your appetite and what you pair them with. One cup with fruit and a small protein source (yogurt, cheese, nuts) is often a balanced breakfast. For a heartier meal, two cups plus a protein or vegetable side can be satisfying.
Q: Can I make these ahead for the week?
A: Yes. They’re ideal for batch prep. Make a batch, refrigerate what you’ll eat within a few days, and freeze the rest. Portioning in silicone muffin liners or paper liners makes them easy to grab.
Q: Will repeating the same base feel boring?
A: Not if you vary toppings and pairings. Changing textures and temperatures — warm with nut butter one day, cold with fresh fruit the next — keeps the experience fresh. Small swaps like a different spice or fruit can make the same base feel new.
Q: How do I make lighter meals feel more satisfying overall?
A: Focus on a balance of textures and include a small protein or fat at each meal. That’s more about how you compose the plate than making the recipe itself heavier. A modest portion of nuts, a spoonful of yogurt, or an egg on the side can make a lighter dish feel complete.
Final thoughts from Daniel
I like this recipe because it honors two practical principles: keep the base simple, and keep serving intentional. It’s easy to make, easy to store, and easy to eat in a way that supports daily energy and enjoyment. Cooking intuitively — trusting basic ratios and focusing on flavor and texture rather than strict rules — makes staying consistent feel realistic.
If you’re looking for something reliable that won’t crowd your meal plan, this recipe is a great candidate for regular rotation. It’s forgiving, adaptable, and subtly nourishing. Give it a few tries, play with how you serve it, and you may find it becomes a quiet, helpful anchor in your weekly routine.
Conclusion
If you want to see another version of a simple baked oatmeal cup, take a look at Recipe Rebel’s Easy 4 Ingredient Baked Oatmeal Cups for more context and photos. For ideas that use a no-bake approach and chocolate-peanut flavor, check out Beaming Baker’s 4 Ingredient No Bake Chocolate Peanut Butter Oatmeal Cups. If you prefer a recipe focused on simple peanut butter and oats without baking, consider The Balanced Nutritionist’s No Bake Peanut Butter Oat Cups (4 Ingredients!) for another minimalist take. For an additional no-bake peanut butter oat cup variation, see Dani’s Healthy Eats No-bake peanut butter oat cups.
— Daniel Brooks
Easy 4 Ingredient Oatmeal Cups
Ingredients
Method
- Preheat your oven to 350°F (175°C) and line a muffin tin with paper liners.
- In a mixing bowl, combine the rolled oats, mashed bananas, milk, and vanilla extract. Mix until well combined.
- Divide the mixture evenly among the muffin tin slots, filling each about 3/4 full.
- Bake in the preheated oven for 15-20 minutes, or until the edges are golden.
- Allow to cool slightly before removing from the tin.
- Serve warm or allow to cool completely and store in the refrigerator or freezer.