Air Fryer Bread in 30 Minutes

Introduction
This Air Fryer Bread in 30 Minutes is one of those small, steady wins I come back to when I want something that feels homemade without a big time investment. It’s a straightforward loaf — simple dough, a short rest, and a quick turn in the air fryer — but it yields a warm, tender bread that works for so many everyday meals. For people who want food that’s balanced and practical, this is a good example: it’s not trying to impress with complexity, it’s focused on reliable texture, honest flavor, and the comfort of freshly baked bread.
I use this recipe on weeknights when I need a neutral, satisfying carbohydrate to round out a meal, or on slow mornings when toast and a jar of jam feel like a small ritual. It’s also a great repeat recipe because the technique is consistent and forgiving — you’ll learn how your air fryer and hands like to treat the dough, and that familiarity makes it easy to return to. If you enjoy the idea of quick home baking alongside other everyday dinners, you might also like exploring simple accompaniments from my broader collection of dependable dishes in the dinner recipe collection.
How this recipe fits into a balanced lifestyle
This bread earns its place in a balanced routine by being adaptable rather than prescriptive. It’s not a heavy, butter-soaked loaf; it’s a modest, single-loaf bread that comes together with pantry basics. Because it’s small and quick, it encourages portion awareness naturally — you bake what you need and avoid having a full, bakery-sized loaf lingering for days. That contributes to a sense of balance without any need for restriction.
The recipe keeps things light by design: minimal fat, a modest amount of sugar, and a quick bake in the air fryer that produces a thin, crisp crust and a tender interior. That contrast in textures — crisp outside, soft inside — helps the bread feel satisfying without requiring dense crumb or a lot of butter to make it enjoyable. When you pair a slice with lean proteins, fresh vegetables, or a light spread, the meal stays feeling both nourishing and approachable.
If you find yourself rotating similar simple dishes through the week, this sort of recipe helps maintain variety without extra effort. It’s easy to make a few loaves on different nights, change what you serve with them, or turn leftover slices into sandwiches or croutons. For more ideas on how this kind of bread pairs with straightforward dinners, check some complementary recipes in my regular weeknight dinner recipes collection.
How to make Air Fryer Bread in 30 Minutes
The overall flow of this recipe is one of short, intentional steps: mix, knead briefly, rest, shape, and air-fry. Simplicity matters most in how you approach the dough — be gentle but deliberate, and trust the short resting time to do its work. You don’t need a stand mixer or special ingredients; a bowl, a spoon, a clean countertop, and your hands are sufficient.
Start by combining the dry ingredients, then add the water and oil and mix just until the dough comes together. The kneading stage is important but short — about five minutes — which helps develop enough gluten for structure without making the loaf heavy. The quick 10–15 minute rest is not the same as a long, traditional rise; it’s a practical compromise that gives the dough a little lift and improves texture while keeping the total time under 30 minutes.
When shaping, keep the loaf compact so it fits comfortably in your air fryer basket. The air fryer bakes differently than an oven: the circulating air sets the crust rapidly, so the crumb stays tender even with a relatively short bake. Pay attention to color and a hollow sound when you tap the loaf — those are the signs the bread is done. If you want to keep things simple and reliable, think of the recipe as a template you follow closely until you get a sense of how your equipment responds.
If you’re interested in pairing this bread with main dishes or building small meals around it, I often turn to quick, balanced accompaniments I keep handy in my collection of practical dinner ideas at simple dinner ideas.
Ingredients
1 cup all-purpose flour, 1 teaspoon instant yeast, ¼ teaspoon salt, ½ teaspoon sugar, ½ cup warm water (about 110°F), 1 tablespoon olive oil
Each ingredient has a clear role here:
- 1 cup all-purpose flour: This is the structural foundation. All-purpose flour gives a tender but sturdy crumb that’s familiar and versatile.
- 1 teaspoon instant yeast: Instant yeast is chosen for convenience and speed — it mixes directly into dry ingredients and gives a reliable quick rise in this short recipe.
- ¼ teaspoon salt: Salt amplifies flavor and strengthens the dough’s structure by tightening the gluten network a bit, which helps with chew and crumb.
- ½ teaspoon sugar: A touch of sugar feeds the yeast and helps with browning, giving the crust a pleasant golden color without sweetness overpowering the loaf.
- ½ cup warm water (about 110°F): The water hydrates the flour and wakes the yeast. The temperature is warm but not hot to preserve yeast activity.
- 1 tablespoon olive oil: Olive oil adds a subtle richness and helps keep the crumb tender while contributing to a pleasant, lightly savory flavor.
These are purposeful, minimal choices. The balance comes from combining small amounts of each element so the bread is flavorful, textured, and satisfying without relying on large quantities of fat or sugar. Making simple, mindful ingredient choices like this keeps the result feeling clean and approachable — the kind of bread that complements meals rather than overwhelming them.
Directions
In a mixing bowl, combine the flour, instant yeast, salt, and sugar. Stir in the warm water and olive oil until a shaggy dough forms., Knead the dough on a lightly floured surface for about 5 minutes until smooth and elastic. Cover with a clean towel and let it rest for 10 to 15 minutes to allow a quick rise., After resting, shape the dough into a round loaf or small oval, depending on the size of your air fryer basket. Line the basket with parchment paper or lightly grease it, then place the dough inside., Set the air fryer to 330°F and bake the bread for 15 to 18 minutes, or until the top is golden and the loaf sounds hollow when tapped., Remove from the air fryer and let cool for a few minutes before slicing.
Supportive guidance around the steps:
- Mixing: Aim for a shaggy dough that holds together without being dry — it should be slightly tacky at first. Don’t overcomplicate this stage; mix until combined, then move to kneading.
- Kneading: Five minutes of hand kneading is typically enough here. You’re developing structure rather than a dense crumb. If your dough feels very sticky, dust your hands and the surface lightly; if it’s too dry, add a teaspoon of water at a time.
- Resting: Ten to fifteen minutes is a quick rest, not a long fermentation. This gives the dough a little lift and makes shaping easier. Keep it covered so the surface doesn’t dry out.
- Shaping and air-frying: Shape to fit the basket — a snug oval or round loaf bakes more evenly. The air fryer works fast; the color on top and the hollow tap are reliable finish cues. If the top browns too quickly in your air fryer, lower the temperature by 10–15°F or tent with a small piece of foil in the last minutes.
- Cooling: Letting the loaf rest a few minutes before slicing keeps the crumb from becoming gummy and makes slicing cleaner.
These are small, practical checks that keep the process calm and reliable. The recipe’s simplicity is its strength: precise enough to deliver good results, forgiving enough for everyday cooking.
The role of preparation in keeping this dish light
Lightness in a meal often comes from technique as much as ingredients. Here, the air fryer’s rapid circulation produces a thin, crisp exterior while leaving the interior tender. That contrast gives the impression of a substantial bite without requiring heavy fats or long proofing time that can create denser loaves.
Short, purposeful kneading and a brief rest reduce the bread’s density while still building enough gluten for structure. Overworking or overproofing could yield a heavier crumb, while underworking can make the texture loose and uneven. The balance is in hitting the middle ground: enough technique to make the bread satisfying without turning the process into a full baking project.
Small choices — using warm water instead of hot, shaping the loaf to fit the basket, monitoring the color rather than strictly the time — influence the final result more than adding extra ingredients. The method is intentionally modest so the bread supports a lighter-feeling meal rather than dominating it.
Simple ways to adjust without losing balance
You can make minor adjustments that shift flavor and texture while keeping the recipe’s light spirit:
- Flavor accents: A teaspoon of herbed salt or a teaspoon of finely chopped rosemary folded into the dough adds aroma without adding heaviness.
- Texture tweaks: Brushing the top with a little olive oil before baking gives a slightly crisper crust and more sheen.
- Size and shape: Make smaller rolls instead of one loaf for portion control, or form a longer oval for slicing into sandwich-friendly pieces. Be mindful that smaller pieces will bake faster.
- Serving options: Toasting a slice and topping it with ricotta and lemon zest or a smear of chickpea mash emphasizes freshness and makes the meal feel bright.
These concepts keep the core recipe intact — no new steps or ingredients beyond how you use what’s already there — and let you personalize the loaf for different meals or occasions.
Pairing ideas for a complete, well-rounded meal
This bread works well as a background player that supports a variety of light, balanced meals:
- Soup and salad: A warm slice alongside a simple vegetable soup and a crisp salad creates a nourishing, balanced plate.
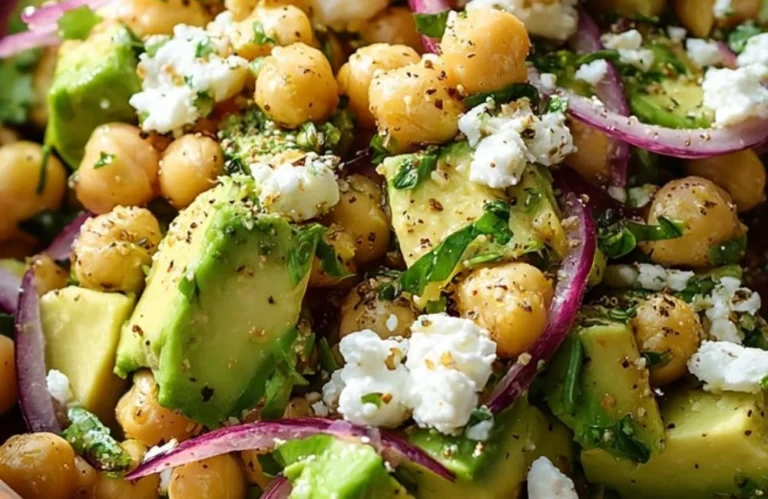
- Open-faced toasts: Top toasted slices with mashed avocado, a squeeze of lemon, and black pepper for a light brunch or lunch.
- Protein-comfort combo: Pair with grilled fish or roasted chicken and a side of sautéed greens to keep the meal satisfying without heaviness.
- Simple spreads: A thin smear of olive oil with a sprinkle of sea salt, or a modest serving of hummus and fresh cucumber, keeps things fresh and flavorful.
Aim for contrast: creamy or silky components with crisp, fresh vegetables and the light chew of the bread. That combination offers satisfaction through variety rather than sheer quantity.
Storage, leftovers, and next-day enjoyment
Because this is a small loaf, it’s naturally suited to short-term enjoyment. Store at room temperature in a paper bag or loosely wrapped cloth for a day to keep the crust from softening too much. If you plan to keep it longer, slice and freeze for up to a month; thaw slices at room temperature or toast directly from frozen.
Reheating in the air fryer for a minute or two at a low temperature restores some crispness without drying the crumb. Alternatively, a quick toast or a skillet warm-through can revive flavor and texture. If the loaf becomes slightly stale, use the slices to make croutons or breadcrumbs — that’s an efficient way to avoid waste and add fresh crunch to salads or soups.
Common questions about lighter everyday cooking
Q: How do I balance portion sizes without feeling deprived?
A: Choose reasonable slice sizes and pair the bread with protein, vegetables, and a bit of healthy fat. That combination keeps meals satiating while preventing over-reliance on the bread as the main component.
Q: Can I repeat this recipe frequently without boredom?
A: Yes — rotate toppings, pairings, and small mix-ins (like herbs) to keep it interesting. Changing what you serve with the bread has a big impact on how the meal feels.
Q: How does this fit into meal planning?
A: Make one or two loaves during the week and plan meals around them: sandwiches for lunch, toast for breakfast, or a side for dinner. Small, repeatable recipes like this are building blocks for varied, comfortable weekly menus.
Q: What if I don’t have an air fryer?
A: The method is designed for an air fryer, but many home bakers follow similar dough steps for a small oven loaf. Be mindful that oven times and texture will differ; the air fryer’s quick circulation is part of why this loaf stays light.
Final thoughts from Daniel
This Air Fryer Bread in 30 Minutes is a practical reminder that satisfying, homemade food doesn’t need to be complicated. With a few mindful choices — a small ingredient list, intentional technique, and thoughtful pairings — you can bring fresh-baked bread to the table in a way that supports day-to-day balance. It’s the kind of recipe I turn to when I want predictable, pleasant results that fit into an ordinary week without fuss.
Cooking like this encourages a calm, steady approach: give the dough the simple attention it needs, tune into your equipment, and let the bread play a supportive role on your plate. That balance — not too elaborate, not too plain — is what keeps recipes useful over time.
Conclusion
If you want to see another simple air-fryer mini loaf that follows the same spirit of quick, approachable baking, check out this Really Easy Air Fryer Banana Bread (Mini Loaf!) – Scrummy Lane for inspiration and variation.

Air Fryer Bread
Ingredients
Method
- In a mixing bowl, combine the flour, instant yeast, salt, and sugar.
- Stir in the warm water and olive oil until a shaggy dough forms.
- Knead the dough on a lightly floured surface for about 5 minutes until smooth and elastic.
- Cover with a clean towel and let it rest for 10 to 15 minutes.
- After resting, shape the dough into a round loaf or small oval.
- Line the air fryer basket with parchment paper or lightly grease it, then place the dough inside.
- Set the air fryer to 330°F and bake for 15 to 18 minutes.
- Remove from the air fryer and let cool for a few minutes before slicing.