Easter Treat
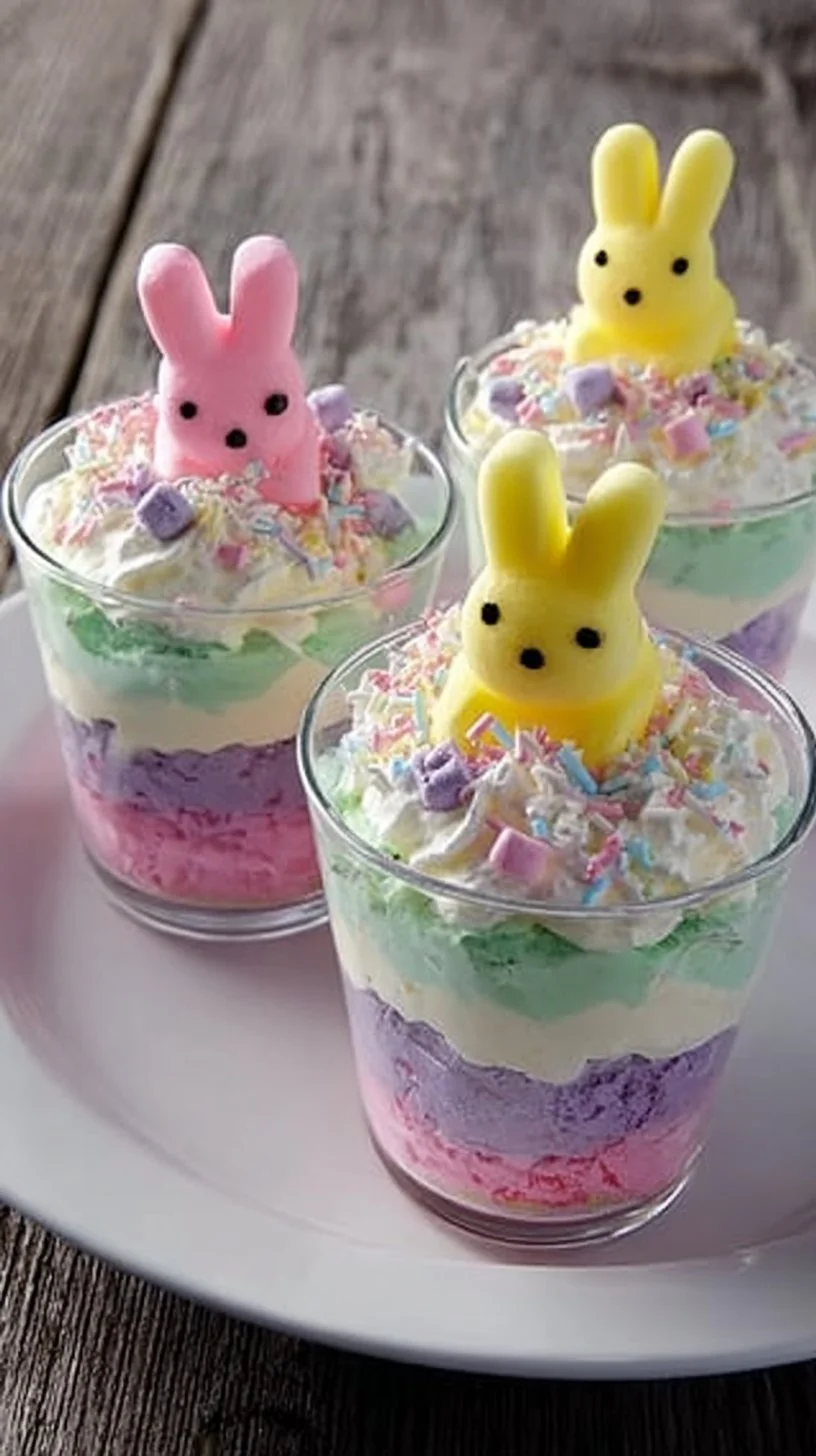
Hello — I’m Carla Carter, Founder & Recipe Developer of RecipesCabin. If you’re looking for a cheerful, no-fuss sweet to make for Easter, this Easter Treat is exactly the kind of recipe that welcomes you into the kitchen. It’s simple, quick, and forgiving — which makes it a perfect first project if you’re new to baking or returning after a long break. It’s also a fun one to make with kids, or to bring to a spring gathering when you want something bright and familiar.
What makes this recipe approachable is that it uses pantry-stable ingredients and a short, clear process. You don’t need special tools or complicated techniques, and the results are instantly satisfying: crispy, chocolatey, and topped with colorful sprinkles. I’ll walk you through what to watch for, why each step matters, and how to feel calm and confident while you make it.
Why this recipe is easy to get right
This Easter Treat is forgiving in several ways. First, the ingredients are sturdy — chocolate chips, marshmallows, and Rice Krispies don’t hide surprises. They handle a little variance in timing and temperature without collapsing. The method is straightforward: melt, mix, press, and cool.
There’s also flexibility in texture. If the mixture is a touch too sticky, a short chill will firm it up. If it’s a touch dry, pressing firmly into the pan brings the pieces together. Those small imperfections don’t ruin the treat; they just change the look slightly. That’s okay — the flavor and overall appeal remain.
Finally, the recipe doesn’t require precise measuring tools beyond standard cups and teaspoons, and it doesn’t demand a perfect oven or advanced timing. That makes it ideal for cooks of all levels — anyone who can melt butter and stir can succeed here.
How to make Easter Treat
The process breaks down into three clear stages: melting, mixing, and setting.
- First: Melting. You’ll melt the butter gently and then add chocolate chips so everything becomes a glossy, pourable coating. The key here is low heat and slow stirring so the chocolate and butter blend smoothly.
- Next: Mixing. Once the chocolate mixture is off the heat and scented with vanilla, you’ll fold in mini marshmallows and Rice Krispies. The goal is even coating — you want the cereal and marshmallows to be covered but not crushed.
- Last: Pressing and cooling. You’ll press the mixture into a greased dish, top with colorful sprinkles, and allow it to cool before cutting. Pressing firmly helps the pieces hold together; cooling solidifies the chocolate so the squares cut cleanly.
Where beginners should slow down:
- While melting, slow and patient stirring prevents burning and grainy texture.
- When folding in marshmallows and cereal, use a gentle hand to keep pieces from getting pulverized.
- When pressing into the dish, aim for even thickness; uneven pressure can make some pieces too dense and others too crumbly.
Focus on gentle, steady motions rather than speed. Each step has obvious visual cues I’ll point out below, so you’ll know if you’re on track.
Ingredients
1 cup of chocolate chips, 2 cups of mini marshmallows, 1 cup of colored sprinkles, 4 cups of Rice Krispies cereal, 1/2 cup of butter, 1 teaspoon of vanilla extract
- 1 cup of chocolate chips: These provide the chocolate coating that brings flavor and structure. When melted, chocolate chips combine with butter to form a shiny binder that helps the cereal and marshmallows stick together.
- 2 cups of mini marshmallows: Marshmallows add chew and help with binding. As they warm, they become soft and slightly sticky, helping the mixture cling together along with the melted chocolate.
- 1 cup of colored sprinkles: Sprinkles are the cheerful finish for Easter: they add color and a bit of crunch on the surface. They don’t affect the structure, so they’re strictly decorative and forgiving.
- 4 cups of Rice Krispies cereal: The base of the bars — light, crispy, and absorbing. The cereal’s texture is what makes the treat feel airy and crunchy rather than heavy.
- 1/2 cup of butter: Butter melts with the chocolate to make a smooth, spreadable binder. It softens the chocolate and adds a rich mouthfeel.
- 1 teaspoon of vanilla extract: A small measure with big impact — vanilla rounds out the chocolate and marshmallow flavors, making the finished bars taste more complete.
None of these items are complicated or intimidating. You likely already have most of them, and together they create a balance of crunch, chew, and sweetness that makes this Easter Treat so approachable.
Directions
- In a saucepan, melt the butter over low heat., 2. Stir in the chocolate chips until melted and smooth., 3. Remove from heat and add the vanilla extract., 4. Mix in the mini marshmallows and Rice Krispies cereal until evenly combined., 5. Pour the mixture into a greased baking dish and press down firmly., 6. Top with colored sprinkles., 7. Allow to cool, then cut into squares and serve.
Supportive guidance around the steps:
Step 1: In a saucepan, melt the butter over low heat.
- Visual cues and feel: The butter should liquefy gently into a pale gold pool. You should see it shimmer but not brown. Low heat keeps it from sizzling and changing flavor.
- If the butter starts to foam or brown, reduce the heat immediately — a quick cool and stir will usually bring it back.
Step 2: Stir in the chocolate chips until melted and smooth.
- What to watch for: The chocolate chips will soften, then become glossy and uniform. Stir slowly and continuously at first; you’ll see the mixture transition from streaky to smooth.
- Texture and timing: This takes only a few minutes over low heat. If you need to, lift the pan off the heat briefly while stirring — residual warmth will finish melting the chips.
Step 3: Remove from heat and add the vanilla extract.
- Why this matters: Vanilla is heat-sensitive; adding it off the heat preserves its aroma. You’ll notice a warm vanilla scent that blends with the chocolate.
Step 4: Mix in the mini marshmallows and Rice Krispies cereal until evenly combined.
- Visual cues: The marshmallows will soften and look glossy as they’re coated. The Rice Krispies should be evenly dispersed, with no dry pockets of cereal.
- Technique: Use a large spoon or spatula to fold gently. If the mixture seems too stiff to stir, a brief warm-up (off direct heat) will loosen it.
Step 5: Pour the mixture into a greased baking dish and press down firmly.
- How it should feel: The mixture should be tacky but cohesive. Pressing firmly creates a compact block that slices neatly. Don’t be afraid to press — that’s what makes the pieces stick together.
- Tip: Press with a sheet of parchment or a clean spatula to get an even surface without sticking to your hands.
Step 6: Top with colored sprinkles.
- Placement: Press sprinkles lightly into the surface so they stay in place. They brighten the bars and signal the Easter theme.
Step 7: Allow to cool, then cut into squares and serve.
- Cooling cues: The chocolate should return to a matte finish and feel firm to the touch. If you cut too soon, pieces may crumble. If you need faster results, brief chilling will speed things up.
- Serving: Use a sharp knife, wiping it between cuts for clean edges.
If something isn’t perfect — perhaps the mix is a little soft or the top is bumpy — don’t worry. Cooling and gentle pressing usually resolve these issues. Small imperfections are normal and part of homemade charm.
Key techniques you’ll practice in this recipe
- Gentle melting: You’ll learn how slow, low heat prevents burning and produces a smooth chocolate-butter mixture. This technique is useful whenever you melt chocolate, butter, or other delicate ingredients.
- Folding: Combining the marshmallows and cereal without crushing them teaches a light, controlled motion that preserves texture.
- Pressing to set: Learning how force and even pressure create a stable bar will help with other no-bake treats or frozen desserts.
These techniques are foundational and transfer to many simple sweets: chocolate bark, granola bars, or marshmallow treats. Practicing them here builds confidence for slightly more complex projects down the road.
Common mistakes and how to avoid them
Melting on too high heat:
- Symptom: Grainy or separated chocolate, burnt aroma.
- Fix: Remove from heat immediately and stir. If it’s only slightly grainy, a spoonful of warm liquid (like a teaspoon of warm milk) can help smooth it. But prevention is best: keep the heat low and stir.
Overmixing the cereal:
- Symptom: Crushed, dense pieces instead of light and crisp texture.
- Fix: Stop stirring once everything is evenly coated. If it’s already dense, a gentle hand when pressing will avoid compacting it further.
Pressing inconsistently:
- Symptom: Bars that are uneven — some fall apart, others are too hard.
- Fix: Press evenly across the dish, using a flat tool or parchment to spread pressure. If some pieces are loose after cooling, rewarm slightly and press again.
Cutting too soon:
- Symptom: Crumbling edges and sticky knife.
- Fix: Allow adequate cooling. If you’re impatient, chill the dish for 15–20 minutes until firm.
If something goes off track, remember you rarely need to start over. Chill to firm up, gently reheat to rebind, or compact small pieces together — rescue is usually possible.
How to adjust confidently without changing the recipe
While I’m not changing ingredients or steps, here are conceptual ways to adjust outcomes without altering the list:
- Scaling portions: If you want more or fewer bars, scale the pan size rather than each ingredient precisely in a pinch. Use a slightly larger or smaller dish and expect minor changes in thickness; pressing time and cooling remain the same.
- Flavor preferences: The recipe is neutral enough that the vanilla and chocolate will always be front-and-center. If you prefer stronger chocolate flavor within the same ingredient list, choose a darker chocolate chip; if you want lighter sweetness, use milk chocolate chips. Those choices don’t change the steps.
- Texture tweaks: For a chewier bar, press more firmly and allow a slightly shorter cooling time before cutting. For an airier bar, press less and use a slightly shallower pan so the bars are thinner.
These adjustments are conceptual — you’re still following the original steps and quantities, just making small choices about how the final product feels and looks. That’s confidence-building because you learn to influence results without needing a new recipe.
Serving, storage, and reheating made simple
- Serving: These bars are best at room temperature after they’ve set. Arrange them on a platter for a party, or wrap individual squares in wax paper for a picnic. They’re an easy grab-and-go treat.
- Storage: Store in an airtight container at room temperature for up to 3 days. If your kitchen is warm, refrigerate to keep the bars firm; they’ll last up to a week chilled. Layer parchment between pieces to prevent sticking.
- Reheating: If the bars get firm in the fridge and you prefer a softer texture, leave them at room temperature for 15–30 minutes before serving. Avoid microwaving whole bars — short, gentle warming (a few seconds per piece) can soften them if needed, but too much heat will melt the chocolate.
These simple storage steps help maintain texture and flavor without fuss.
Questions new cooks often ask about this recipe
- How long should I melt the chocolate and butter?
- Answer: Melt until smooth — usually a few minutes on low heat. Look for a glossy, uniform mixture and stop when the last streaks disappear.
- What if my marshmallows clump?
- Answer: That’s normal if you stir too firmly. A gentle hand helps separate them. If clumping happens, a short warm stir loosens them again.
- Do I need a special pan?
- Answer: No — any greased baking dish of similar size works. A smaller dish will make thicker bars; a larger dish will make thinner bars.
- Is it normal for the top to look uneven?
- Answer: Yes. Lightly pressing or smoothing with parchment solves most bumps, and sprinkles hide small imperfections.
- Can kids help?
- Answer: Absolutely. Kids can press the mixture into the dish and add sprinkles. Keep them away from the hot pan during melting, and focus their tasks on cooling and decorating.
These are all normal questions, and every small misstep is part of learning. I encourage you to keep going — the process is friendly and forgiving.
Final encouragement from Carla
I want you to know that successful baking and candy-making is built on small, steady steps. This Easter Treat is an excellent way to practice patience, control, and sensing when things are done. You don’t need perfect technique — you need attention and a calm pace. If a bar looks or tastes a little different from batch to batch, that’s okay. What matters is that you tried, learned, and now have a lovely homemade treat to share.
Keep practicing — each small victory in the kitchen builds confidence. The next time you make this recipe, you’ll notice the little refinements that make the process even quicker and more enjoyable. And remember: the goal is joy and shared moments, not perfection.
Conclusion
If you’re looking for more inspiration for sweet, seasonal confections to complement this Easter Treat, I enjoy the round-up of ideas over at 16 Sweet Easter Treats – Bakerella for playful decorating and variety. For a different spin on a festive candy, check the approachable recipe for Easter Bark at Easter Bark (a Fun Easter Treat) – Meatloaf and Melodrama.
Happy baking — and remember, each batch teaches you something new.

Easter Treat
Ingredients
Method
- In a saucepan, melt the butter over low heat.
- Stir in the chocolate chips until melted and smooth.
- Remove from heat and add the vanilla extract.
- Mix in the mini marshmallows and Rice Krispies cereal until evenly combined.
- Pour the mixture into a greased baking dish and press down firmly.
- Top with colored sprinkles.
- Allow to cool, then cut into squares and serve.