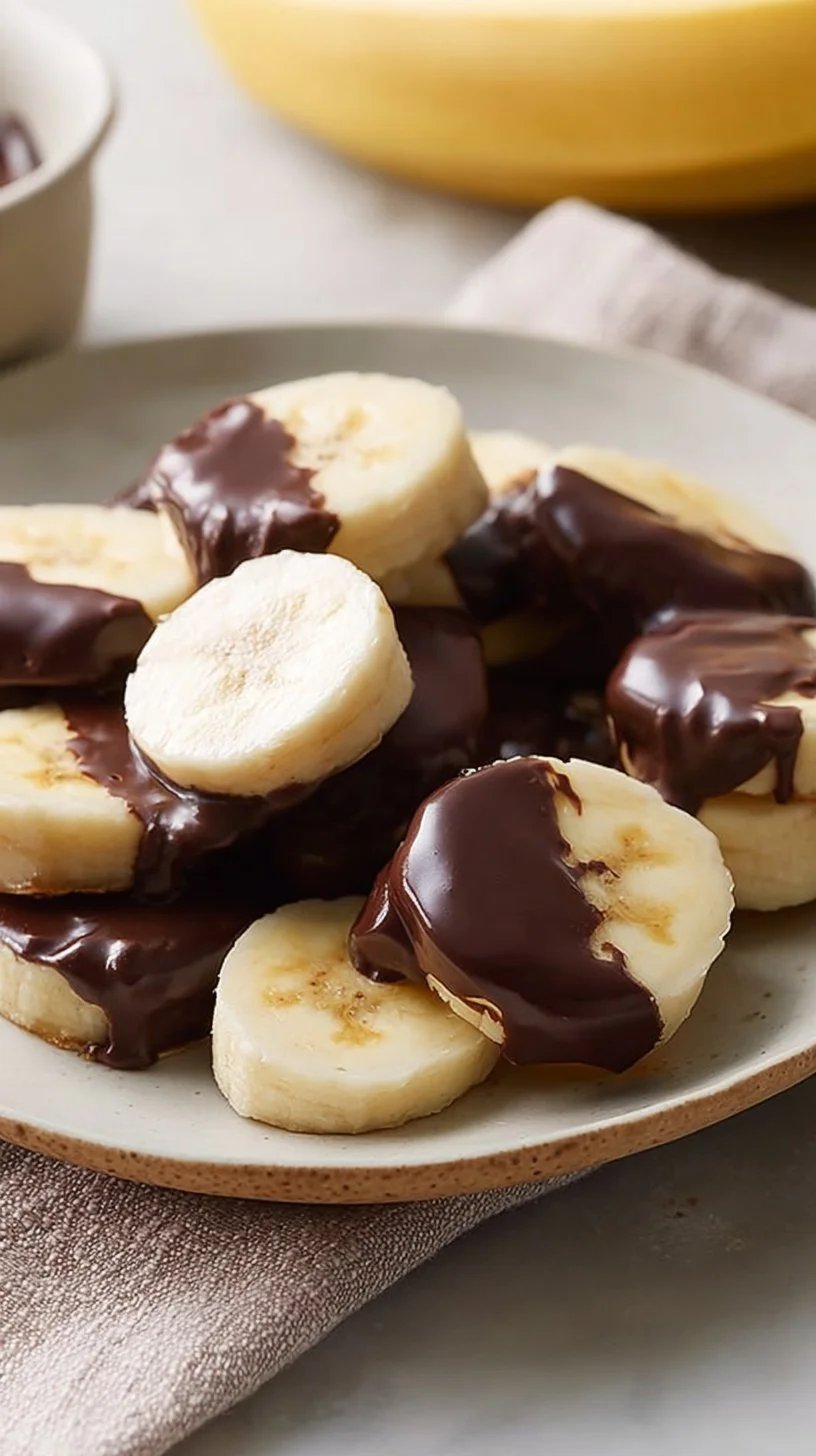
Chocolate Peanut Butter Banana Bites
If you love simple, comforting snacks that are forgiving to make, Chocolate Peanut Butter Banana Bites are for you. This little recipe is perfect for busy parents, home cooks who are new or returning to the kitchen, and anyone who wants a sweet treat without fuss. It’s approachable because the steps are clear, the ingredients are familiar, and the results are quick to see — you’ll go from fresh fruit to a freezer-ready snack in about an hour and change.
You don’t need fancy tools or a perfect technique to succeed here. I’ll walk you through each step, explain why it matters, and point out the small things that make a big difference. If you’ve tried frozen banana treats before, you might enjoy comparing notes — for another simple variation I like to reference recipes like Frozen Greek Yogurt Peanut Butter Bites when thinking about texture contrasts. Take a breath: this is a recipe that builds confidence with each bite.
Why this recipe is easy to get right
This recipe is forgiving because the ingredients are simple and the technique is straightforward. You’re doing two main things: assembling cold banana-and-peanut-butter sandwiches, and coating them in melted chocolate. Freezing gives you time — the banana becomes firm, which makes dipping easier and hides small assembly imperfections.
Flexibility shows up in several places. If your banana slices are slightly thicker or thinner, they’ll still freeze and taste great. If the peanut butter is a little more or less, it won’t ruin the batch — it’ll just change the peanut butter-to-banana ratio slightly. The chocolate coating is forgiving, too: a little extra stir or a few more seconds in the microwave will bring it back to a dippable texture.
The process suits all skill levels because it emphasizes calm steps rather than high-pressure timing. The freezer does the heavy lifting, and you can pause between stages — assembly, freeze, coat, refreeze — which removes the rush and lets you focus on neatness, not perfection.
How to make Chocolate Peanut Butter Banana Bites
Overall you’ll follow three big stages: assemble, freeze, and coat. First, you slice and sandwich the bananas with peanut butter. This is a tactile step — you’ll feel the soft banana and the spreadable peanut butter come together. Next, freezing firms everything so the bites don’t fall apart during dipping. Last, you melt the chocolate and use a quick dipping motion to coat half of each bite, then return them to the freezer until the chocolate sets.
What to focus on at each stage:
- Assembly: steady hands and even slices help, but tiny differences are fine. Aim for banana rounds about 1/4 inch thick so each bite is easy to eat.
- Freezing: give the bites a full hour to become solid. That firmness prevents the peanut butter from smearing and makes dipping neat.
- Melting and dipping: melt chocolate until smooth and shiny; the coconut oil thins it slightly and helps it set with a nice sheen. Work with one platter at a time so the chocolate stays warm enough to coat but the frozen bites don’t thaw.
Beginners should slow down during the first assembly and the first few dips. Practice one or two test dips to get a feel for how the chocolate flows. If the chocolate cools too much, it will thicken — a short 10–15 second microwave return will fix it, but do so carefully. Small imperfections are normal; the goal is deliciousness, not perfection.
Ingredients
3 ripe bananas, 1/3 cup natural peanut butter, 1/2 cup dark chocolate chips, 2 teaspoons coconut oil
- 3 ripe bananas: Ripe bananas are sweet and soft, which makes them pleasant to bite into even when frozen. Their natural sugars help balance the dark chocolate. They also freeze solid quickly, giving your bites structure.
- 1/3 cup natural peanut butter: Natural peanut butter often separates a bit but is wonderfully spreadable. It acts as the “glue” between two banana slices and adds richness and protein. A small amount — about 1/2 teaspoon per sandwich — is enough to deliver that classic flavor without overwhelming the fruit.
- 1/2 cup dark chocolate chips: The chocolate creates the crisp, chocolatey outer layer. Dark chocolate pairs beautifully with sweet banana and salty peanut butter, and the chips melt evenly when combined with a touch of coconut oil.
- 2 teaspoons coconut oil: Coconut oil thins and smooths the melted chocolate, making it easier to dip and giving the coating a glossy finish. It also helps the chocolate set up a bit firmer in the freezer.
None of these ingredients are complicated or intimidating — they’re pantry staples for many homes. Together they create contrasts in texture (soft banana, creamy peanut butter, crisp chocolate) and flavor (sweet, salty, bitter) that feel indulgent but simple.
Directions
Peel and slice bananas into rounds about 1/4 inch thick. Line a platter or small baking sheet with parchment paper. Place about 1/2 teaspoon of peanut butter on a banana slice and top with another banana slice to make a little banana peanut butter sandwich. Keep doing this until all banana slices are used and you have about 30 bites. Place bites on parchment lined platters or plates and place in the freezer to harden for about 1 hour. Once banana bites have been in the freezer for over an hour, melt your chocolate by adding chocolate and coconut oil to a microwave-safe bowl. Microwave for 1 minute, stir and microwave in additional 30 second increments until chocolate is completely melted. This shouldn’t take more than 2 minutes of microwave time. Once chocolate is melted, remove one platter of your frozen banana bites from the freezer. Dip each frozen banana bite into the melted chocolate so that half of each bite is coated. Place chocolate covered bites back on the parchment lined platter. Place back in freezer to harden up for about 15 minutes. At this point you’re ready to enjoy or transfer the bites into a freezer safe storage container for later. They should last at least 1-2 months in the freezer. When stored for a longer period, let them thaw for about 5 minutes before eating.
Supportive guidance for these directions:
- Visual cues: When you slice bananas, aim for even rounds — they’ll look like small coins. After you sandwich them and freeze for about an hour, the surfaces will look frosty and feel firm to the touch.
- Chocolate texture: Melted chocolate should be smooth and glossy with no visible lumps. If it looks grainy, keep stirring; if it starts to seize, a tiny extra splash of warmed coconut oil (very small) and patient stirring can help.
- Dipping motion: Hold each frozen sandwich by the edge and dip just to the halfway point so you get a clean contrast of banana and chocolate. It’s okay if the chocolate drips a little back onto the parchment — that helps make a neat base for the bite to sit on while it re-freezes.
- Timing hints: The first freeze is the longest stage (about an hour) and is the most important for structure. The final 15-minute set is quicker because the bites are already frozen; you’re only firming the chocolate.
If your first batch looks a little rustic, that’s perfectly fine. These bites are meant to be homemade and comforting.
Key techniques you’ll practice in this recipe
This recipe reinforces a few fundamental skills that are widely useful:
- Even slicing: Learning to slice fruit consistently helps with cooking times and presentation in many recipes.
- Freezing and timing: Understanding how freezing changes texture is useful for other frozen treats and meal prep.
- Melting chocolate: You’ll learn to melt gently, stir regularly, and adjust heat in short bursts — a transferable skill for ganaches, sauces, or coating other snacks.
- Dipping and setting: Controlling how much coating adheres to an item is a useful technique for candy-making and decorating.
Practicing these techniques builds comfort with basic manipulations and short heat bursts, and they’ll make you more confident in the kitchen overall.
Common mistakes and how to avoid them
- Mistake: The banana sandwiches fall apart while dipping. Avoidance: Make sure the bites are thoroughly frozen for the full hour before dipping. A solid freeze prevents slippage.
- Mistake: Chocolate becomes thick and clumpy. Avoidance: Melt chocolate in short microwave bursts, stirring between each one. The coconut oil helps, too — it loosens the chocolate for smoother dipping.
- Mistake: Bites stick to the parchment paper. Avoidance: Use good parchment or a silicone mat. Also let the chocolate harden a bit on the platter before moving them to storage, which helps create a stable base.
- Mistake: Banana becomes too soft because of thawing. Avoidance: Work quickly when removing a platter from the freezer; dip a few bites and then return the platter to the freezer. You can handle one platter at a time so the rest stays solid.
If something goes off track — for example, if the chocolate cools and thickens — you don’t need to start over. Rewarm in very short bursts, stir, and proceed. If a few bites crack or the peanut butter squeezes out, those pieces are still delicious and make great on-the-spot snacks.
How to adjust confidently without changing the recipe
While we’re not modifying ingredients or steps, it helps to understand how adjustments in scale or preference conceptually affect results:
- Scaling portions: Doubling or halving the number of bananas will scale the process linearly. If you double the recipe, work in batches when freezing and coating so you don’t overwhelm your freezer space or the melted chocolate.
- Flavor preferences: The balance between banana and peanut butter can be adjusted simply by how much peanut butter you place on each slice. If you like more peanut butter, use a slightly heaping 1/2 teaspoon; less peanut butter is fine too. These are texture and flavor judgments, not precise chemistry.
- Texture tweaks: Freezing time controls texture. If you prefer a slightly softer center, reduce the initial freeze time a little, knowing the bites will be easier to dip but less firm. Conversely, a longer initial freeze gives you a crisper bite after coating.
A note: these are conceptual adjustments — follow the recipe as written for a reliable baseline, and use these ideas to make small, deliberate changes next time.
Serving, storage, and reheating made simple
Serving: These bites are best straight from the freezer, after a brief 5-minute thaw so the banana softens a touch. Serve them on a small platter for an elegant snack or tuck them into lunchboxes in a small insulated container.
Storage: Transfer fully frozen bites into a freezer-safe container with parchment layers between layers to prevent sticking. They’ll keep at least 1–2 months, and often longer, while still tasting fresh. Label the container with the date so you know how long they’ve been stored.
Reheating/Thawing: No oven or microwave is needed — simply let a few bites sit at room temperature for about 5 minutes before eating. If you want a slightly softer banana, a couple more minutes at room temperature will do it. Avoid microwaving frozen bites; the chocolate can become too soft and the banana may heat unevenly.
Questions new cooks often ask about this recipe
- How long will the bites be messy? If the chocolate is properly set and you handle them briefly after a 5-minute thaw, they’re not messy. Work in quick motions when dipping to keep things tidy.
- Do I have to use coconut oil? Coconut oil helps the chocolate set and shine, but if you absolutely don’t have it you can omit it; the chocolate may be a touch thicker while dipping and set with a slightly duller finish.
- Can I use crunchy peanut butter? Yes — crunchy peanut butter adds texture and is fine to use. Expect a slightly more textured bite.
- What equipment do I need? A microwave-safe bowl, a small baking sheet or platter lined with parchment, and a spoon for spreading and dipping are enough. No special molds or tempering tools required.
- Is it normal for the chocolate to look uneven at first? Yes. Small streaks or drips are normal and will firm up in the freezer. The important thing is taste, not a showroom finish.
If anything feels uncertain while you’re working, pause and look for the simple cues: banana slices should be firm after the initial freeze; chocolate should be glossy and smooth; and the bites should be returned to the freezer right away after dipping.
Final encouragement from Carla
You’ve chosen a recipe that’s kind to beginners and rewarding every time. Chocolate Peanut Butter Banana Bites are a little triumph: simple steps, forgiving timing, and a delicious payoff that builds kitchen confidence. Remember that small imperfections are part of home cooking; each batch teaches you something new. Keep practicing these basic techniques and you’ll find the kitchen becoming a friendlier place.
Conclusion
If you’d like a visual walk-through and another variation, I find Frozen Chocolate Peanut Butter Banana Bites (+ Video) helpful for seeing the dipping motion. For a take focused on a peanut-butter-forward filling, Chocolate Peanut Butter Banana Bites – Eating Bird Food shows a slightly different approach to assembly. If you’re exploring quick frozen treat ideas, Easy Frozen Chocolate Peanut Butter Banana Bites – A Clean Bake is another gentle reference with clear photos. And for a darker chocolate emphasis with a classic presentation, I like Dark Chocolate Peanut Butter Banana Bites – Smile Sandwich as a comforting comparison.

Chocolate Peanut Butter Banana Bites
Ingredients
Method
- Peel and slice bananas into rounds about 1/4 inch thick.
- Line a platter or small baking sheet with parchment paper.
- Place about 1/2 teaspoon of peanut butter on a banana slice and top with another banana slice.
- Repeat with all banana slices until they are used, yielding about 30 bites.
- Place bites on the parchment lined platters and freeze for about 1 hour.
- Melt chocolate and coconut oil in a microwave-safe bowl, microwaving for 1 minute, stirring, and continuing in 30 second increments until smooth.
- Remove one platter of frozen banana bites from the freezer.
- Dip each frozen sandwich into the melted chocolate so that half is coated.
- Return the chocolate-coated bites to the parchment lined platter.
- Place back in the freezer for about 15 minutes to harden.