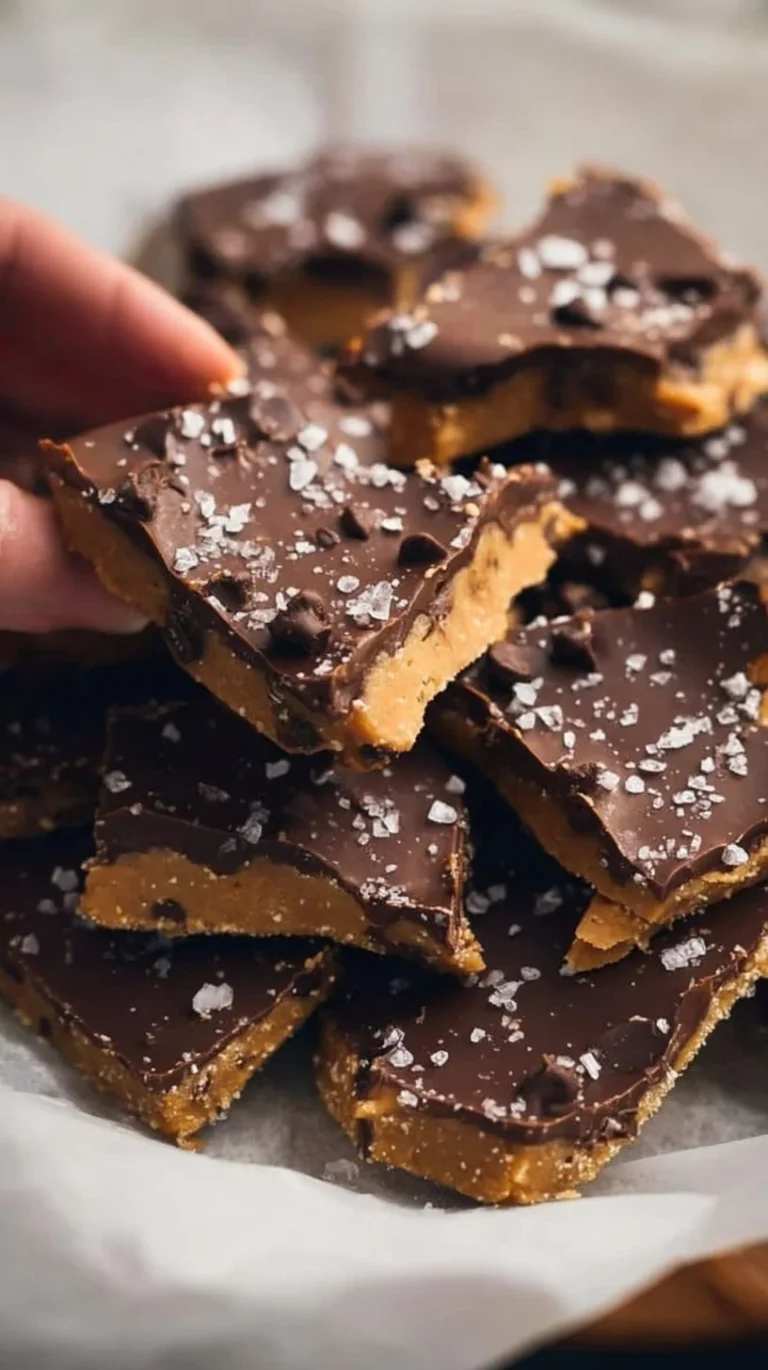
Greek Yogurt Brownies
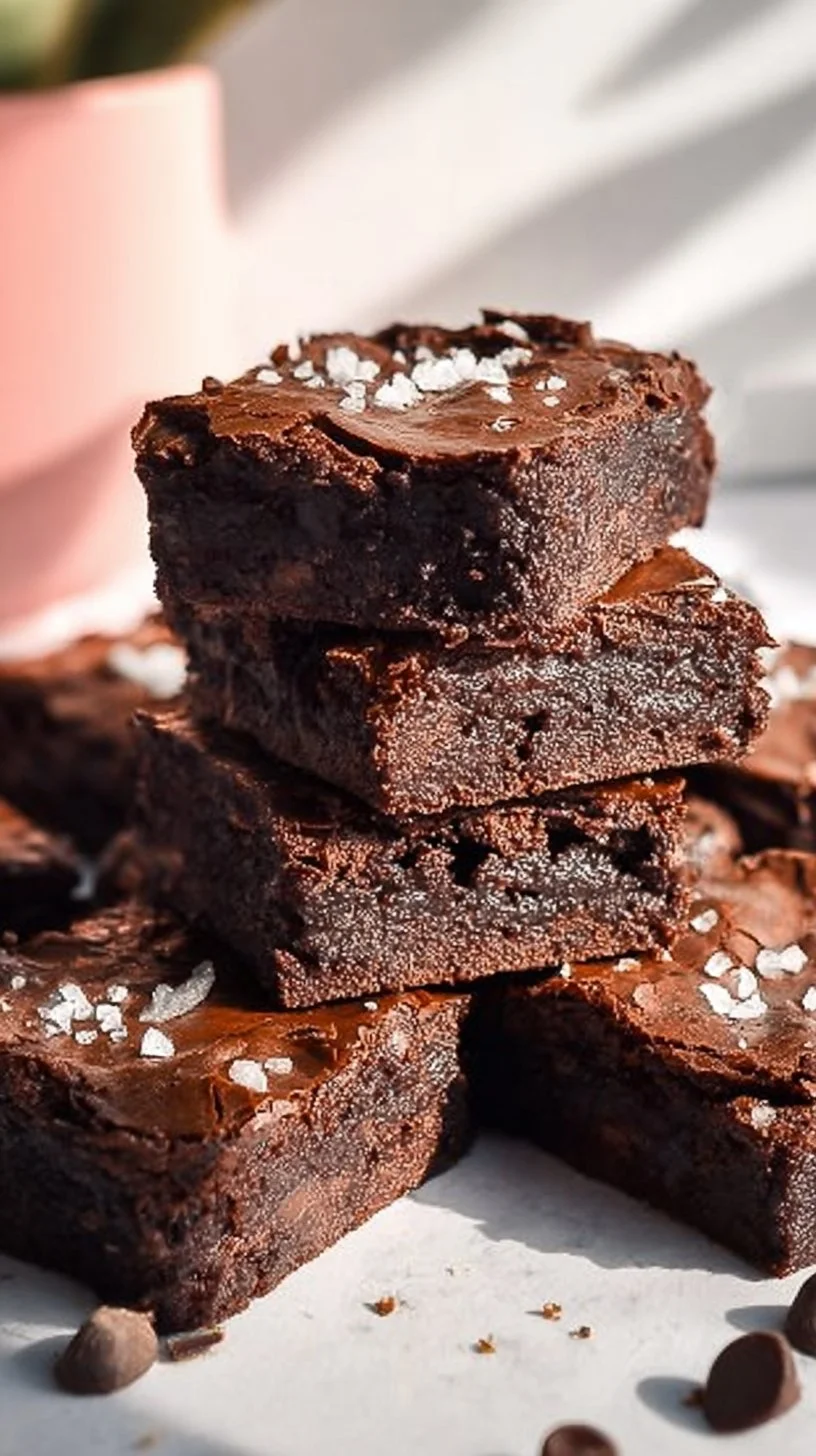
These Greek Yogurt Brownies are the sort of recipe I turn to when I want something comforting that doesn’t leave me feeling weighed down. They hold the familiar chocolate brownie rhythm—mocha aroma, fudgy crumb, a little snap from melted chocolate—while using a few ingredient choices that keep the texture feeling lighter and the portioning simple. If you cook during weeknights or pack snacks for lunches, this is one of those make-ahead options that fits right into the week: it’s quick to mix, bakes in under half an hour, and stores well.
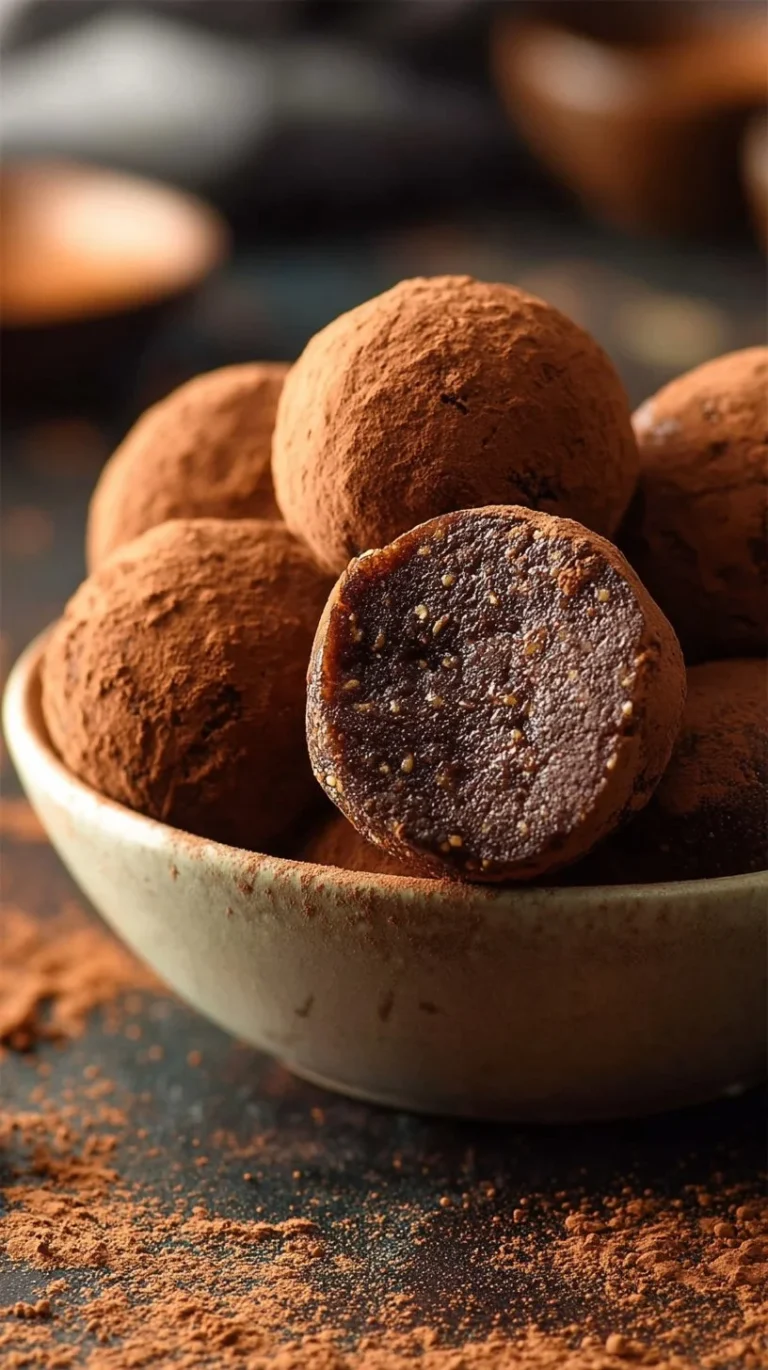
If you like pairing creamy, protein-forward snacks with indulgent treats, you might also enjoy some frozen yogurt bites I recommend alongside sweet projects like this: frozen Greek yogurt peanut butter bites. They’re an easy companion when you want variety without overcomplicating the menu.
How this recipe fits into a balanced lifestyle
A balanced approach isn’t about forbidding anything; it’s about using ingredients and methods that let you enjoy favorites more often without them feeling heavy. These brownies do that by swapping in plain Greek yogurt for some of the fat and by using a measured amount of chocolate and sweetener. The result keeps the rich, chocolate-forward experience intact but leans lighter on the texture so you feel satisfied, not sluggish.
Because they’re straightforward and portion-friendly, they slot easily into a weekly routine. Make a batch for the weekend, cut them into modest squares, and use them as an afternoon pick-me-up, a dessert after a balanced dinner, or a sweet addition to packed lunches. If you want ideas for pairing lighter sweets with protein-rich options, take a look at this high-protein frozen snack that complements a dessert-forward plan: high-protein frozen peanut butter Greek yogurt bites. Treats like these help meals feel balanced across the day without leaning on extremes.
How to make Greek Yogurt Brownies
At its heart this recipe follows a simple wet-to-dry assembly and a short bake. You melt a portion of the chocolate with coconut oil, whisk together dry ingredients, combine the yogurt-based wet mix with the melted chocolate, fold in the dry ingredients just until combined, and stir in the remaining chocolate chips. The whole process prioritizes keeping things light and not overworked—overmixing can tighten the crumb and make the brownies denser than intended.
Simplicity matters most when you’re balancing texture and flavor. Use a consistent spatula or spoon, keep an eye on the bake time, and resist the urge to overbake (a slightly moist center is part of the appeal here). If you prefer a touch of fruit with chocolate, you can read about a fruit-swirled yogurt bite for inspiration on how to combine creamy and bright flavors without changing this brownie recipe: blueberry swirl yogurt bites.
Ingredients
2/3 cup Sugar-Free Chocolate Chips (divided), 1 teaspoon Coconut Oil, 3/4 cup Plain Greek Yogurt, 1 large Egg, 1/4 cup Almond Milk (or soy milk, or any milk of choice), 1/2 cup Granulated Sweetener (sugar-free brown erythritol or coconut sugar or brown sugar), 1 teaspoon Vanilla Extract, 1/2 cup Oat Flour (or all-purpose flour ightly packed, swept ), 1/2 cup Unsweetened Cocoa Powder, 1 teaspoon Baking Powder, 1/4 teaspoon Salt
Here’s a quick look at what each ingredient brings to the party and why mindful choices matter:
- 2/3 cup Sugar-Free Chocolate Chips (divided): The chocolate provides the core flavor and the contrast of melted versus little pockets of chocolate when some chips are left whole. Splitting them keeps the batter studded with bites of chocolate without making the whole batch too dense.
- 1 teaspoon Coconut Oil: Facilitates melting with the chocolate and adds a smooth mouthfeel. A little oil helps the crumb remain tender without relying on large amounts of butter.
- 3/4 cup Plain Greek Yogurt: Adds moisture and creaminess with protein to help the brownies feel more sustaining. Yogurt contributes to a softer, more tender crumb than you might get with oil alone.
- 1 large Egg: Helps with structure and stability so these brownies hold together when cut and handled.
- 1/4 cup Almond Milk (or soy milk, or any milk of choice): A small amount of milk thins the batter just enough for an even bake without adding heaviness.
- 1/2 cup Granulated Sweetener (sugar-free brown erythritol or coconut sugar or brown sugar): Allows flexibility in your sweetness source while keeping the sugar level appropriate for the batch. Choose one that fits your palate while recognizing each will subtly affect texture and color.
- 1 teaspoon Vanilla Extract: Small but critical for rounding and deepening chocolate flavor.
- 1/2 cup Oat Flour (or all-purpose flour ightly packed, swept ): Oat flour gives a slightly denser, grainier crumb and a pleasant nuttiness; all-purpose will make a more classic brownie texture. The “ightly packed, swept” note is in the original ingredient list and reflects the casual nature of home measuring here—aim for a measured half cup that’s not overly compacted.
- 1/2 cup Unsweetened Cocoa Powder: The backbone of chocolate flavor; unsweetened keeps control over sweetness through your chosen sweetener.
- 1 teaspoon Baking Powder: Small lift to prevent the brownies from being too compact; it keeps the interior pleasantly tender.
- 1/4 teaspoon Salt: Balances sweetness and amplifies chocolate notes. A little salt makes flavors sing.
Mindful ingredient choices here are less about restriction and more about purpose: each item contributes to taste, texture, or stability. Together they create balance — not by removing joy, but by making the texture lighter and the flavor focused.
Directions
Preheat the oven to 350°F (180°C)., Line an 8-inch x 8-inch brownie pan with parchment paper. Slightly oil the pan. Set aside., In a microwave-safe bowl, melt 1/3 cup chocolate chips and coconut oil. Set aside to cool for a few minutes at room temperature., In a mixing bowl, whisk the dry ingredients: flour, cocoa powder, sweetener, baking powder, and salt. Set aside., In another large bowl, whisk plain Greek yogurt, egg, vanilla extract, milk, and melted cooled chocolate mixture., Sift the dry ingredients into the wet ingredients and stir with a silicone spatula until just combined., Stir in the remaining 1/3 cup chocolate chips and distribute evenly in the batter., Pour the batter into the prepared brownie pan., Bake for 20-23 minutes at 350°F (180°C) or until a toothpick inserted in the brownie comes out clean., Cool immediately on a cooling rack for an hour before cutting.
Supportive guidance around the steps:
- When melting the chocolate chips with coconut oil, work gently and let the mixture cool briefly. If it’s too hot when you mix it with the yogurt, it can thin the batter too much or affect the yogurt’s texture.
- Whisking the dry ingredients first makes it easy to spot any lumps in the cocoa or baking powder so you don’t overwork the batter later.
- Sifting the dry into the wet helps prevent clumping and makes folding quicker; aim to fold until the streaks of flour disappear but stop as soon as it’s uniform. Overmixing will tighten the texture.
- You want the center to remain slightly moist. A toothpick that comes out mostly clean with a few moist crumbs is preferable to a bone-dry result.
- Cooling on the rack before cutting lets the crumb set so your squares hold their shape. It’s tempting to dig in hot, but patience makes for cleaner slices and a better texture.
The role of preparation in keeping this dish light
How you prepare these brownies impacts not just doneness but the sensory weight of each bite. Gentle handling—mixing until just combined, cooling slightly before slicing—preserves a tender crumb that feels satisfying rather than heavy. Using Greek yogurt as a moistening agent instead of increasing fat content is a technique that keeps mouthfeel rich while changing the calorie density per bite less dramatically than swapping in more butter or oil.
Baking time and temperature also matter: a quick bake at a moderately hot oven gives a thin crust and moist interior, which our brains often read as indulgent even when the ingredients are measured. Small technique choices—like letting melted chocolate cool a touch before adding it to dairy, or avoiding vigorous beating once the dry ingredients are added—make the result feel balanced and thoughtfully prepared.
Simple ways to adjust without losing balance
There are subtle ways to make this recipe feel tailored without changing its core structure or ingredients list:
- Texture: Swap oat flour for all-purpose if you want a more traditional brownie crumb; stick with oat flour for a slightly heartier, nuttier finish.
- Sweetness: If you prefer a less sweet treat, choose a less sweet sweetener or reduce by a small amount—but take care, because sweetener type affects texture.
- Chocolate intensity: Use a darker cocoa powder or bittersweet chips for more depth; lighter cocoa or milk chocolate will feel sweeter and creamier.
- Mix-ins: Think small—chopped toasted nuts, a few dried cherries, or a sprinkle of flaky salt on top add interest without overwhelming the lighter balance.
- Serving size: Cut smaller squares and pair with a smear of plain yogurt or a handful of fresh berries to keep a treat-style dessert that feels moderate and balanced.
These adjustments are conceptual—keep your core recipe steps identical and let small tweaks be about preference, not correction.
Pairing ideas for a complete, well-rounded meal
Brownies often sit on the dessert side, but with a few smart pairings you can turn them into part of a satisfied, balanced plate:
- Afternoon snack plate: One small brownie with a spoonful of plain yogurt, a scattering of fresh raspberries, and a few almonds. The yogurt and berries add freshness and a light acidic contrast to chocolate.
- After-dinner treat: A single brownie served with a simple fruit compote or sliced pear. Fruit introduces moisture and brightness so the chocolate feels like a finish, not a whole meal.
- Coffee or tea break: Pair a modest square with a cup of black coffee or herbal tea to add cleansing tannins that balance sweetness.
- Family-friendly dessert: Add a bowl of sliced fruit and a plate of sliced cheese and crackers. The variety keeps portions reasonable and the meal diverse, so everyone gets a little of what they want.
Think in terms of variety and contrast: creamy, crunchy, bright, and bitter elements help a small chocolatey treat feel like part of a rounded experience.
Storage, leftovers, and next-day enjoyment
These brownies store well at room temperature in an airtight container for a day or two; refrigeration will extend freshness for up to 5 days. If you refrigerate, bring them to room temperature before serving so the chocolate softens and the texture becomes more enjoyable. For longer storage, freeze individual squares wrapped tightly for up to a month—thaw at room temperature or briefly on the counter.
Reheating tips:
- A few seconds in the microwave (10–15 seconds) brings back that just-baked warmth and softens the center.
- A quick 5–7 minute low-temperature oven warm-up (275°F / 135°C) refreshes the crust and evens heat without drying.
Keeping portions reasonable and storing in a way that preserves moisture makes leftovers feel intentional rather than like something to rush through.
Common questions about lighter everyday cooking
Q: How can I keep portions balanced with tempting treats like brownies?
A: Cut smaller squares and pair them with fresh fruit, yogurt, or a small handful of nuts. Treats are part of balance when they’re shared across flavors and textures rather than eaten in isolation.
Q: How often should I make dessert-style recipes if I want a lighter routine?
A: There’s no fixed rule; a practical approach is to build a routine where treats are a planned part of the week—perhaps once or twice—so they’re enjoyed without feeling like an emergency or a deprivation.
Q: How do I avoid boredom if I repeat recipes?
A: Small shifts in pairing and presentation—fresh fruit, a different beverage, a sprinkle of nuts—go a long way. Rotate accompaniments rather than recipes when you want variety without extra effort.
Q: Can these brownies be prepped ahead for busy schedules?
A: Yes. Mix and bake on a weekend, then portion and store for the week. Freezing single squares lets you pull out a single treat without having to reheat a whole pan.
Final thoughts from Daniel
I encourage you to approach this recipe with a calm, practical mindset: it’s a reliable, relatively simple way to enjoy chocolate without feeling like you need to overcompensate elsewhere. Small, intentional choices—Greek yogurt instead of extra fat, measured chocolate, mindful portions—create a dessert that feels like part of a balanced life, not a departure from it. Cook intuitively, adjust in small ways that suit your taste, and let this become one of those routine recipes you reach for when you want familiar comfort that still supports daily energy and enjoyment.
Conclusion
If you want to compare techniques or see another take on Greek yogurt brownies, I find it useful to look at different versions for ideas on texture and sweetness; for example, this variation offers an under-100-calorie spin that highlights portion control and swapping techniques: Greek Yogurt Brownies (Under 100 Calories!) – The Big Man’s World. Another home cook’s perspective shows how similar ingredient choices come together in a straightforward way: Greek Yogurt Brownies – Foodie With Family.

Greek Yogurt Brownies
Ingredients
Method
- Preheat the oven to 350°F (180°C).
- Line an 8-inch x 8-inch brownie pan with parchment paper and lightly oil the pan.
- In a microwave-safe bowl, melt 1/3 cup of chocolate chips with coconut oil. Set aside to cool.
- In another bowl, whisk together the dry ingredients: oat flour, cocoa powder, sweetener, baking powder, and salt.
- In a large bowl, whisk together Greek yogurt, egg, vanilla extract, almond milk, and the melted chocolate mixture.
- Sift the dry ingredients into the wet ingredients and stir with a spatula until just combined.
- Fold in the remaining 1/3 cup of chocolate chips, distributing evenly.
- Pour the batter into the prepared brownie pan.
- Bake for 20-23 minutes, or until a toothpick inserted comes out clean.
- Cool on a rack for an hour before cutting into squares.