Peanut Butter Oat Cups
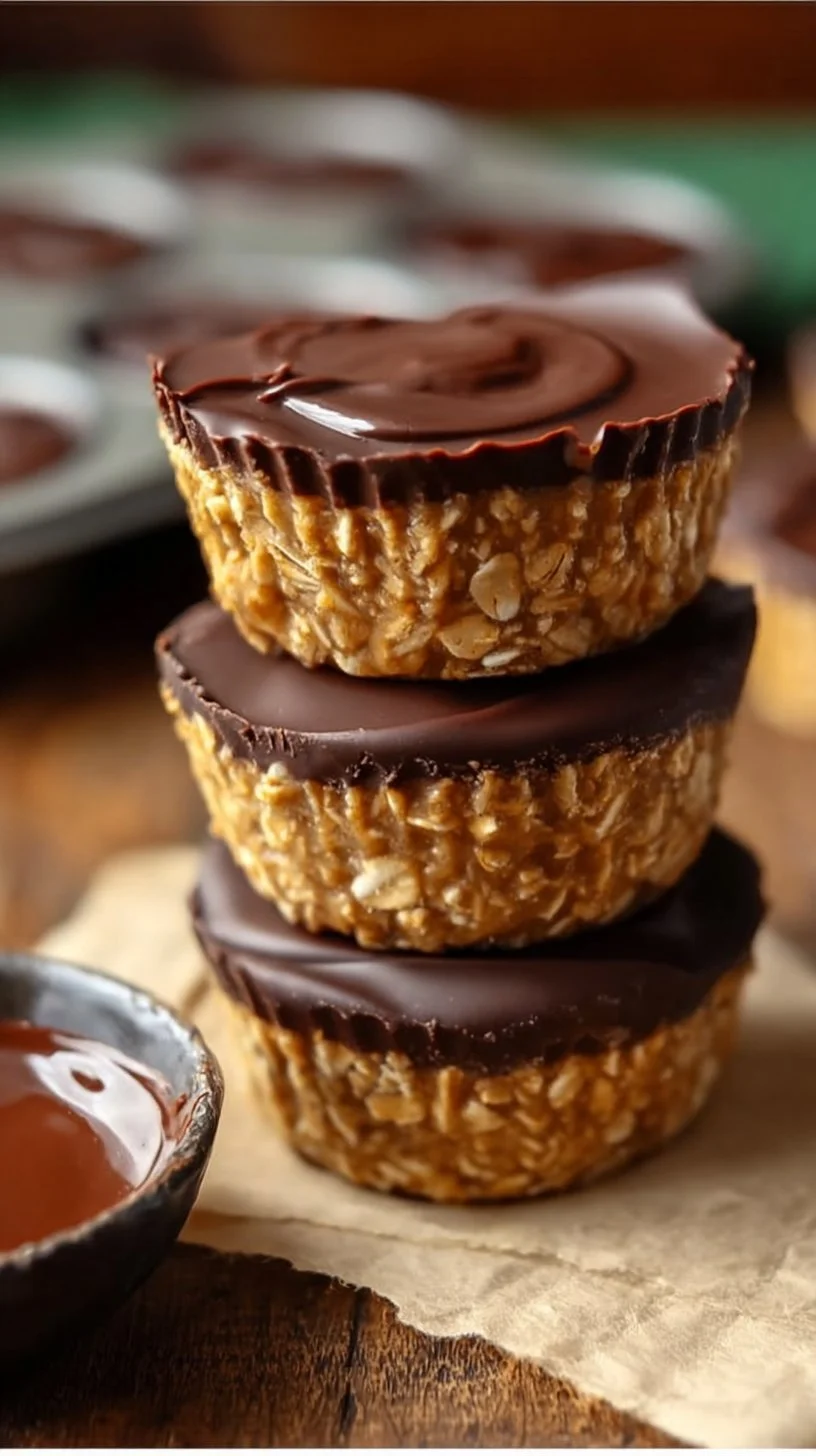
Peanut Butter Oat Cups are one of those easy, dependable snacks that sit comfortably between a treat and a tiny, purposeful meal. They’re no-bake, familiar in flavor, and straightforward to make — which is why I turn to them when I want something that feels satisfying without tipping into heaviness. These cups carry the richness of peanut butter and a bit of chew from oats, and when you keep the portions moderate, they work well for afternoons, lunchboxes, or as a compact post-workout bite.
If you like the idea of portable, protein-forward snacks that don’t demand a lot of fuss, this recipe sits very naturally in that space. For readers who enjoy variations on simple bite-sized snacks, I often reference similar make-ahead options like frozen Greek yogurt peanut butter bites — not because they’re the same, but because they share the same practical spirit: minimal ingredients, clear purpose, and easy storage.
How this recipe fits into a balanced lifestyle
This recipe supports a balanced approach by focusing on whole, recognizable ingredients and portion control rather than restricting any food groups. The peanut butter brings flavor and satiety, while oats add fiber and a pleasing chew that slows you down a little at snack time. Together they create a small, energy-sustaining package you can fit into a varied week.
Because these cups aren’t fried or heavily sweetened, they feel lighter compared with many commercially produced bars or dense pastries. That doesn’t mean they skimp on satisfaction — the mouthfeel from the peanut butter and the optional chocolate chips gives the sensory cues our brain associates with comfort. If you’re planning meals for the week, a batch of these is a sensible component alongside fresh fruit, yogurt, or a cup of tea. You can also alternate them with other portable snacks — for example, pair them with higher-protein chilled bites like high-protein frozen peanut butter Greek yogurt bites on days you need a protein boost — to keep variety without extra complication.
How to make Peanut Butter Oat Cups
The overall flow is refreshingly simple: mix, press, chill, and enjoy. There’s no baking, no special equipment beyond a muffin tin or liners, and the timing is mostly passive while the cups set in the refrigerator. The places to focus are texture and temperature — warm peanut butter mixes more smoothly, oats should be stirred in just enough to coat them, and pressing the mixture firmly into the cups will help them hold together once chilled.
Simplicity matters most at two points: getting a cohesive mixture and packing it firmly in the mold. Overthinking the process usually leads to fiddling with add-ins or unnecessary steps that don’t improve the final product. Trust the basic proportions and use the brief chilling time to plan whatever you’ll serve alongside them. If you want a lighter mouthfeel, choose a peanut butter with a slightly thinner texture (stirring it first helps); if you prefer a denser bite, natural, thicker peanut butter will do that work for you.
Ingredients
1 cup peanut butter, 1 cup rolled oats, 1/4 cup honey or maple syrup, 1/4 cup chocolate chips (optional), 1/2 teaspoon vanilla extract, A pinch of salt
Each ingredient here has a clear role:
- 1 cup peanut butter: The central flavor and source of richness. It binds the mixture and provides healthy fats and a satisfying, familiar taste that makes these feel like a treat rather than a bland health snack.
- 1 cup rolled oats: Adds chew, bulk, and a neutral backdrop that balances the richness of the peanut butter. Oats also stretch the recipe so you get more pieces without sacrificing texture.
- 1/4 cup honey or maple syrup: Acts as both sweetener and binder. Honey tends to be a bit stickier, which helps the cups hold together; maple syrup brings a distinctive flavor note if you want that earthy sweetness.
- 1/4 cup chocolate chips (optional): These are for contrast — a little chocolate brightens the flavor and signals indulgence. Keeping the amount modest maintains the balance between sweet and satisfying.
- 1/2 teaspoon vanilla extract: A small but effective flavor-layering ingredient. Vanilla enhances the perception of sweetness without adding sugar and ties the peanut and oat flavors together.
- A pinch of salt: Salt sharpens the flavors, cuts through the sweetness, and makes the peanut butter taste more pronounced. Even just a pinch makes a noticeable difference.
This is a recipe built on mindful choices: you’re not removing foods, you’re using smaller, purposeful amounts of ingredients that lift the overall experience. Combination, not restriction, is how balance is achieved here.
Directions
- In a large bowl, combine the peanut butter, honey (or maple syrup), and vanilla extract. Stir until smooth., 2. Add the rolled oats and salt to the mixture and mix until well combined., 3. If using, fold in the chocolate chips., 4. Line a muffin tin with paper liners or spray with cooking spray., 5. Spoon the mixture into the muffin cups, pressing down firmly to ensure they hold together., 6. Refrigerate for at least 30 minutes to set., 7. Once set, remove from the tin and enjoy your no-bake snack!
Notes and what to look for as you work:
- Step 1: Aim for a smooth, uniform base. If your peanut butter has separated, stir it first or heat gently for a few seconds to make mixing easier. The goal is a cohesive, silky mix before you add oats.
- Step 2: When the oats are added, mix until they’re evenly coated but don’t overwork them. You want each oat to be covered so the texture is consistent, but the mixture should remain slightly sticky rather than dry.
- Step 3: Folding in chocolate chips at the end keeps them intact and gives a nice contrast. If you prefer melted ribbons of chocolate, you could reserve some to drizzle after setting.
- Step 5: Pressing firmly is essential. These are no-bake cups, so physical compression is what helps them hold their shape once chilled. Use the back of a spoon or a small measuring cup to compact the mixture.
- Step 6: Refrigeration is mostly passive time. Thirty minutes is the minimum; an hour gives a firmer set if you like a less yielding bite.
Avoid overcomplicating the process: follow the steps in order, focus on consistency and texture, and you’ll get reliable results every time.
The role of preparation in keeping this dish light
The preparation method — no baking, minimal added fat beyond what’s in the peanut butter, and light sweetening — is key to why these cups feel lighter. Direct heat can concentrate fats and sugars into a denser product, whereas simply chilling a balanced mixture keeps the ingredients’ individual textures intact: the peanut butter remains smooth, the oats stay chewy, and the chocolate chips (if used) provide little pops of richness.
Technique matters, too. Pressing the mixture compactly reduces crumbly edges that can leave you wanting more, and chilling until firm prevents a greasy or overly soft mouthfeel. Small choices — like using a milder sweetener or choosing a slightly thinner peanut butter — will make the final result feel fresher and less heavy, without losing the comforting, familiar flavors that make these cups enjoyable.
Simple ways to adjust without losing balance
You can personalize these cups while keeping them balanced by thinking in terms of flavor accents rather than wholesale swaps. A few conceptual tweaks:
- Texture tweaks: Stir in a tablespoon of chia or ground flaxseed for a tiny boost of fiber and a firmer texture, or briefly pulse the oats for a finer crumb if you prefer a smoother cup.
- Flavor accents: Add a pinch of cinnamon or swap vanilla for almond extract to shift the flavor profile subtly without changing structure.
- Sweetness adjustments: Use less honey or maple syrup for a less sweet bite, or choose a darker maple option for a deeper flavor note.
- Topping ideas: Sprinkle flaky sea salt or toasted coconut on top before chilling to add contrast without making the cups feel heavier.
Keep the core recipe the same and treat these suggestions as optional nudges. Small adjustments preserve balance and make it easy to keep the cups feeling light and satisfying.
Pairing ideas for a complete, well-rounded meal
These cups work well as part of a small, composed plate. Think about combining textures and flavors that complement their richness:
- Fresh fruit: Slices of apple, pear, or a handful of berries add brightness and a juicy counterpoint to the dense cups.
- Yogurt or kefir: A small bowl of plain or lightly sweetened yogurt provides creaminess and extra protein — a simple way to stretch a snack into a light breakfast.
- Raw vegetables: Crisp cucumber or carrot sticks offer a refreshing contrast if you want to keep things savory-forward.
- A simple beverage: Green tea, black coffee, or a cold glass of milk pairs nicely without adding heaviness.
If you’re planning a dessert-style plate for guests, think about a few small bites instead of large portions: one or two peanut butter oat cups alongside a spoonful of yogurt and some citrus segments creates a balanced spread. For ideas that bring an elegant small-bite approach to your sweets rotation, I sometimes pair this kind of recipe with delicate confections like buttercream macarons on occasion — not to match them exactly, but to create contrast in texture and presentation.
Storage, leftovers, and next-day enjoyment
These cups store very well. Keep them in an airtight container in the refrigerator for up to 7 days; the chill helps them stay firm and preserves texture. If you want to make a larger batch for longer-term storage, freeze them in a single layer on a tray until solid, then transfer to a freezer-safe container for up to 2 months. Thaw in the refrigerator for 15–30 minutes before serving to regain a pleasant, slightly yielding texture.
When you pull them from the fridge, let them sit 3–5 minutes at room temperature before eating — they soften slightly and the flavors open up. If they feel too firm straight from the fridge, a brief 10-second zap in the microwave can bring them to a more tender bite, but avoid long heating which will make the peanut butter oily. Proper storage and brief, gentle warming keep these cups tasting fresh and balanced day to day.
Common questions about lighter everyday cooking
Q: How many of these should I eat at once?
A: Portion guidance is personal, but the recipe makes small cups that are designed to be a single-sitting snack. Pair one or two with fruit or yogurt for a light, balanced combo.
Q: How do I keep from getting bored if I make these frequently?
A: Rotate small changes: swap honey for maple syrup one week, add cinnamon the next, or alternate between adding and omitting chocolate chips. Small seasonal toppings like citrus zest or toasted seeds keep things interesting.
Q: Can I make these ahead for a weekly meal plan?
A: Yes — they refrigerate and freeze well. Storing them in single layers with parchment between helps with grab-and-go portions. Making a batch on a weekend and pairing them with fresh produce through the week is a practical approach.
Q: How do I keep lighter meals feeling satisfying?
A: Focus on texture and balance: include a mix of fat (peanut butter), complex carbs (oats), and a bit of sweetness, and pair with fresh or protein-rich sides when needed. That combination gives you sensory satisfaction and helps meals last without feeling heavy.
Final thoughts from Daniel
This recipe embodies the kind of everyday cooking I like to encourage: simple, honest ingredients handled with a few thoughtful techniques. Peanut Butter Oat Cups are easy to prepare, easy to adapt, and easy to include in a weekly rotation without fuss. They reward small acts of care — stirring until smooth, pressing firmly, and chilling — and in return give you a portable snack that tastes comforting while still feeling light.
Balance in the kitchen is flexible: it’s less about rigid rules and more about choosing patterns that sustain you. Keep this recipe on hand for busy afternoons, quick breakfasts, or when you want something that feels a little indulgent but not complicated. Trust the process, keep portions sensible, and let small tweaks keep it fresh.
Conclusion
For more no-bake inspirations similar to this style, you can compare ideas with No-Bake Chocolate Peanut Butter Oatmeal Cups – rachLmansfield, or explore a slightly different take at No Bake Peanut Butter Oat Cups (4 Ingredients!). If you enjoy a straightforward, cookie-like approach, see the version here: Peanut Butter Oat Cups – Lovely Delites. For a vegan or gluten-free perspective with a chocolate twist, check out Peanut Butter Chocolate Oat Cups (No-bake/Vegan/Gluten-free).

Peanut Butter Oat Cups
Ingredients
Method
- In a large bowl, combine the peanut butter, honey (or maple syrup), and vanilla extract. Stir until smooth.
- Add the rolled oats and salt to the mixture and mix until well combined.
- If using, fold in the chocolate chips.
- Line a muffin tin with paper liners or spray with cooking spray.
- Spoon the mixture into the muffin cups, pressing down firmly to ensure they hold together.
- Refrigerate for at least 30 minutes to set.
- Once set, remove from the tin and enjoy your no-bake snack!