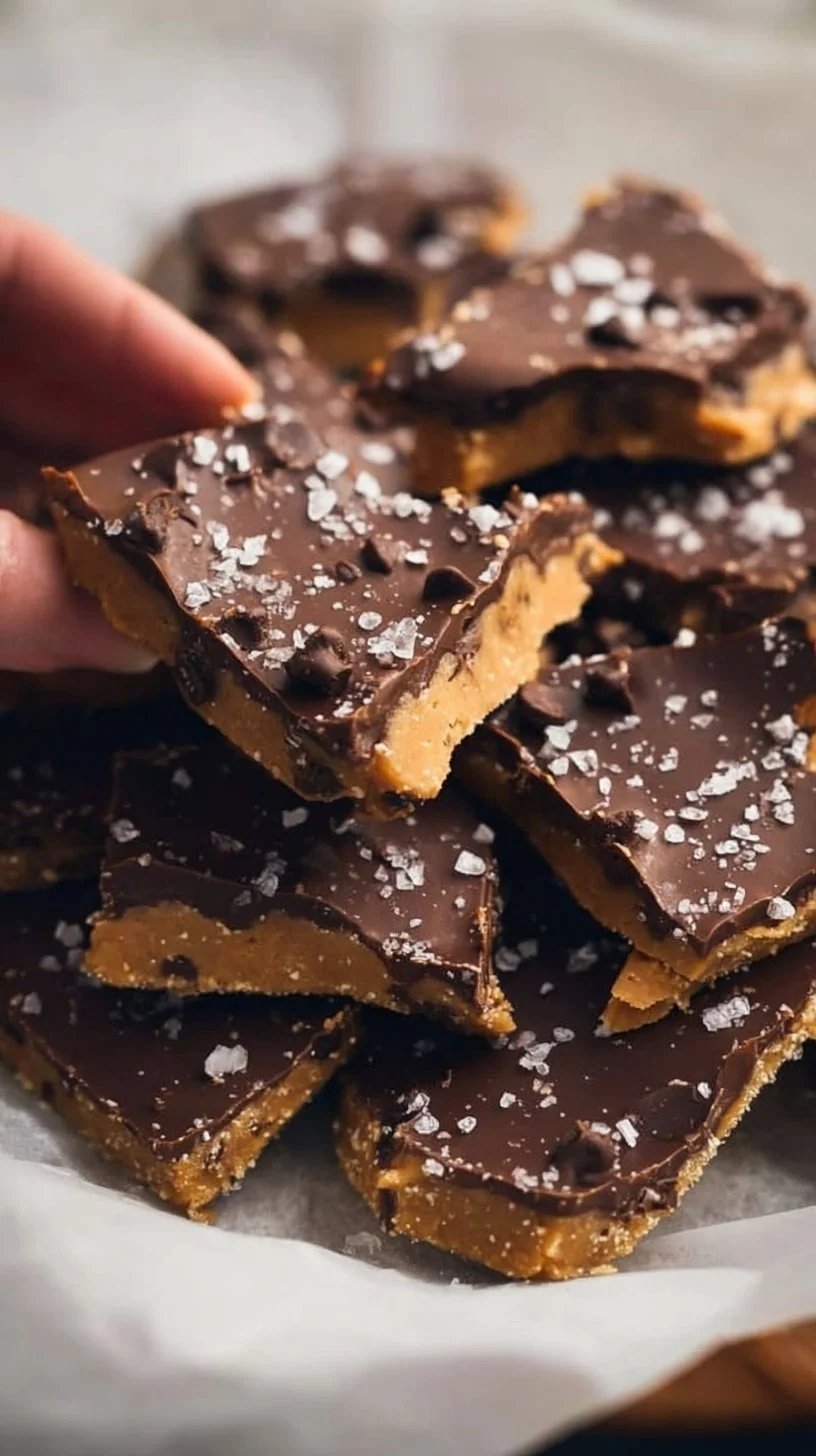
Healthy Cookie Dough Bark
Hi, I’m Carla Carter, Founder & Recipe Developer of RecipesCabin. If you love the idea of cookie dough but want something a little lighter and much easier to make, this Healthy Cookie Dough Bark is for you. It’s a sweet, scoopable snack that doesn’t require an oven, isn’t fussy, and gives you big-cookie flavor in small, satisfying bites. This recipe is approachable whether you’re new to baking or returning after a long break — and if you like simple, high-protein treats, you might also enjoy my easy healthy protein waffles, which share that same accessible spirit.
What makes this bark a great recipe to learn from is how straightforward the steps are: mix a few pantry-friendly ingredients, press into a thin layer, melt chocolate, and set. There’s no rolling, no precise timing or temperature tracking, and very little clean-up. I’ll walk you through each stage with gentle, practical cues so you can feel confident from start to finish.
Why this recipe is easy to get right
This cookie dough bark is forgiving in several ways. First, the base is almond flour with a nut butter binder — it comes together easily and won’t separate or collapse if you press it a little thicker or thinner. Second, the chocolate layer sets quickly in the freezer, so timing isn’t strict. Small imperfections, like uneven edges or a slightly thicker pocket of chocolate, don’t affect the flavor and are easy to cover with a sprinkle of flaky sea salt.
Flexibility is built into the recipe: brands of nut butter and chocolate vary, but substitutions won’t break the texture as long as the ratios stay the same. The mix-and-press method means there’s no overbaking to worry about — you can correct sticky or dry dough by briefly warming your hands or adding another teaspoon of coconut oil if it seems dry (I’ll note when that’s helpful). For new cooks, this is a low-stress way to practice combining ingredients and working with melted chocolate without intimidating techniques.
How to make Healthy Cookie Dough Bark
The process flows in three clear stages: make the dough, melt the chocolate, and assemble + chill. Focus on one stage at a time and use the sensory cues I describe below.
First: mix the dough. You’ll combine almond flour, nut butter, maple syrup, melted coconut oil, vanilla, and salt. Look for a uniform, slightly sticky dough that holds together when pressed. If you pinch a bit between your fingers it should form a small ball without crumbling apart.
Next: flatten the dough. Transfer it to parchment and press it to about 1/2-inch thick. This is where even pressure matters more than perfection. Work from the center outward to avoid air pockets and to make a smooth surface for the chocolate.
Last: melt and spread the chocolate. Melt the chocolate chips with a small amount of coconut oil in short bursts, stirring between intervals. Once glossy and pourable, spread it across the dough and add a few flakes of sea salt. Freeze briefly to set, then chop into rustic chunks.
Beginners should slow down during the mixing stage — ensure almond flour is evenly incorporated so there are no dry pockets. Also take your time melting chocolate in the microwave in 30-second intervals; stirring is where you’ll see the sheen that tells you it’s ready.
I’ll include the full, exact recipe directions in the Directions section below so you have the precise steps on hand.
Ingredients
1 and 1/2 cups almond flour, 1/4 cup cashew butter (or peanut butter), 1/4 cup maple syrup, 2 tbsp melted coconut oil, 1 tsp vanilla extract, 1/4 tsp salt, 1/4 cup chocolate chips, 1 cup chocolate chips, 1 tsp coconut oil, Flaky sea salt, optional
Here’s what each ingredient does and why you don’t need anything fancy to succeed:
- Almond flour: This is the backbone of the dough. It provides structure and a tender, slightly nutty texture. Unlike wheat flour, almond flour doesn’t need to be “activated” by baking, which is why this no-bake bark works so well.
- Cashew butter (or peanut butter): The nut butter binds the almond flour and adds richness. Cashew butter is mild and silky; peanut butter gives a stronger, familiar cookie-dough flavor. Either option works — use what you like.
- Maple syrup: This liquid sweetener both sweetens and helps the dough hold together. It also adds a subtle depth that complements the nutty almond flour.
- Melted coconut oil: A little fat helps the dough come together and keeps it pliable. Because it’s melted, it disperses evenly and gives that desirable soft bite once chilled.
- Vanilla extract: A small splash of vanilla brightens flavors and makes the dough taste more “cookie-like.” You only need a teaspoon to make a notable difference.
- Salt: Just a touch balances the sweetness and brings out the nutty flavors. Try to use the amount listed; the final sprinkle of flaky sea salt is optional but lovely.
- 1/4 cup chocolate chips (for the dough): These are stirred into the dough so you get chocolate chips throughout each piece. They’re small, sweet pockets inside the bark.
- 1 cup chocolate chips + 1 tsp coconut oil (for melting): The larger amount of chips is melted to form the top layer. A teaspoon of coconut oil smooths the melted chocolate and helps it set with a glossy finish.
- Flaky sea salt (optional): A few flakes on top enhance brightness and add a pleasant crunch contrast to the soft cookie dough.
None of these ingredients are complicated — most are pantry staples or easy to find. Together they create a balance of texture (soft dough, crisp chocolate top) and flavor (nutty, sweet, lightly salted).
Directions
In a bowl, add almond flour, cashew butter, maple syrup, melted coconut oil, vanilla, and salt. Mix together until evenly combined. Then, stir in the chocolate chips., Place parchment paper on a cutting board or large plate. Transfer the cookie dough to the parchment paper. Using a silicone spatula or clean hands, firmly press the cookie dough to flatten (about 1/2-inch thick). Set aside., In a small bowl, add chocolate chips and coconut oil. Microwave in 30-second intervals, stirring between, until the chocolate is fully melted., Pour and spread the melted chocolate over the cookie dough. Sprinkle flaky sea salt on top., Chill cookie dough bark in the freezer for 10 minutes to set. After, chop into large chunks. Enjoy!
Supportive guidance around each step:
- Mixing: You’re aiming for an even texture without streaks of almond flour. The dough should be soft but not wet. If it seems too dry and won’t hold together, a tiny splash of extra maple syrup or a drop of melted coconut oil can help — add sparingly. If it’s too soft, chill it briefly for 5–10 minutes to firm up.
- Pressing the dough: Use a piece of parchment to press the top for a smoother finish. Firm, steady pressure gives an even thickness. If edges aren’t neat, that’s okay — they’ll hold flavor and make pretty irregular pieces.
- Melting chocolate: Microwave in 30-second bursts, stirring each time. Chocolate often looks slightly grainy when you first take it out; continued stirring brings it glossy as the residual heat finishes melting small pieces. If it seizes (looks lumpy and dull), a tiny bit of warm coconut oil and vigorous stirring can help smooth it.
- Spreading and chilling: Spread the chocolate quickly but carefully — it sets fast once the cold dough is in place. A sprinkle of flaky salt adds brightness; don’t be shy if you like salty-sweet. Freeze for the listed 10 minutes; it sets quickly, and you’ll know it’s ready when the chocolate no longer gives under gentle pressure.
Remember: imperfect edges or uneven chocolate are normal. The flavor won’t care, and those little quirks often make homemade treats more charming.
Key techniques you’ll practice in this recipe
This recipe is a gentle way to build several useful kitchen skills:
- Measuring and combining: You’ll practice precise measuring and mixing ingredients to a consistent texture — a core skill for both baking and no-bake recipes.
- Judging texture: Learning to recognize the look and feel of a properly combined dough (soft, slightly sticky, cohesive) helps with future recipes that rely on similar visual cues.
- Melting chocolate gently: Heating in short intervals and stirring teaches patience and control so chocolate melts smoothly without burning — useful for sauces, glazes, and other confections.
- Pressing and layering: Even pressure and spreading a thin layer are simple but transferable techniques for bars, tarts, and layered desserts.
Each of these techniques is low-pressure here — practice builds confidence, and success with this recipe makes it easier to try other small-batch sweets.
Common mistakes and how to avoid them
A few things commonly trip up new cooks, but they’re easy to recover from:
- Dough too dry and crumbly: Often due to slightly less maple syrup or too much almond flour packed in the measuring cup. Fix: gently warm your hands and press; if it still falls apart, stir in a teaspoon of melted coconut oil or a little more maple syrup, one teaspoon at a time.
- Dough too wet or sticky: This can happen if your nut butter is very thin or you measured a bit heavy on liquids. Fix: pop the dough in the fridge for 10–15 minutes; chilling firms it up without changing flavor.
- Chocolate overheating/seizing: If the chocolate comes out grainy and dull, it’s likely been overheated. Fix: stir vigorously and add a small pinch (1/4 tsp) of coconut oil to restore gloss. If that doesn’t work, start fresh with a small amount of new chocolate and fold in the seedy bits — the flavor will still be fine.
- Uneven chocolate layer: If the chocolate sets too quickly before you can spread it, work in slightly warmer conditions next time or melt the chocolate a touch less so it’s more fluid. You can also use the back of a spoon or an offset spatula to gently nudge chocolate into an even layer.
If something goes off track, pause, assess, and use one of the simple fixes above — you rarely need to start over entirely.
How to adjust confidently without changing the recipe
You asked how to make adjustments while sticking to the recipe’s spirit — here are confident, concept-only tweaks that keep the listed ingredients and steps intact:
- Portion scaling: To make more bark, double every ingredient and use a larger tray; the process and timing remain the same. For a smaller batch, halve the ingredients. When scaling, keep the same ratios so texture stays consistent.
- Flavor preference adjustments: If you prefer a nuttier or bolder flavor, use peanut butter instead of cashew butter (the ingredient list already allows this). If you like a brighter top note, add a pinch more flaky sea salt at the end.
- Texture tweaks (conceptual): For a firmer bite, press the dough a touch thinner than 1/2-inch; for a chewier bite, press slightly thicker. The chocolate-to-dough ratio will change with thickness, so adjust your spreading accordingly.
These adjustments are about proportions and technique, not changing ingredients or steps. Trust your senses — the dough’s feel and the chocolate’s sheen tell you more than a clock does.
Serving, storage, and reheating made simple
Serving: Cut or chop the bark into large, rustic chunks and arrange on a small plate. It’s lovely alongside a cup of tea or as an afternoon pick-me-up. Because the pieces are meant to be irregular, don’t worry about perfect squares — part of the charm is the mix of sizes.
Storage: Store leftover bark in an airtight container in the refrigerator for up to one week. For longer storage, freeze in a single layer on a parchment-lined tray until solid, then transfer to a sealed container for up to three months. When freezing, place parchment between layers so pieces don’t stick together.
Reheating: There’s no reheating needed — this is meant to be enjoyed chilled. If you want the chocolate softer, let a piece sit at room temperature for 5–10 minutes. If you’ve frozen pieces, thaw in the fridge for 15–30 minutes, then bring to room temperature briefly before serving for best texture.
If you want to explore more storage-friendly sweet snacks, check out my recipe for high-protein cottage cheese cookies — they store well and offer a different texture experience.
Questions new cooks often ask about this recipe
Q: How long will mixing take?
A: About 2–3 minutes. You’re just making sure everything is combined evenly — look for no streaks of almond flour.
Q: Can I use crunchy nut butter?
A: Yes, but expect more texture in the dough. If the pieces are too large, the dough may be a touch harder to press; mixing a little longer helps.
Q: Is it normal for the melted chocolate to look matte at first?
A: Yes. Stirring brings shine as any remaining unmelted bits dissolve. If it stays matte and grainy, add a tiny bit of coconut oil and stir.
Q: My bark is a bit soft after chilling — what went wrong?
A: It may have needed a few extra minutes in the freezer or the coconut oil in the melted chocolate was too high. Pop it back in the freezer for 5–10 minutes and check again.
Q: Do I need special tools?
A: No. A bowl, spatula (or clean hands), a small microwave-safe bowl, and parchment paper are all you need.
If something feels uncertain, take a breath and try the simple fixes above. Baking and no-bake recipes are forgiving when you pay attention to textures.
Final encouragement from Carla
You don’t need perfect tools or perfect timing to make something delicious. This Healthy Cookie Dough Bark is a gentle, satisfying way to practice simple kitchen skills and enjoy a sweet treat you made yourself. Mistakes are part of learning — an uneven edge or a slightly thicker piece doesn’t mean failure, it means you tried something new.
Keep experimenting in the small, brave ways — every snack you make builds confidence. I’m proud of you for trying this recipe, and I can’t wait for you to find little ways to make it your own. Remember: progress matters more than perfection.
Conclusion
If you want another take on a plant-based version of cookie dough bark, I found a lovely approach at Healthy Cookie Dough Bark (Vegan & Gluten-Free) – Purely Kaylie that complements the ideas here. For more inspiration on dairy-free and gluten-free cookie-dough-style treats, this variation is helpful: Chocolate Chip Cookie Dough Bark (vegan + gluten-free).

Healthy Cookie Dough Bark
Ingredients
Method
- In a bowl, add almond flour, cashew butter, maple syrup, melted coconut oil, vanilla, and salt. Mix together until evenly combined.
- Stir in the chocolate chips.
- Transfer the cookie dough to parchment paper and firmly press it to flatten to about 1/2-inch thick.
- In a small bowl, add chocolate chips and coconut oil. Microwave in 30-second intervals, stirring between, until fully melted.
- Spread the melted chocolate over the cookie dough and sprinkle with flaky sea salt.
- Chill cookie dough bark in the freezer for 10 minutes to set, then chop into large chunks.