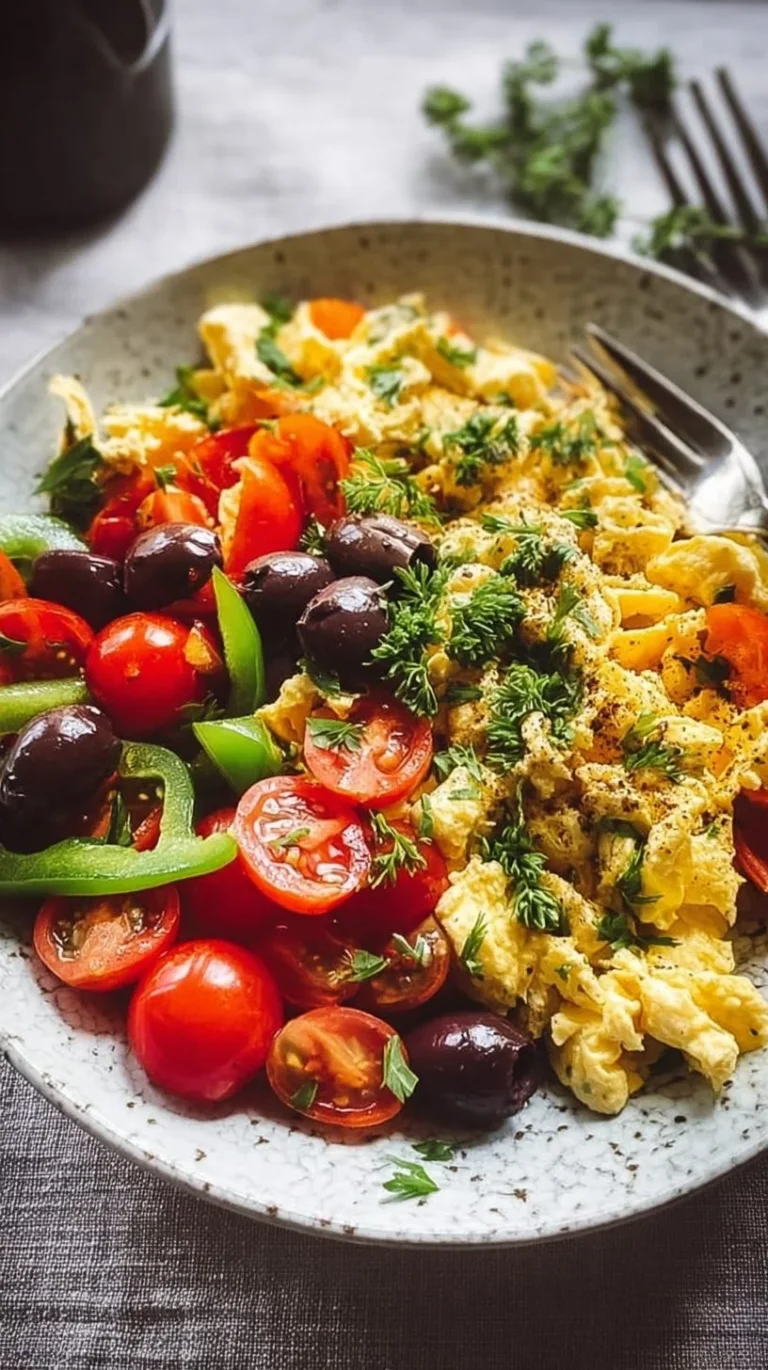
Crispy Egg Salad
Introduction
Hi—I’m Carla Carter, Founder & Recipe Developer of RecipesCabin. If you’ve ever eyed an egg salad and thought, “I could mess this up,” you’re in the right place. This Crispy Egg Salad is for anyone who wants something comforting and a little adventurous without complexity. It’s approachable because it uses familiar ingredients and straightforward steps. You’ll get the creamy familiarity of a classic egg salad with a satisfying crisp from a quick pan fry. That contrast of textures makes it an excellent recipe to learn from: it teaches a few gentle techniques you can use again and again, and it’s forgiving enough that small imperfections won’t ruin the dish.
Take a deep breath—this is a recipe designed to build confidence. I’ll walk beside you, explain why each step matters, and show you what to look for so you can succeed on your first try.
Why this recipe is easy to get right
This recipe is forgiving in several ways. The core ingredients are simple and not fussy: hard-boiled eggs, mayo, a bit of heat from sriracha, cheese for melt and support, and chives for brightness. Because the eggs are already cooked, you’re mainly assembling and finishing on the stove, rather than juggling raw proteins and timing multiple moving parts.
Flexibility helps here: you don’t need exact knife skills to chop the eggs—small inconsistencies are fine and even charming in a rustic salad. The pan fry step is short and visual: you’ll see when the outside turns golden and hear a gentle sizzle. That makes it easy to gauge rather than rely on a timer. If something is slightly off—say the pan is a touch too hot—you can lower the heat and rescue the dish without starting over.
For anyone new to cooking, this recipe is a low-stakes chance to practice heat control, gentle chopping, and flavor balancing. Those are skills that matter far beyond one plate.
How to make Crispy Egg Salad
At a high level, the recipe moves through three stages: mix, pan fry, and assemble. Here’s what happens at each stage and what to watch for.
- First: Mix the Egg Salad. You’ll combine the chopped hard-boiled eggs with mayonnaise, sriracha, shredded mozzarella, chives, salt, and pepper. The goal here is a cohesive mixture that’s creamy but still has some egg texture. Focus on gentle folding so the eggs stay chunky rather than turning into a paste.
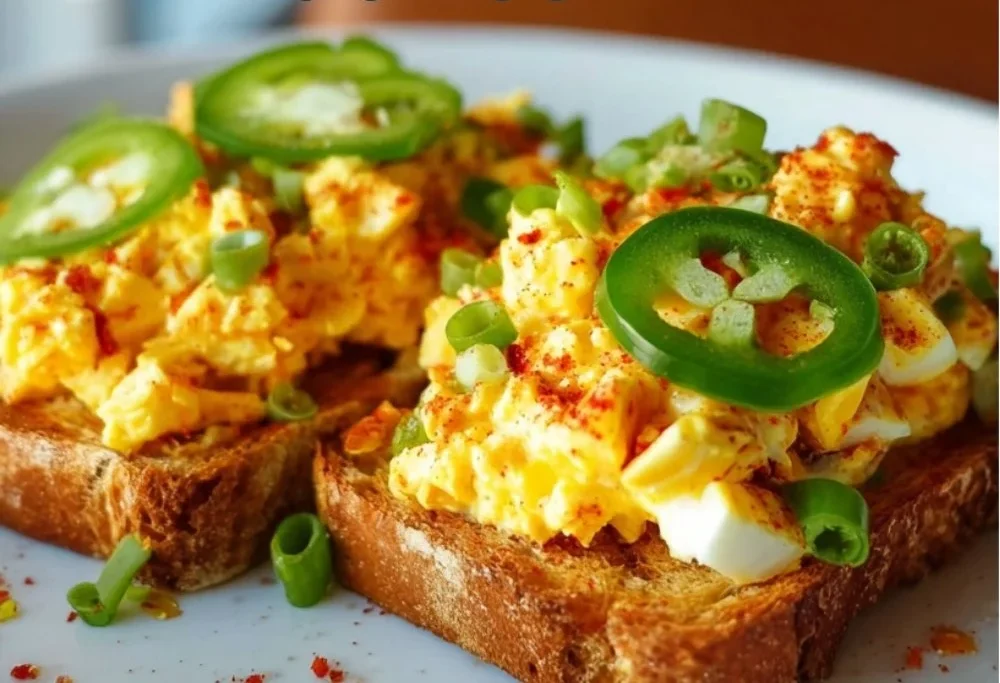
- Next: Pan Fry the Egg Salad. This step gives you the “crispy” in Crispy Egg Salad. You’ll press the mixed salad gently into a warm, lightly oiled skillet and let it brown. Look for a golden, slightly firm crust that lifts easily from the pan. The smell will switch from just mayo and eggs to a warm, toasted note—trust that cue.
- Last: Assemble. How you serve is up to you—on toast, in a sandwich, or on a bed of greens. The goal is contrast: creamy interior meets a crisp exterior. When assembling, focus on balance so each bite has both textures and a touch of heat from the sriracha.
If you’re new, slow down during the mixing so you can feel the texture under your spoon. During the pan fry, take time to watch the color change rather than racing the clock.
Ingredients
6 hard-boiled eggs (chopped ), ½ cup shredded mozzarella cheese, 2 tablespoons mayonnaise (option to use kewpie mayonnaise ), ½ tablespoon sriracha, 2 teaspoons chives (chopped small), kosher salt (to season), black pepper (few turns of cracked black pepper)
Each ingredient plays a clear, friendly role:
- 6 hard-boiled eggs (chopped ): The foundation. They give the salad body, creaminess when combined with mayo, and the mild egg flavor everyone recognizes. Chopping rather than smashing keeps pleasant chunks for texture.
- ½ cup shredded mozzarella cheese: Mozzarella adds melt and chew. It’s mild, so it won’t overpower, but when warmed briefly in the pan it becomes soft and brings a comforting stringy quality in each bite.
- 2 tablespoons mayonnaise (option to use kewpie mayonnaise ): Mayo binds everything together and adds richness. Kewpie is an optional swap if you like a slightly sweeter, umami-rich mayo—but either way, the mayo’s purpose is simple: make a cohesive, spreadable salad.
- ½ tablespoon sriracha: A touch of heat and a little acid from the chili will lift the flavors. Half a tablespoon is modest, so the heat doesn’t dominate—just brightens.
- 2 teaspoons chives (chopped small): Freshness and a gentle onion note without the bite of raw onion. Chives are tiny flavor lift-makers that make the salad feel finished.
- kosher salt (to season): Salt enhances everything else. Use it sparingly at first and taste—salt is the one thing where small adjustments make a big difference.
- black pepper (few turns of cracked black pepper): Pepper adds warmth and a slight bite that plays well with the sriracha.
None of these ingredients are intimidating. They’re pantry-friendly and combine to create a clear, balanced profile: creamy, savory, a little spicy, and bright.
Directions
Mix the Egg Salad, Pan Fry the Egg Salad, Assemble
Now let’s add supportive guidance around those steps without changing them:
- Mix the Egg Salad: Combine the chopped hard-boiled eggs, shredded mozzarella, mayonnaise, sriracha, chopped chives, kosher salt, and black pepper in a bowl. Use a large spoon or spatula and fold gently. Visual cue: you want the mixture to look uniformly coated but still show distinct egg pieces and little ribbons of cheese. The texture should be creamy, not soupy. If it looks too dry, a tiny extra dab of mayonnaise will help—if too wet, a touch more chopped egg or cheese will firm it up. Don’t worry about perfectly even pieces; variation is expected.
- Pan Fry the Egg Salad: Heat a skillet over medium to medium-low heat with a small amount of neutral oil or butter. Press the mixed egg salad into an even layer in the pan—think a loose patty rather than a compact cake. Visual cues: you’ll hear a steady, gentle sizzle and see the outer edge turn a light golden brown. The cheese will soften and help bind the surface. Timing is short, usually a few minutes per side depending on your heat. Use a spatula to lift a corner and check the color; if it browns too quickly, lower the heat. The goal is a golden, crisp exterior and a warm, creamy interior.
- Assemble: Transfer the crispy portion to your chosen base—toast, sandwich bread, or greens. If using bread, you can toast it first so it holds up to the warmth and moisture. Assemble so each bite gives you some crispness and some soft egg. Taste and add a final sprinkle of chives, a pinch of salt, or another turn of pepper if needed.
If at any point it doesn’t look perfect, that’s okay. The pan fry is forgiving; a slightly uneven crust still tastes great. The mixing stage is flexible—small differences in texture don’t ruin the dish.
Key techniques you’ll practice in this recipe
This recipe helps you practice several useful, transferable techniques:
- Gentle chopping and texturing: Learning to chop eggs into chunks rather than mush teaches control over texture—handy for salads, relishes, and fillings.
- Folding and binding: Mixing without overworking keeps ingredients distinct while creating cohesion. This skill matters for anything from potato salad to tuna salad.
- Heat control and pan frying: You’ll practice adjusting stove temperature, watching color, and rescuing an overly hot pan. Those instincts are essential for sautéing, searing, and browning.
- Taste and balance: Salting and adjusting heat are basic, repeatable skills that improve every dish you cook.
Each technique is approachable here because the stakes are low: if a chop is uneven, the sandwich will still be delicious; if the pan browns unevenly once, you can lower the heat next time.
Common mistakes and how to avoid them
Here are the typical missteps and quick fixes:
- Mistake: Overmixing the eggs until they’re mushy. Fix: Fold gently and stop when you have creamy coating with distinct egg pieces. You can always add a touch more chopped egg if you’ve overmixed.
- Mistake: Pan is too hot, causing the outside to darken too fast while the inside remains cold. Fix: Lower the heat, remove the pan from the burner for a moment to cool slightly, and try again. A golden crust should develop slowly.
- Mistake: Salad too wet or too dry. Fix: If too wet, add a bit more chopped egg or cheese to absorb moisture. If too dry, stir in a small extra dot of mayonnaise.
- Mistake: Not tasting as you go. Fix: Sample a small spoonful after mixing (or a tiny bit on a cracker) to check seasoning. Adjust salt, pepper, or sriracha in small increments.
- Mistake: Using a thin pan that causes sticking. Fix: Choose a nonstick skillet or a well-seasoned cast iron and use a small amount of oil or butter to prevent sticking.
None of these errors are permanent. The recipe is forgiving: a shifted texture or a browning misstep often still tastes great and teaches you how to tweak next time.
How to adjust confidently without changing the recipe
You may want to tailor portions, heat, or texture without altering measurements or steps—here’s how to think about that.
- Portion scaling concepts: To feed more people, double the batch in the bowl and pan fry in batches rather than crowding the pan. Crowding lowers the pan temperature and prevents crisping. For smaller portions, use the same method in a smaller pan—just press less into the skillet.
- Flavor preference adjustments: If you prefer less heat, mentally scale the sriracha back—start with less when you mix and add more to taste. If you like it tangier, serve with a squeeze of lemon at the table instead of changing the mix.
- Texture tweaks — conceptually only: If you want a slightly firmer interior, press the mixture a little more before flipping in the pan; for a looser interior, don’t press it down as compactly. These are subtle shifts you can control by how you handle the mixture, not by changing ingredients.
The key is to think in small increments: taste, nudge, taste again.
Serving, storage, and reheating made simple
Serving: This recipe shines on toasted bread, inside a soft sandwich roll, or on crisp salad greens for a lighter option. A fresh pickle or thinly sliced cucumber on the side adds brightness. Consider a simple green salad dressed lightly if you want contrast.
Storage: Keep leftovers in an airtight container in the fridge for up to 2 days. Because mayonnaise and cooked eggs are present, shorter storage is safer—freshness matters. If you’ve already pan-fried and assembled into a sandwich, separate components when possible; store the salad and bread separately to keep the bread from getting soggy.
Reheating: To bring back crispness, reheat gently in a skillet over low heat for a few minutes on each side—this revives the exterior without drying the inside. A toaster oven on a low setting also works well for an assembled sandwich. Avoid microwaving if you want to preserve the crisp texture; the microwave will warm it but soften the crust.
If the salad loses a little crunch in the fridge, reheating in a pan will usually restore pleasant texture quickly.
Questions new cooks often ask about this recipe
- How long will the pan-fry step take? It’s short—usually a few minutes per side. Watch for a steady golden color and a gentle sizzle. Use the lift-and-peek method: slide your spatula underneath and check the color; if it’s golden, flip.
- What pan should I use? A nonstick skillet or well-seasoned cast iron is easiest. Both allow you to get a good crust without sticking. Use a wide pan so the mixture can spread into a loose layer rather than a tall mound.
- Is it normal for the cheese to ooze? Yes. The mozzarella will soften and help bind the surface as it heats. That’s part of the appeal—warm, melty cheese with the creamy egg inside.
- What if my eggs are cold from the fridge—will that affect the pan fry? Slightly chilled eggs may take a bit longer to warm through, but it won’t break the recipe. You’ll still be aiming for a warm interior and golden exterior. If you want a quicker crisp, let the mixed salad sit at room temperature for 10–15 minutes before frying.
- What if the crust gets too dark? Reduce the heat and finish more slowly. A little color is delicious; too dark and it can taste bitter. You can always scrape off a very dark portion and continue with the rest.
Final encouragement from Carla
Cooking is a practice, not a performance. With this Crispy Egg Salad, you get immediate, satisfying results from simple steps. If your first try isn’t textbook-perfect, that’s normal—and it doesn’t mean you failed. You learned about texture, heat, and seasoning in real time. Those lessons will make your next cook even better.
Be gentle with yourself. Keep tasting, keep adjusting, and remember that small wins add up. I believe you can make this dish delicious today—and you’ll carry the skills forward to countless other recipes.
Conclusion
If you’d like to compare variations or see another take on a crispy egg salad, take a look at Healthyish Foods’ Crispy Egg Salad and Little Pine Kitchen’s Crispy Egg Salad. Both offer helpful visuals and ideas that can inspire how you present or season your own version.

Crispy Egg Salad
Ingredients
Method
- Combine the chopped hard-boiled eggs, shredded mozzarella, mayonnaise, sriracha, chopped chives, kosher salt, and black pepper in a bowl.
- Use a large spoon or spatula and fold gently until the mixture is uniformly coated yet still shows distinct egg pieces.
- Heat a skillet over medium to medium-low heat with a small amount of neutral oil or butter.
- Press the mixed egg salad into an even layer in the pan to form a loose patty.
- Cook until the outside is golden brown, about a few minutes per side, adjusting heat as necessary.
- Transfer the crispy egg salad to toast, sandwich bread, or a bed of greens.