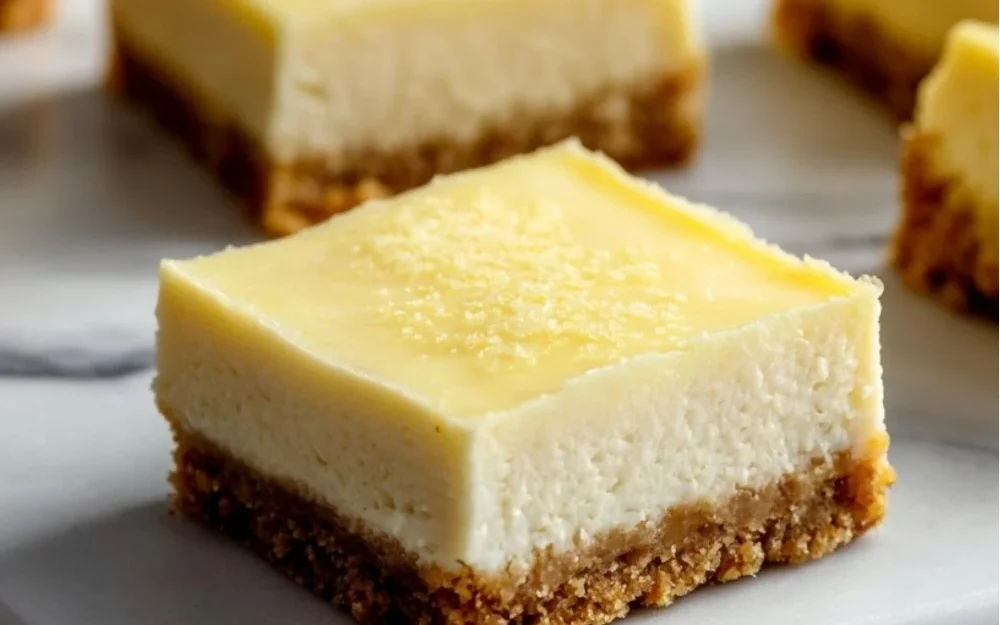
Lemon Cheesecake Protein Bars
Introduction
If you’re looking for a bright, protein-packed snack that feels a little like dessert and a lot like a smart kitchen win, these Lemon Cheesecake Protein Bars are for you. They’re approachable, forgiving, and designed to build confidence rather than intimidate. Whether you’re newer to baking or returning after a hiatus, this recipe is a gentle place to practice a few useful techniques.
If you enjoy light, protein-forward sweets, you might also like my no-bake version of a creamy dessert for quick weekday treats — see No-Bake High Protein Cheesecake Fluff for another simple option. I’ll walk you through what to expect at each stage, what to watch for, and how to feel comfortable even if something looks a little different from the picture. This is about steady progress — not perfection.
Why this recipe is easy to get right
What makes these bars accessible is how much the ingredients do the work for you. The almond flour and protein powder form a forgiving base that binds well without needing exact mixing technique. Cream cheese and Greek yogurt bring moisture and creaminess so small texture variations are more likely to taste great than fail. Lemon juice and sweetener are bold enough that if your measurements are a little off, the flavor is still bright and appealing.
Flexibility is baked in: you don’t have to perfectly finesse a batter or worry about rigid shaping skills. The recipe doesn’t require temperamental steps like whipping egg whites or precise sugar work. Because the bake time gives a broad window (25–30 minutes), you have room to read visual cues rather than race the clock. That relaxed timing helps take the stress out of learning.
How to make Lemon Cheesecake Protein Bars
First, set yourself up: preheat the oven and line your pan. That simple setup step gives you a calm, predictable environment. Next, you’ll combine the dry ingredients so they’re even — this prevents pockets of protein powder or almond flour in the finished bars. Adding the cream cheese, lemon juice, sweetener, vanilla, Greek yogurt, and salt brings the mixture together into a thick, spreadable batter.
When you pour into the prepared dish, aim for an even layer; it’s okay if the surface isn’t perfectly smooth. In the oven, the edges will begin to take a gentle golden hue while the center firms — that’s the main signal the bars are done. Finally, cooling completely is important; the bars finish setting as they cool, and cutting too early can lead to sinking or crumbling.
Beginners should slow down when combining the wet and dry components. Take a moment to scrape the bowl and make sure everything is incorporated. This is a low-pressure task — patience here pays off with an even texture.
If you want to study a few other recipes that use similar mixing and bake-to-set logic, I recommend looking at this simple egg-based protein breakfast for technique ideas: Baked Cottage Cheese Eggs: Protein-Packed Breakfast Bliss.
Ingredients
1 cup almond flour, 1/2 cup protein powder, 1/2 cup cream cheese, softened, 1/4 cup lemon juice, 1/4 cup sweetener (like erythritol or stevia), 1 tsp vanilla extract, 1/4 cup Greek yogurt, Pinch of salt
Here’s what each ingredient is doing and why none are scary:
- 1 cup almond flour: Provides body and a subtle, nutty base. Almond flour gives the bars a tender, slightly grainy texture that’s pleasing and forgiving — unlike wheat flour, it won’t develop gluten and toughen if mixed a bit.
- 1/2 cup protein powder: Adds structure and, importantly, protein. It helps the bars hold together and gives a slight density that makes them satisfying. A scoop or two of protein powder absorbs moisture differently depending on brand, which is why watching texture matters more than exactness.
- 1/2 cup cream cheese, softened: This is your creamy binder. Softened cream cheese blends smoothly into the batter, lending the cheesecake character without a complicated cream-cheese filling.
- 1/4 cup lemon juice: Brings the bright, tangy flavor that makes these bars feel like lemon cheesecake. It balances the richness and works with the sweetener to create a refreshing finish.
- 1/4 cup sweetener (like erythritol or stevia): Sweetness here is flexible. Choose a sweetener you like and tolerate well. Because the sweetener is mixed with lemon juice and cream cheese, even modest amounts taste satisfying.
- 1 tsp vanilla extract: A small addition that lifts the whole flavor profile and rounds the tartness into a familiar dessert note.
- 1/4 cup Greek yogurt: Adds moisture and a little tang, similar in function to cream cheese but lighter. It also helps the bars set nicely when baked.
- Pinch of salt: Enhances all the flavors and keeps the lemon from tasting flat. Salt is a background hero — such a small amount makes a big difference.
None of these are specialty items you need a pro pantry for. They come together predictably and in a way that teaches you how different components (dry base, creamy binder, bright acid, sweetener) interact — a good lesson for many future recipes.
Directions
- Preheat your oven to 350°F (175°C) and line an 8×8 inch baking dish with parchment paper., 2. In a bowl, mix together almond flour and protein powder until combined., 3. Add the softened cream cheese, lemon juice, sweetener, vanilla extract, Greek yogurt, and salt. Mix until everything is well-combined and smooth., 4. Pour the mixture into the prepared baking dish and spread it evenly., 5. Bake for 25-30 minutes, or until the edges are lightly golden and the center is set., 6. Allow to cool completely before cutting into bars. Enjoy your guilt-free treat!
Supportive guidance around the steps:
- Step 1: Preheat and line — do this first so your oven is steady and you’re not rushing. Parchment makes removing bars easy; if you don’t have it, lightly grease the pan.
- Step 2: Mixing dry ingredients — you’re just bringing the almond flour and protein powder to an even consistency. A quick stir with a fork is enough. The goal is no clumps.
- Step 3: Adding the wet ingredients — softened cream cheese blends more smoothly. If your cream cheese is slightly chilly, microwave it for 5–8 seconds to make mixing easier. When you mix, aim for a thick, homogenous batter; scrape the sides so nothing is left behind.
- Step 4: Spreading — use a spatula or the back of a spoon to even the batter. It doesn’t need to be glass-smooth; small ridges are normal and won’t affect the bake.
- Step 5: Baking cues — watch for lightly golden edges and a center that’s set but still slightly soft to touch. The middle shouldn’t jiggle like raw batter. If you insert a toothpick and it comes out mostly clean with a few moist crumbs, you’re good.
- Step 6: Cooling — this step matters. As the bars cool, they firm up. Cutting too soon can make pieces fall apart; patience rewards you with neat slices.
If the surface cracks a little or looks uneven, it’s okay — those are just character marks, not errors.
Key techniques you’ll practice in this recipe
- Even mixing of dry ingredients: This simple habit prevents streaks and ensures every bite tastes balanced. It’s a fundamental technique that helps in muffins, pancakes, and quick breads.
- Softening and folding cream cheese: Learning to get a smooth, lump-free cream cheese mixture is useful for cheesecakes, frostings, and fillings. You’ll practice bringing two textures together into one.
- Reading visual doneness cues in the oven: Instead of relying only on a timer, you’ll learn to observe edges, color, and center firmness — skills that transfer to many baked goods.
- Spreading batter evenly in a pan: This is a small motor skill that makes slices uniform and predictable. It’s an easy win and builds kitchen confidence.
Each of these techniques is approachable and will help you feel capable in other recipes, from protein waffles to breakfast bakes.
Common mistakes and how to avoid them
- Mistake: Cream cheese is too cold and leaves lumps.
- Fix: Give it 5–8 seconds in the microwave or let it sit at room temperature for 15–20 minutes before mixing. If lumps remain, beat a little longer; the batter will smooth out.
- Mistake: Center sinks or is underbaked after cutting early.
- Fix: Allow bars to cool completely before slicing. Cooling is the final set — it’s not a punishment, it’s part of the process.
- Mistake: Batter is too dry or crumbly.
- Fix: Check the consistency as you mix. If it seems overly dry because your protein powder is extra absorbent, a tiny splash of milk or a teaspoon more Greek yogurt can help, used sparingly. (This is conceptual guidance — do not change the recipe steps or measurements.)
- Mistake: Overbrowning at the edges while center remains unset.
- Fix: If your oven runs hot, reduce the temperature by 10–15°F next time or tent the pan with foil partway through baking. Also try positioning the rack in the center of the oven for the most even heat.
If something goes off track, pause, assess, and make a small correction rather than starting over. Most issues are fixable with one small adjustment.
How to adjust confidently without changing the recipe
Portion scaling: The recipe is written for an 8×8 dish. If you want more or fewer bars, you can conceptually scale portions up or down, keeping in mind that a larger pan will yield thinner bars and a smaller pan will make thicker ones. When you scale, bake time will change — thinner means faster, thicker means slower — so rely on visual cues.
Flavor tweaks: If you like bolder lemon, consider a little extra lemon zest added to the batter (conceptually). If you prefer sweeter, a slightly sweeter topping or more sweetener could be used, but within the same balance. The recipe is forgiving to small flavor nudges because the cream cheese absorbs and spreads flavor evenly.
Texture tweaks: For a denser bar, press the batter more firmly into the pan before baking. For a lighter, cakier bar, loosen the batter slightly as you mix so more air is incorporated. These are conceptual approaches that don’t require changing the listed ingredients or steps — just small shifts in handling and attention.
Serving, storage, and reheating made simple
Serving: Cut bars into squares and serve chilled or at room temperature. A thin lemon slice or a light dusting of your favorite low-sugar powder can be pretty, but the bars are lovely on their own. They make a great post-workout snack or an afternoon treat.
Storage: Store in an airtight container in the refrigerator for up to 4–5 days. If you want longer storage, these freeze well. Place individual bars on a baking sheet to freeze solid, then transfer to a sealed container or bag for up to 2 months. When ready to eat, thaw in the fridge overnight.
Reheating: If you prefer a softer, slightly melted texture, microwave a bar for 8–12 seconds. I recommend a short burst — too long and the texture changes. For a gently warmed slice, let the bar sit at room temperature for 15–20 minutes from the fridge.
If you’d like to explore storage and make-ahead ideas for other protein-focused snacks, check out these bagel bite recipes for inspiration on portability and reheating: High Protein Bagel Bites.
Questions new cooks often ask about this recipe
- How do I know when the center is set?
- Look for no large jiggling when you gently shake the pan. The center should feel springy, not liquid. A toothpick with a few moist crumbs is fine.
- Can I use a different protein powder?
- Yes. Different brands absorb moisture differently. If the batter feels unusually dry, give it a moment and assess; very small additions of moisture (like a teaspoon of yogurt or water) can help — but the recipe as written usually works well with common protein powders.
- What if my cream cheese has lumps after mixing?
- Beat a little longer or press through a sieve for an ultra-smooth finish. Small lumps are normal and won’t ruin the bars.
- Do I need a special pan or tool?
- No. An 8×8 inch baking dish and parchment are ideal; a spatula and a mixing bowl are sufficient. No advanced equipment needed.
- Is it normal if the top cracks slightly?
- Yes. Slight cracks are cosmetic. They don’t affect flavor or texture.
These are common moments of uncertainty — they’re all normal and manageable. Take them as learning opportunities rather than failures.
Final encouragement from Carla
You don’t need to be perfect to make tasty, nutritious snacks. This Lemon Cheesecake Protein Bars recipe is designed to teach a few dependable techniques while delivering reliable results. If a bar looks a little uneven or the top has a small crack, remember that flavor and effort matter more than a flawless surface. Each batch you make builds skill and confidence.
If baking has felt intimidating before, let this recipe be a gentle introduction. Take your time with the mixing, watch for the visual cues, and give yourself credit for trying. Cooking is a series of small experiments — celebrate the progress.
Conclusion
If you’d like to see a different take on this idea, there’s a great variation at Lemon Cheesecake Protein Bars | Busy But Healthy that offers another perspective on flavors and presentation. For a low-carb and high-protein approach with a slightly different technique, you can compare notes with Lemon Cheesecake Protein Bars | High Protein Low Carb Dessert … — exploring other versions can help you refine what you like most. Keep baking, keep tasting, and remember: every attempt teaches you something useful.