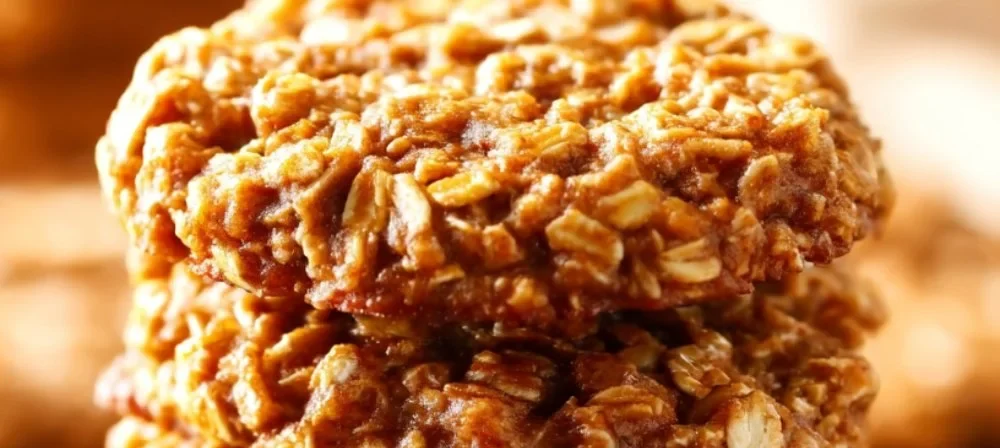
Protein Oatmeal Cookies
Introduction
If you’re looking for a simple, satisfying snack that’s both approachable and nourishing, these Protein Oatmeal Cookies are exactly the kind of recipe I like to teach. They’re for anyone who wants a straightforward way to combine wholesome pantry staples into a chewy, lightly sweet cookie that travels well in a lunchbox or pairs nicely with afternoon tea.
This recipe is designed to build confidence: it uses familiar ingredients, a short list of steps, and forgiving textures. If you enjoy trying other high-protein treats, you might also like my high-protein cottage cheese cookies, which are another gentle, beginner-friendly way to experiment with protein-forward baking. Read on and I’ll walk you through the why and how so you feel comfortable from the first scoop to the first bite.
Why this recipe is easy to get right
What makes these Protein Oatmeal Cookies forgiving is the balance between structure and flexibility. The oats and nut butter give the cookies body, while the syrup and protein powder add sweetness and binding. There’s no delicate creaming of butter and sugar or complicated timing — you mix, scoop, and bake. Because the mixture is thick and forgiving, small differences in mixing or spoon size won’t ruin the cookie. If one cookie spreads a little more than another, that’s normal and it won’t affect flavor.
You also have room to adapt: use peanut or almond butter without changing the feel of the cookie; swap maple syrup for agave nectar if that’s what you have. The recipe tolerates different protein powders (whey, plant-based) and small variations in pantry items. That freedom is why it’s suitable for cooks at every level — you learn to read textures, not rely on perfect measurements or advanced techniques.
How to make Protein Oatmeal Cookies
This recipe moves in three clear stages: assembly, optional mix-ins, and baking/cooling. First, you’ll gather and combine the dry and sticky ingredients so the oats are coated and the mixture holds together. Next, you’ll fold in any optional chips, which simply adds pockets of chocolate and a bit of contrast. Last, you’ll portion, bake, and cool the cookies so they set.
Start by preheating the oven so it’s ready when your dough is mixed — an oven that’s already at temperature helps the cookies begin to set around the edges as soon as they go in. When you mix the ingredients, focus on getting an even texture: the oats will go from loose flakes to a clump that holds its shape when pressed. This is the practical checkpoint that tells you the cookies will bake into cohesive rounds rather than crumbly bits.
When you scoop the cookies onto the baking sheet, use even spoonfuls to help them bake evenly; but if sizes vary a little, don’t worry — just watch the baking time and start checking a minute or two early for smaller cookies. Finally, allow the cookies to cool on the sheet for a short time and then transfer to a rack if you have one. Cooling is where those slightly soft centers firm up into a pleasant chew.
Beginners: slow down during mixing. Take a moment to scrape the bowl and press a small piece of dough between your fingers — if it sticks together, it’s ready. If it seems too dry, a small extra splash of syrup or a dab of nut butter can help, but that’s rarely necessary.
Ingredients
1 cup rolled oats, 1/2 cup peanut butter or almond butter, 1/4 cup maple syrup or agave nectar, 1/4 cup protein powder, 1/2 teaspoon baking soda, 1/4 teaspoon salt, 1/4 cup dark chocolate chips (optional)
- 1 cup rolled oats: Oats are the structure of the cookie. They provide chewiness and a whole-grain base that feels satisfying without heaviness. Rolled oats hold up well in baking; they won’t dissolve into the mixture, which makes the texture obvious and pleasing.
- 1/2 cup peanut butter or almond butter: The nut butter acts as the fat and binding agent. It brings richness, moisture, and flavor. Because it’s already oily and smooth, it helps the oats stick together and gives the cookie that tender, slightly dense mouthfeel.
- 1/4 cup maple syrup or agave nectar: This is the sweetener and a liquid binder. It adds flavor and helps the ingredients mingle into a cohesive dough. Maple gives a warm, slightly caramel note; agave is milder — both work well.
- 1/4 cup protein powder: Protein powder boosts the protein content and slightly firms the crumb. It’s a texture-enhancer here, and it helps the cookies hold together without needing eggs. Use a flavor you enjoy — vanilla or unflavored both play well.
- 1/2 teaspoon baking soda: A small leavener that gives a gentle lift. It helps the edges set and prevents the cookie from being completely flat.
- 1/4 teaspoon salt: Salt rounds out sweetness and brings depth to the nut butter and chocolate. Even a small pinch matters.
- 1/4 cup dark chocolate chips (optional): These are optional and add little pockets of melty richness. If you skip them, the cookies are still sweet and satisfying.
None of these ingredients are complicated or intimidating. They’re familiar pantry items that work together predictably: oats for chew, nut butter and syrup for binding and moisture, protein powder for substance, and a little baking soda and salt to round things out.
Directions
- Preheat your oven to 350°F (175°C)., 2. In a mixing bowl, combine the rolled oats, peanut butter, maple syrup, protein powder, baking soda, and salt. Mix until well combined., 3. If using, fold in the dark chocolate chips., 4. Drop spoonfuls of the mixture onto a prepared baking sheet., 5. Bake for 10-12 minutes until the edges are lightly golden., 6. Allow to cool before enjoying your healthy snack!
Helpful guidance for each step:
- Step 1 — Preheat your oven to 350°F (175°C): Give the oven at least 10–15 minutes to reach temperature. You want a steady heat so the cookies start to bake immediately, producing a lightly golden edge and a chewy center.
- Step 2 — Mixing the ingredients: As you combine the oats with nut butter and syrup, you’ll see the oats become coated and the mixture come together in clumps. That’s the look you want: thick and moldable. If a spoon can press a small ball that keeps its shape, you’re on track.
- Step 3 — Folding in chocolate chips: Gently stir them through so you don’t overwork the dough. The chips should be scattered throughout, not pulverized into the mix.
- Step 4 — Dropping spoonfuls onto a prepared baking sheet: “Prepared” usually means lined with parchment paper or a silicone mat so cookies don’t stick and cleanup is easy. Space the spoonfuls a couple of inches apart — they don’t spread a lot, but give them breathing room.
- Step 5 — Baking 10–12 minutes: Watch for the edges to turn lightly golden while the centers remain slightly soft. Ovens vary; start checking at 10 minutes. If you like a chewier cookie, err on the lower side of the time range.
- Step 6 — Allow to cool: This step is important. The cookies will be fragile right out of the oven but firm up as they cool. Let them sit on the baking sheet for 5–10 minutes before moving them to a rack or plate.
If the first batch looks uneven, that’s okay. Small variations in spoon size and oven hotspots are normal. Use those first cookies as your guide for adjusting time or portion size for the next batch.
Key techniques you’ll practice in this recipe
- Mixing to the right texture: You’ll learn to read when a dough is cohesive enough by sight and touch. That sensory cue — a thick, clumpable mixture — is useful in many no-egg cookie and bar recipes.
- Gentle folding: Adding chips or other mix-ins without overworking the dough keeps textures intact. This is the same care you’ll use when folding berries into muffin batter or nuts into granola.
- Timing and visual doneness: Watching the edges for color rather than relying only on the clock helps you bake consistent results across different ovens. That skill transfers to cookies, biscuits, and quick breads.
Each technique is simple but foundational. Practicing them here gives you confidence for other recipes that use similar steps and judgments.
Common mistakes and how to avoid them
- Dough too dry or crumbly: This usually means the nut butter or syrup ratios felt off, or your protein powder absorbs more liquid. Instead of starting over, press a small amount together — if it doesn’t hold, add a teaspoon of syrup or a dab more nut butter and remix.
- Dough too wet and spreading too much: If you accidentally added too much syrup, chill the dough a few minutes to firm it up, then scoop. A slightly cooler dough spreads less in the oven.
- Cookies baking unevenly: Rotate the baking sheet halfway through baking if your oven has hot spots. Also, try to keep spoonfuls the same size for even timing.
- Chocolate chips sinking or melting into a blob: Fold them in gently and don’t overmix. If chips seem to disappear, use slightly more chips next time or press a few onto the tops before baking.
- Removing cookies too early: They’ll look soft out of the oven but will set as they cool. If you move them immediately, they can break. Wait 5–10 minutes on the sheet.
If something goes off track, small fixes usually work. These cookies aren’t delicate pastries — a little adjustment will usually save the batch.
How to adjust confidently without changing the recipe
- Portion scaling: If you want more cookies, double the recipe and use two baking sheets or work in batches. If you halve it, use the same ratios — the texture behaves the same at smaller scale. Conceptually, the important part is keeping the balance between oats, nut butter, and syrup so the dough stays cohesive.
- Flavor preference adjustments: Without changing the listed ingredients, you can vary the type of nut butter or protein powder for a flavor shift. A vanilla protein powder will lend a sweeter, creamier note; a chocolate protein powder will produce a more chocolate-forward cookie. Remember: these swaps change flavor but not the process or measurements.
- Texture tweaks (conceptual): If you prefer a softer cookie, bake at the lower end of the time range and allow a longer cooling period on the sheet so the centers remain tender. If you prefer a firmer cookie, bake slightly longer until the edges are more golden. These are timing decisions, not ingredient changes.
These adjustments let you personalize the outcome while keeping the simple, reliable structure of the recipe intact.
Serving, storage, and reheating made simple
Serving: These cookies are great at room temperature as a grab-and-go snack or paired with yogurt or a glass of milk for a heartier treat. Sprinkle a few extra chocolate chips on top while they’re cooling for a pretty, bakery-style look.
Storage: Let the cookies cool completely before storing. Keep them in an airtight container at room temperature for 3–4 days. If you need longer storage, pop them in the fridge for up to a week or freeze for up to three months in a freezer-safe container with parchment layers to prevent sticking.
Reheating: To refresh a chilled or frozen cookie, microwave for 10–12 seconds to soften, or warm in a 300°F (150°C) oven for about 5 minutes. The goal is to bring the cookie back to a soft, pleasant chew without making it soggy. If frozen, thaw at room temperature for 15–20 minutes before reheating.
Questions new cooks often ask about this recipe
- Timing concerns: “Will 1-2 minutes make a big difference?” It can. Start checking at the lower end (10 minutes), and remember the cookies will continue to firm up off the heat. If in doubt, take them out and let them rest on the sheet for a few minutes.
- Equipment questions: No special tools are needed — a bowl, spoon, and baking sheet (lined with parchment or a silicone mat) are enough. If you have a small ice cream scoop, it helps make uniform cookies but isn’t required.
- Is this normal? moments: If the dough looks shaggy or lumpy from the oats, yes — that’s expected. If the cookies are soft right away, also normal; they’ll set as they cool.
- Confidence-building clarification: You don’t need exact cookie shapes. Rustic, uneven cookies are normal and delicious. The technique matters more than perfect aesthetics.
Final encouragement from Carla
You’ve just learned a gentle, reliable recipe that teaches useful kitchen instincts: how a dough should feel, what a barely-golden edge looks like, and how small adjustments can rescue a batch. Take pride in trying something new. If your first batch is a little uneven, that’s progress — you’ve practiced visual checks and texture cues that will make your next baking project even easier. Keep this recipe in your rotation as a low-stress way to build confidence in the kitchen.
Conclusion
If you want to see another take on a protein-forward oatmeal cookie, there’s a thoughtful version at Protein Oatmeal Cookies | Andy’s East Coast Kitchen that can offer additional inspiration. For a different flavor profile and technique, you might enjoy the ideas shared in Protein Oatmeal Cookies » LeelaLicious. And if you’re exploring protein cookie variations using different protein powders, take a look at Vanilla Protein Oatmeal Cookies | Isopure US for more examples. Keep experimenting gently — each small success builds skills and confidence.