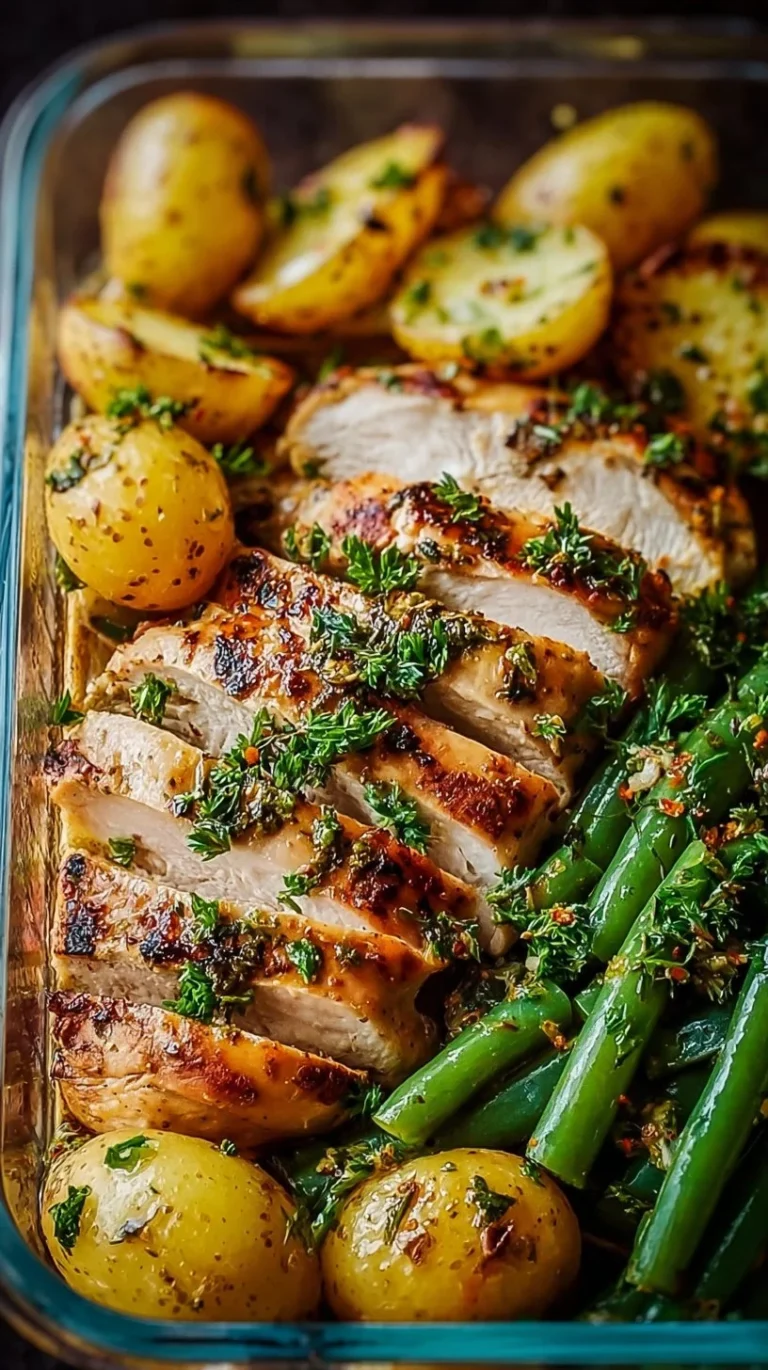
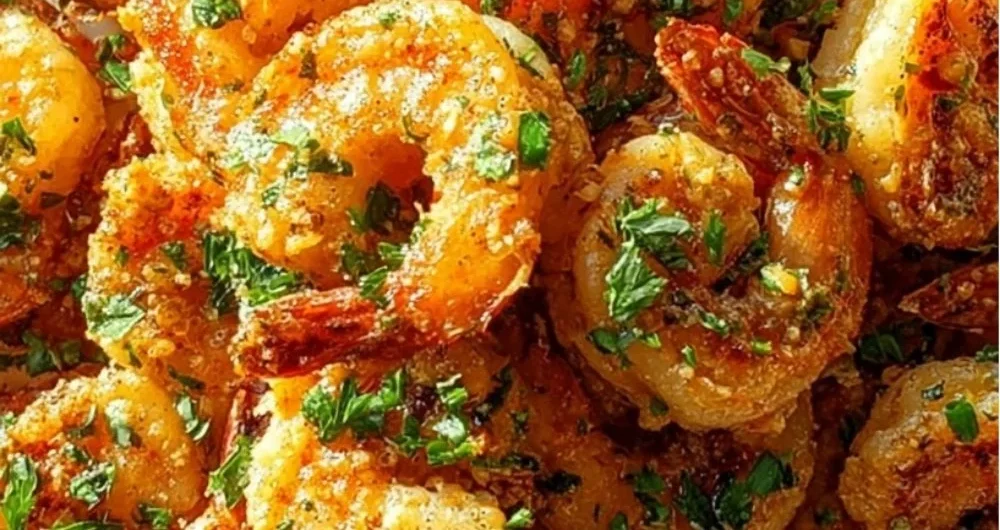
Crispy Garlic Butter Air Fryer Shrimp
Introduction
This Crispy Garlic Butter Air Fryer Shrimp is for anyone who wants a quick, confident weeknight dinner or an impressive appetizer without a lot of fuss. If you’ve ever felt nervous about cooking seafood — worried shrimp will be rubbery or underdone — this recipe is written to calm those worries and set you up for success. I keep things simple, steady, and approachable here: the flavors are familiar, the steps are short, and the payoff is bright, buttery shrimp with a little crisp at the edges.
If you enjoy learning a technique in one place and applying the same calm, clear thinking elsewhere in the kitchen, you might also appreciate my gentle buttercream macaron guide that walks through delicate steps with the same patient approach. That’s how cooking should feel — safer, not scarier — and this shrimp recipe is a great place to practice.
Why this recipe is easy to get right
This recipe is forgiving in several ways. First, the air fryer does a lot of the work: it cooks evenly and crisps without the need to babysit a hot pan. Second, the ingredients are straightforward and bold enough that small timing or measuring differences won’t ruin the result — garlic, butter, and paprika give you a clear flavor profile that hides minor imperfections. Finally, shrimp is quick to cook, so a small mistake is easy to fix: if you slightly undercook, you can pop them back in for a minute; if you overcook, a squeeze of lemon and the butter helps keep them pleasant.
Where it allows flexibility: you can play with garnish, lemon, or how finely you chop the garlic without breaking the dish. Where to be careful: the actual cook time in the air fryer. That’s the one place where watching and learning the visual cues will make the biggest difference. Overall, it’s a low-stress recipe that rewards attention rather than perfection.
How to make Crispy Garlic Butter Air Fryer Shrimp
Think of the process in three clear parts: flavoring, cooking, and finishing.
- First: combine the butter, garlic, paprika, salt, and pepper, then coat the shrimp. This is where the shrimp picks up its primary flavor. The butter carries flavor and helps the paprika toast in the air fryer; garlic gives the aromatic lift.
- Next: cook in the air fryer at 400°F (200°C). The air fryer moves hot air around the shrimp, creating that crisp edge without deep frying. Lay the shrimp in a single layer so each one gets air all around it — that single-layer step is the practical place to slow down and arrange them neatly.
- Last: garnish and serve. A little chopped parsley brightens the plate, and lemon wedges give you control at the table to add acidity where you like it.
Where beginners should slow down: when tossing to coat and when arranging the shrimp in the basket. Visual checks — shrimp turning from gray to pink, tails curling slightly — are clearer indicators than a strict watch on the clock.
Ingredients
1 pound large shrimp, peeled and deveined, 4 tablespoons unsalted butter, melted, 4 cloves garlic, minced, 1 teaspoon paprika, Salt and pepper to taste, Chopped parsley for garnish, Lemon wedges for serving
- 1 pound large shrimp, peeled and deveined: Shrimp is the star here. “Large” gives you a satisfying bite and cooks quickly. Peeled and deveined means less prep and a cleaner eating experience.
- 4 tablespoons unsalted butter, melted: Butter is your flavor carrier and helps the surface of the shrimp brown in the air fryer. Using unsalted butter lets you control the final salt level.
- 4 cloves garlic, minced: Fresh garlic gives an immediate aromatic boost. Minced garlic disperses evenly so you taste it in every bite.
- 1 teaspoon paprika: Paprika adds gentle color and a warm, slightly sweet note. It also helps create that lightly toasted exterior in the air fryer.
- Salt and pepper to taste: These are simple enhancers. A small sprinkle before cooking seasons the shrimp throughout.
- Chopped parsley for garnish: Parsley adds fresh color and a mild herbal lift that balances the richness of butter.
- Lemon wedges for serving: Lemon brightens and sharpens the flavors when squeezed just before eating.
None of these ingredients are complicated. They work together to create a balanced, familiar flavor profile: butter brings richness, garlic gives aroma, paprika adds warmth and color, and lemon and parsley refresh the palate.
Directions
- In a bowl, combine melted butter, minced garlic, paprika, salt, and pepper.
- Add the shrimp to the bowl and toss to coat evenly.
- Preheat the air fryer to 400°F (200°C).
- Place the shrimp in the air fryer basket in a single layer.
- Cook for 5-7 minutes, or until the shrimp are pink and cooked through.
- Garnish with chopped parsley and serve with lemon wedges.
A few supportive notes as you follow those steps:
- Step 1 visual cue: when you mix melted butter and minced garlic with paprika, the mixture will look glossy and lightly colored by the paprika. The pieces of garlic will be visible and will smell pleasantly garlicky when you bring the bowl near your nose. That aroma is a good sign you’re on the right track.
- Step 2 texture hint: when you toss the shrimp, watch for an even sheen — each shrimp should look lightly coated, not swimming in butter. If a little butter pools at the bottom that’s okay; the goal is coverage without drowning them.
- Step 3 timing: preheating the air fryer ensures the shrimp start cooking immediately and helps achieve those slightly crisp edges. Preheat to the temperature listed before you pop the shrimp in.
- Step 4 arrangement: place them in a single layer with a little space between pieces where possible. Overcrowding is the main reason air-fried items steam instead of crisp. If your basket is small, cook in two quick batches.
- Step 5 don’t just rely on the timer — look at the shrimp. They should turn uniformly pink, the flesh should be opaque, and the tails may curl a bit. The 5–7 minute range is forgiving: start checking at five minutes, and remove them as soon as they’re opaque and firm but still springy. If you’re unsure, take one out, cut into it, and look for opaque flesh throughout.
- Step 6 finishing: a sprinkle of chopped parsley and a squeeze of lemon brightens the dish. The lemon is your final control knob for acidity — add as much or as little as you prefer.
If things don’t look perfect the first time — maybe some shrimp are slightly more browned than others — that’s absolutely fine. Small variations are normal. You’ll still have a flavorful result, and you’ll learn what your air fryer does by observing it.
Key techniques you’ll practice in this recipe
- Tossing to coat: Learning to evenly coat proteins with a sauce or seasoned butter is a core kitchen skill. It helps flavors distribute and ensures even cooking.
- Visual doneness cues: Recognizing when shrimp are done by color and texture is an essential skill that applies to many quick-cooking proteins.
- Single-layer air frying: Arranging food in a single layer for even air circulation is the habit that separates crisp results from soggy ones.
- Gentle finishing: Adding chopped herbs and lemon at the end is a simple plating technique that lifts a dish without needing fancy tools.
Practicing these techniques builds a foundation you can use for fish, chicken tenders, roasted vegetables, and more. They’re practical, not precious — and they improve with gentle repetition.
Common mistakes and how to avoid them
- Mistake: Overcrowding the air fryer basket. Consequence: Shrimp steam and don’t crisp. Fix: Cook in batches if needed. It’s not a failure to take two rounds; it’s the path to better texture.
- Mistake: Not preheating the air fryer. Consequence: Longer cook time and uneven browning. Fix: Allow the air fryer to reach 400°F (200°C) before adding shrimp.
- Mistake: Cooking too long. Consequence: Rubberiness. Fix: Use the lower end of the time range (check at 5 minutes) and look for opaque, pink flesh that is springy to the touch.
- Mistake: Too much butter pooling in the basket. Consequence: Hot butter can brown too quickly. Fix: Measure the butter and melt it gently; toss shrimp to coat evenly and shake off any excess before arranging them.
- Mistake: Skipping the lemon. Consequence: The dish can feel heavy. Fix: Don’t skip the acidity; even a tiny squeeze brightens the whole plate.
If something goes off track — for example, if a batch comes out slightly overdone — you can serve that batch sliced over a salad or tucked into a buttered roll with a squeeze of lemon; textures and uses can adapt.
How to adjust confidently without changing the recipe
You asked for ways to adjust while keeping the recipe intact. Here are conceptual ideas you can apply without altering the listed ingredients or steps:
- Portion scaling: If you need more or less shrimp, keep the same proportions of butter, garlic, and paprika in mind. When scaling up, cook in more batches rather than overfilling the basket. When scaling down, reduce the total time slightly and watch for visual cues.
- Flavor preference adjustments: If you prefer brighter flavors, add more lemon at the table rather than changing the step. If you like a smokier note, consider using a smoked paprika (conceptually only — don’t change the ingredient list in the recipe itself).
- Texture tweaks: For a crisper edge, make sure the shrimp are dry before tossing with the butter mixture; pat them with paper towels to remove excess moisture. For a juicier result, avoid the high end of the time range and pull them at the earlier check.
These are guiding concepts rather than recipe edits. They help you control the outcome without rewriting the steps.
Serving, storage, and reheating made simple
Serving: These shrimp are great served right away with lemon wedges and a sprinkle of parsley. They pair well with steamed rice, a simple green salad, crusty bread, or tucked into tacos. Let each person squeeze lemon to taste for personalized brightness.
Storage: Cool leftover shrimp to room temperature for no more than two hours, then refrigerate in an airtight container. They’ll keep 2–3 days. Avoid sitting out too long — shrimp are best when chilled promptly.
Reheating: For the best texture, reheat in the air fryer at a lower temperature (about 330–350°F / 165–175°C) for 2–4 minutes. This brings back some crispness without drying them out. Alternatively, reheat gently in a skillet over medium-low heat with a teaspoon of butter, turning briefly — again, short time and low heat preserve texture.
If you have leftovers that feel a touch overdone after reheating, toss them into a warm pasta or a salad where the extra sauce and other textures soften the issue.
Questions new cooks often ask about this recipe
- How do I know when shrimp are done? Look for opaque, pink flesh throughout and a firm, springy texture. The tails curling slightly is another visual cue.
- Do I need to devein the shrimp? The recipe lists peeled and deveined shrimp; this reduces prep and makes for a cleaner plate. If you buy shrimp with the vein still in, you can remove it, but it’s not a technical requirement if you’re short on time — just know some people prefer the look and texture when it’s removed.
- My shrimp stuck to the basket — what happened? Sticking usually comes from uneven coating or a basket that needs a light wipe of oil. Make sure the shrimp are well coated and that the basket is clean and dry before cooking.
- Can I use frozen shrimp? Yes, if they’re thawed and patted dry. Excess moisture from frozen, not-fully-thawed shrimp will steam instead of crisp.
- Is it normal if some shrimp brown more than others? Yes. Small differences in size or placement in the basket can cause that. Aim for even spacing to minimize it.
If a step worries you, slow down and observe. The sensory notes — sight, smell, and touch — are your best guides.
Final encouragement from Carla
Cooking is practice, not performance. This Crispy Garlic Butter Air Fryer Shrimp recipe is a wonderful little confidence builder: short steps, obvious cues, and a delicious result. If your first attempt isn’t exactly like the picture in your head, that’s okay — you’ll learn how your air fryer behaves and what small changes make the difference for you. Keep going, keep tasting, and remember that each meal teaches you something new.
Conclusion
If you want to compare techniques or see another take on air fryer shrimp for inspiration, I like the clear method shown by Belle of the Kitchen’s air fryer shrimp, which highlights similar simple steps. For another version with a slightly different flavor balance and useful notes, check out Nkechi Ajaeroh’s garlic butter shrimp recipe.